How to defeat Arkveld in MH Wilds: Weaknesses & Strategy
Introduction
Welcome to our MH Wilds Arkveld guide, hunter! In this breakdown, we will reveal the monster's weaknesses, best strategies for the fight and teach you how to craft Arkveld weapons and armor set.
We’ll start by revealing its weakness and resistance and take a look at the most effective weapons and skills to exploit its breakable parts.
Then, we’ll explore all his phases and attacks to build up the best strategies for both solo and multiplayer.
Sharpen your weapons, and let's learn how to defeat Arkveld!
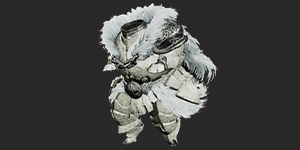
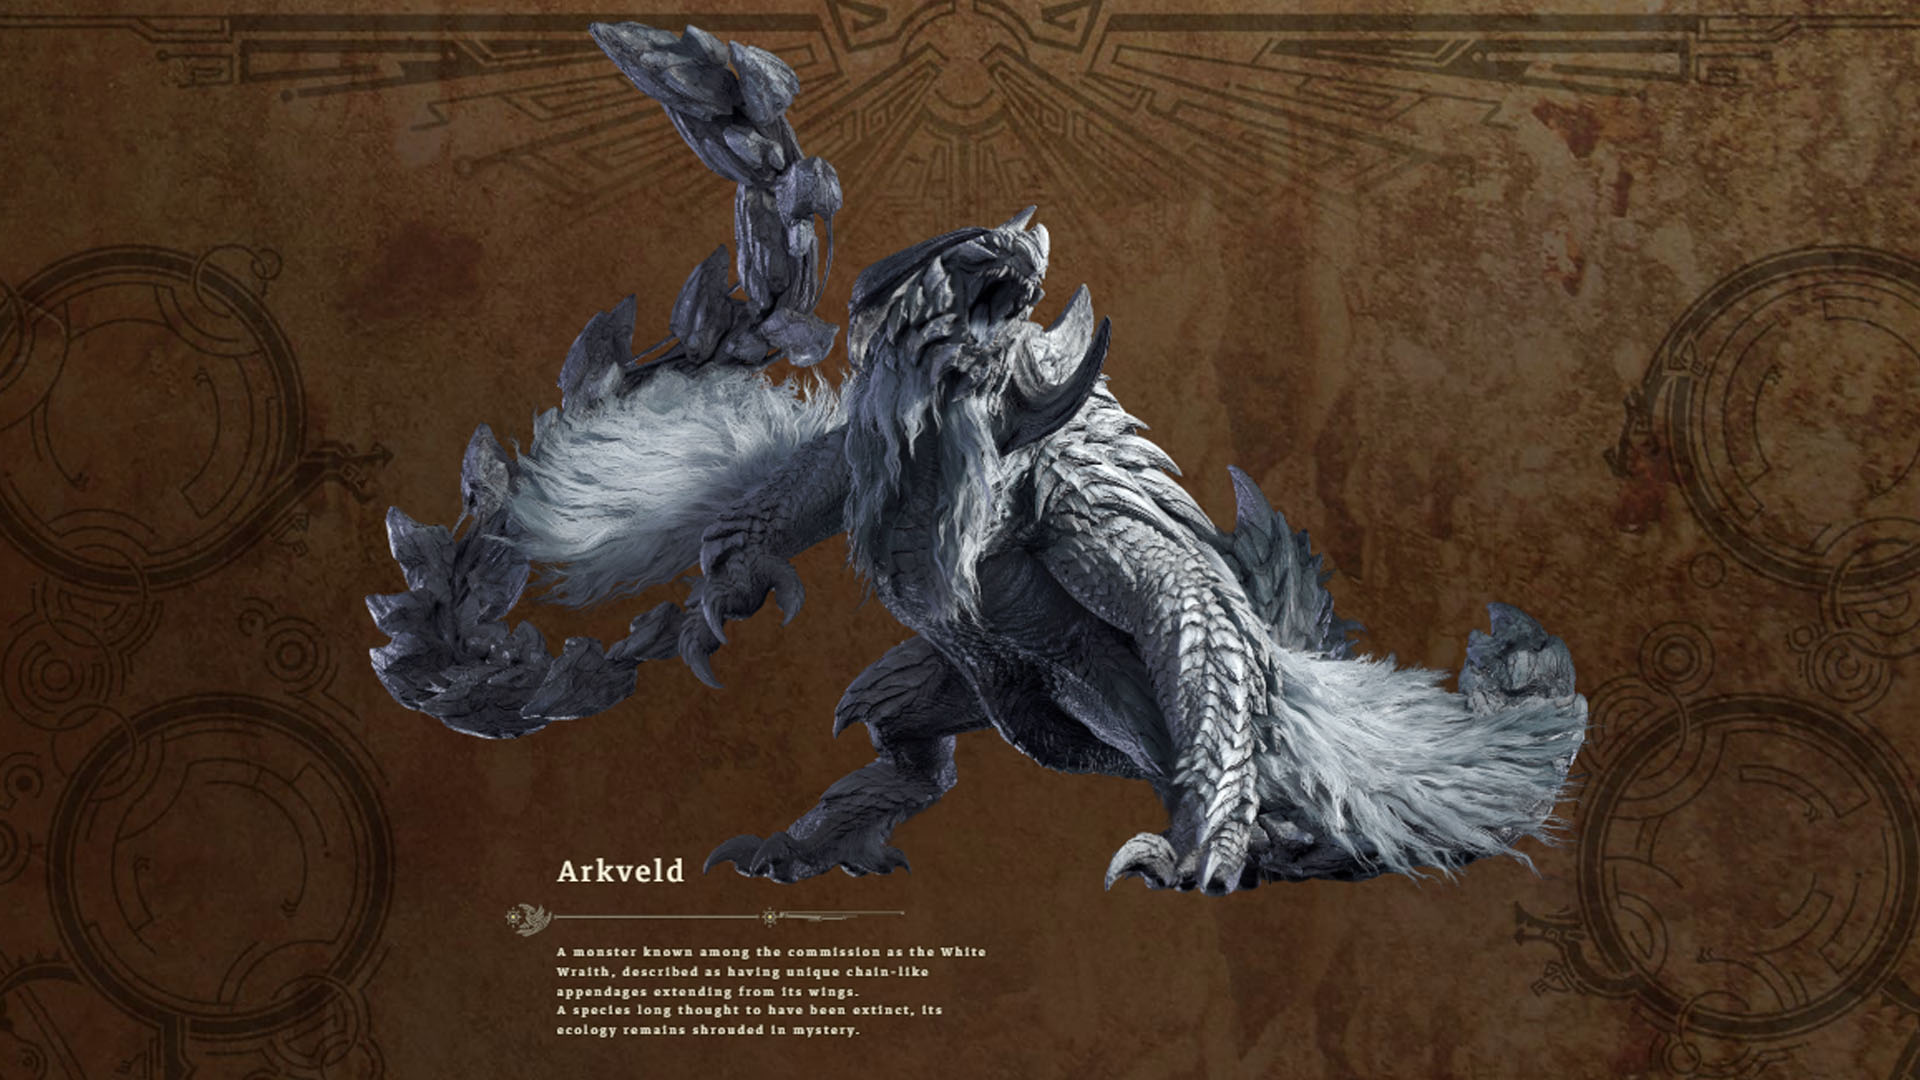
ArkveldThe White Wraith |
|
|
|
| Class: | Flying Wyvern |
| Species: | Unknown (Extinct Species) |
| Type: | Large Monster |
| Element: |

|
| Ailments: |

|
| Habitat: | Windward Plains |
Arkveld’s Weakness Chart
Arkveld is one of the most powerful monsters in MH Wilds, but he has multiple weaknesses. In this section, we’ll break down the best strategies to defeat him efficiently. From elemental vulnerabilities to effective status effects, traps, and weapons, we’ve got everything you need to break Arkveld’s weak parts and earn high-rank materials.
Whether you’re looking for the best build, skills, or traps, the following table will help you prepare for the hunt:
Elemental Weaknesses & Resistances |
|
| ✔️ Effective: |
|
| ➖ Moderate: |


|
| ❌ Resistant: |
Arkveld has no elemental resistances |
Status Effect Weaknesses & Resistances |
|
| ✔️ Effective: |


|
| ➖ Moderate: |


|
| ❌ Resistant: |

|
Effective Ailments |
|


|
|
Best Traps & Items to use |
|
| Traps: | ⚡ Shock Trap 🕳️ Pitfall Trap 🌿 Vine Traps 🐸 Paratoads |
| Items: |
🧥 Ghillie Mantle ⚡ Flash Pods 💣 Bombs 🍇 Nullberries 🏹 Slinger Pods 🦴 Luring Pods |
Best Weapons to use against Arkveld |
|

|
|
Best Skills against Arkveld |
|
| Offensive: |
Dragon Attack, Weakness Exploit, Critical Boost, Partbreaker |
| Defensive: |
Dragon Resistance, Recovery Speed, Evade Extender, Guard, Stun Resistance |
| Utility: | Focus, Trap Master |
Note: to stand a chance against Arkveld, you’ll need an optimized build that integrates all the recommended elements, weapons, skills, and traps. This is a highly difficult monster, so if your gear isn’t right, beating Arkveld might be impossible.
Now that you know how to optimize your loadout, the next step is understanding Arkveld’s attack patterns, behavior, and fight phases. Facing this monster without knowing its moveset means walking into battle blind, where a single mistake could cost you the hunt.
How to Fight Arkveld – Phase-by-Phase Guide
In this section, we’ll break down Arkveld’s attacks, movement patterns, and special abilities, giving you the necessary insight to predict and counter its moves.
Pre-Fight Preparation
Before going for an Arkveld hunt, you must optimize your gear and define your strategy. This fight is way harder than others, as the hunt is limited to 20 minutes, while other monsters allow up to 50 minutes. Every move counts, so proper preparation will determine whether you succeed or fail.
➤ Weapon Selection
Some weapon types are highly effective against Arkveld, dealing high burst damage which is essential for a time-limited hunt like this. Weapons with status effects like Poison, Stun, and Paralysis can also create great openings. In the following list, we have outlined the best weapon types to use against Arkveld in Monster Hunter Wilds:
- Great Sword - Huge burst damage, perfect for landing big hits after knockdowns.
- Hammer - Can stun Arkveld, giving free damage windows for you and your team.
- Lance - Has strong defense options, letting you block heavy attacks.
Note: Choosing a weapon type just because it has an advantage against a specific monster isn’t the best choice. Instead, it’s more important to use the weapon that fits your playstyle.
If you’re not sure which weapon to choose, check out our Best Weapon Guide & Tier List to find the one that suits you best.
Arkveld is a Dragon-element monster, and its official weakness is Dragon. Dragon-element weapons are the most effective. He doesn't have elemental resistances, so all elemental attacks may work aswell.
➤ Best Armor Set
Having the right armor set is just as important as choosing your weapon. Against Arkveld, you’ll need high Dragon resistance and fast health recovery to survive its attacks. Doshaguma set is the best choice against Arkveld. The key benefits of this set are:
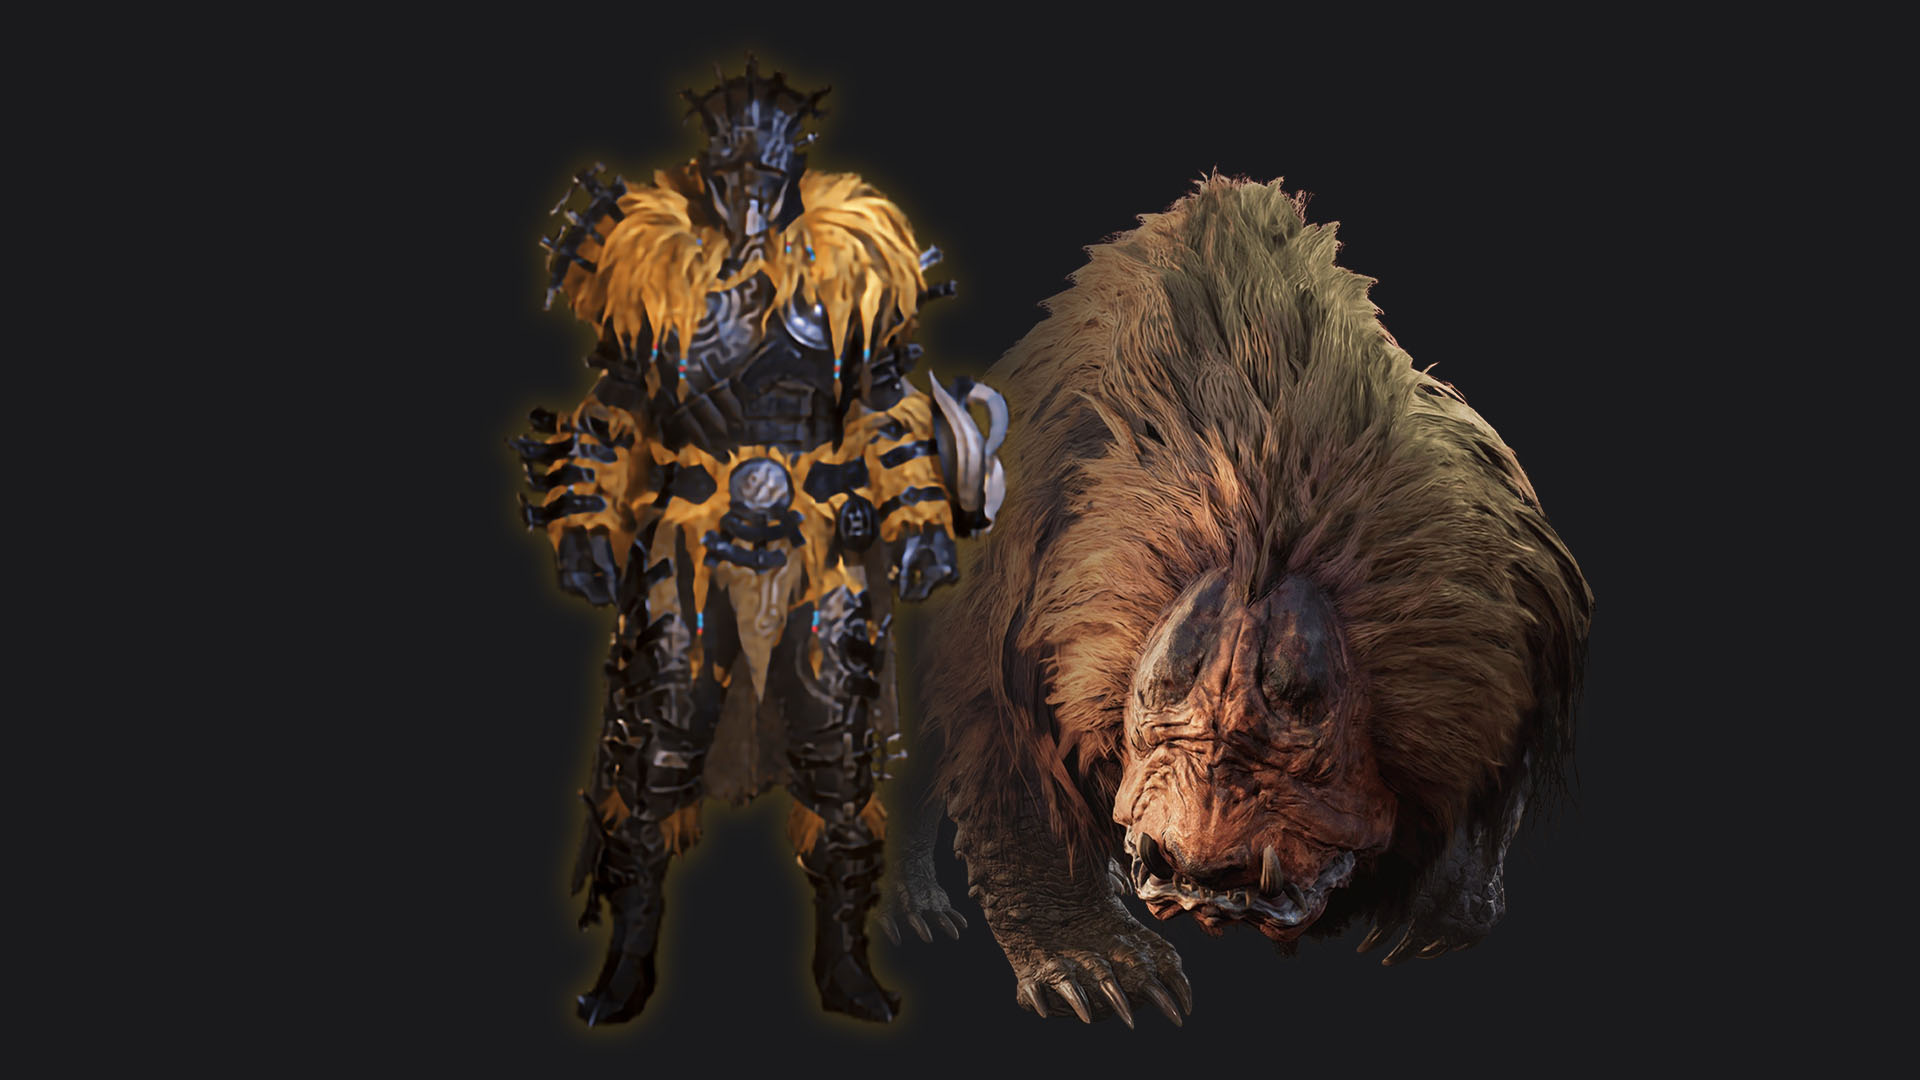
- Dragon Element Resistance - Up to +16 with full set.
- Bonus Resistances - +1 All Resistances (3 pieces), +2 All Resistances (4 pieces), +3 All Resistances (all 5 pieces).
- Inspiring Pelt - A group skill that boosts team synergy. (3 pieces)
- Doshaguma’s Might - A set bonus skill that enhances survivability.
- Recovery Speed - Both Doshaguma arms and waist offer a skill that increases the speed at which you heal.
- Free Meal - Helm, chest, and legs offer a skill that gives you a predetermined chance of consuming a food or drink for free.
After extensive testing and research, we’ve determined that the Doshaguma Set is the best armor choice to help you defeat Arkveld since it has a great elemental defense, fast health recovery, and strong passive skills.
➤ Studying Breakable Parts & Weak Points
Arkveld has some weak parts you should target to ensure you deal maximum damage. Focusing on these body parts will weaken Arkveld over time, making the fight easier.
Arkveld's breakable parts:
- Head
- Chainblades
- Tail
➤ Planing the Route & Using Natural Traps
Observing Arkveld's routes during combat phases will provide strategic benefits. Anticipating its movements allows you to use the terrain to your advantage, maximizing damage during crucial moments.
Lure Arkveld under the Falling Boulders since these environmental traps deal enormous damage (~1,000-4,000/boulder; ~11,000 total). Arkveld has approximately 60,000HP, so this practice will help you drain up to 18% of his health. Use as many as possible from the 8 available on the route. The map below shows you exactly the path you should follow.
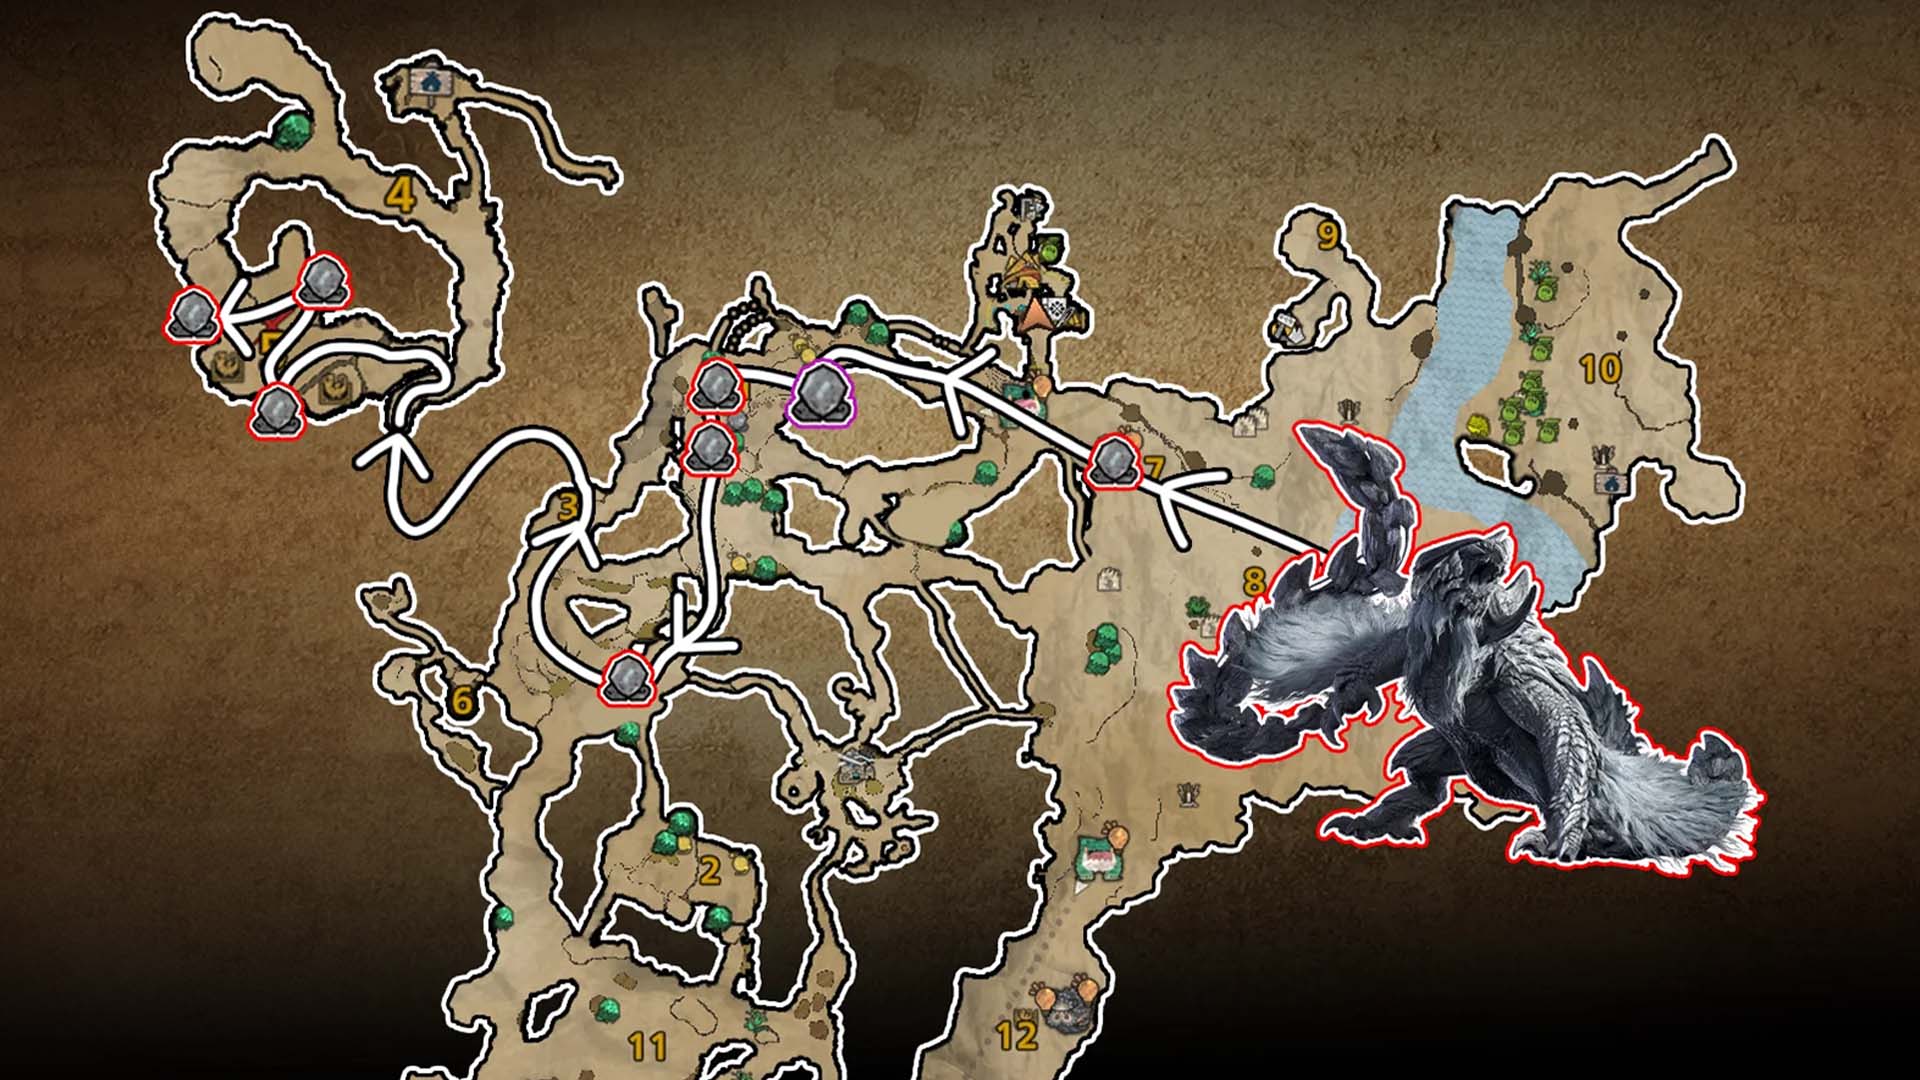
The following video shows exactly how following the Falling Boulders route helps you defeat Arkveld easier:
Arkveld tends to go from Area 1 to Area 5, skipping Area 3, but with good positioning and Luring Pods, you can lead it where you want. Also, ensure you use Vine Traps in areas 7 and 8 to stun the monster and land free hits. Paratoads are also very effective in area 10, paralyzing him for some high-damage combos.
➤ Meal Preparation
Eating before the fight is mandatory, as Arkveld can one-shot or take half your health in one hit. The best meals before the Arkveld fight are:
- Grilled Meat: for stamina, it helps you dodge more.
- Defense-boosting meals: for increased survivability.
- Elemental resistance meals: help against Dragonblight and heavy attacks.

Skipping a meal before this encounter is a big mistake. You need every advantage possible in this fight.
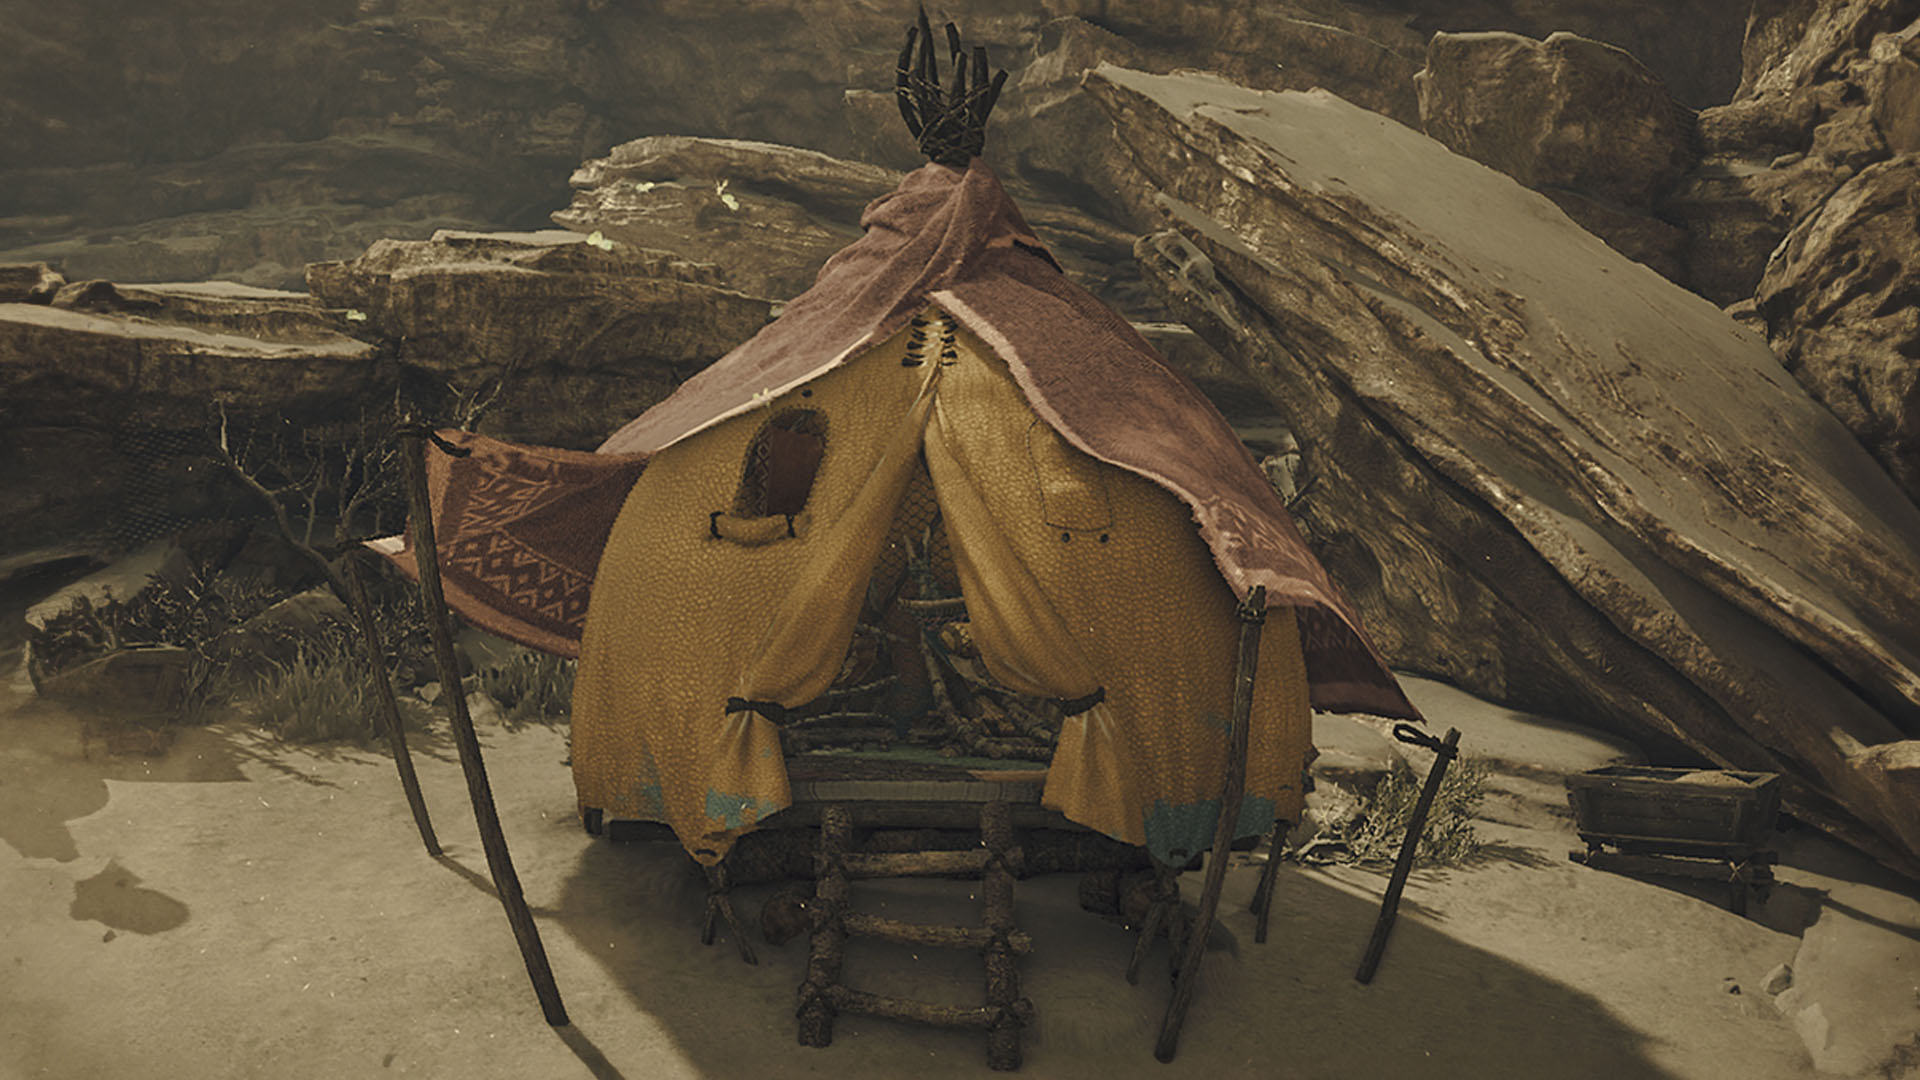
➤ Setting Up Camps
Fast-traveling between camps will save you time when Arkveld moves or if you need to restock. Place camps near Arkveld’s common areas to minimize downtime, heal, sharpen weapons, and prepare between phases.
➤ Equipment Maintenance
Sharpen weapons before going for Arkveld. Keep an eye on durability since a blunt weapon won’t do much against this monster. Upgrade your armor as much as possible before the hunt to reduce incoming damage.
➤ Useful Items & Traps
Bring the right items & traps to turn the Arkveld fight in your favor. We recommend the following:
- Slinger Pods
- Flash Pods
- Luring Pods
- Bombs
- Ghillie Mantle
- Shock Traps
- Pitfall Traps
- Vine Traps
Use these items & traps at the right moments to create damage windows and drain as much HP as possible.
➤ Learning Arkveld's Moveset
Knowing what Arkveld is about to do will allow you to dodge at the right time, counter-attack, and survive longer. Below, you can find some particular movements that you should be aware of:
- Arkveld wing chains glow red before heavy attacks, at that moment you know you should dodge.
- When it prepares an explosion, look for weak spots and get ready to counter.
- It has a grab attack, so you should be ready to use Slinger Pods to escape.
If you react too late, you’re going to take massive damage. The better you learn the moves, the longer you’ll survive.
➤ Rey Dau Turf War
Rey Dau often enters the fight during the hunt, triggering a Turf War against Arkveld. Instead of interfering, let them fight. His natural enemy deals free damage that weakens the monster.
Using Flash Pods, Dung Pods, or Luring Pods on Rey Dau is a mistake, as it might stop the fight and you will lose the opportunity. Take advantage of the moment to sharpen your weapon, heal, or activate buffs.
Arkveld Attacks & How to Defend
Arkveld is an aggressive monster with a wide range of attacks. Learning its patterns is the key to surviving the fight and defeating this monster. Below, you'll find a detailed table breaking down each of its attacks:
| Attack | Description | How to avoid? |
| Dragon Chain Explosion |
Arkveld's chains glow white, then red, before slamming down, triggering a wave of Dragon energy explosions. |
Dodge to the side or stay behind its wings. |
| Tail Pierce |
The monster retracts its tail, then thrusts it forward at high speed. |
Dodge to the side or use a Perfect Guard to block the hit. |
| Heavy Chain Slam |
Arkveld swings one chain downward, immediately following up with another from the same arm. It can also chain into a multi-hit combo. |
Dodge in the opposite direction of the attacking arm. |
| Wing Cleave |
He slashes its chains through the ground in a wide arc, cutting across in front of it. |
Dodge backward to stay clear or roll into the attack to pass through the hit. |
| Grab Attack |
The monster twists its body and swings its chains, attempting to grab hunters in close range. |
Use Slinger Pods to break free. |
| Sweeping Tail Strike | Arkveld briefly pulls back its tail before spinning, sweeping everything in range. | Step backward to escape the hit zone. |
| Dragon Blast | Arkveld charges its chains with Dragon energy before launching an explosive strike. | Dodge forward to move past the blast area. |
| Twin Chain Crush | He slams all chains simultaneously, each landing in different patterns. | Run sideways to avoid the impact. |
| Aerial Chain Sweep | Arkveld takes to the air while dragging its chains along the ground, cutting through anything in its path. | Dodge away from the chain’s path or use Flash Pods to bring Arkveld down. |
Note: If you study and memorize Arkveld’s attacks, you’ll have a great advantage, allowing you to dodge and strike back at the right moments. If you go in blind, Arkveld will catch you off guard, and you won’t stand a chance.
Phase 1 – Early Combat
At the start, Arkveld throws chain and tail attacks, testing your reflexes. Focus on learning its movement patterns and attack signals to dodge and counter.
Phase 2 – Mid-Battle
As the fight progresses, Arkveld becomes enraged (its chains glow red). In this state, its attacks are more aggressive, and it deals increased damage. Keep a safe distance, prioritize defense, and take any opportunity to strike during its recovery moments.
Phase 3 – Final Stage
In the final phase, Arkveld will try to retreat to its nest or a secure spot to recover. Prevent its escape by using traps, try to immobilize it, and throw concentrated attacks to finish the hunt.
Now that you understand Arkveld’s attacks and phases, it's time to learn the best ways to defeat it, whether you're hunting solo or with a team.
Arkveld Solo & Multiplayer Strategies
Whether you're going to hunt Arkveld alone or with a party, a solid game plan is crucial. Let’s break down the best strategies for both situations.
How to defeat Arkveld Solo?
Hunting Arkveld solo is a test of skill, requiring precision, patience, and smart resource management. Since you won’t have support from teammates, your survival and damage output depend entirely on you. Here’s how to defeat Arkveld on your own:
- Choose the right build - equip an armor with high Dragon element resistance & pick a high-damage weapon.
- Use Shock Traps and Pitfall Traps to create damage windows.
- Eat before the hunt & sharpen your weapons.
- Use Paratoads and Vine Traps in the environment to stun the monster.
- Use Flash Pods to bring Arkveld down when he takes off.
- Focus on dodging - knowing its attack patterns is key to avoiding taking damage.
- Hit weak points.
- Mount often by landing aerial attacks.
- Lure Arkveld under Falling Boulders.
- Mount often by landing aerial attacks.
- If Rey Dau appears, don’t interfere.
Pro Tip: don’t rush attacks, just wait for the right moment to strike, and Arkveld will fall. A well-planned solo hunt is often faster than a chaotic multiplayer one if you know how to control the fight.
Arkveld Multiplayer Tactic
In a team hunt, coordination is key. Arkveld will benefit from higher damage and HP with each hunter who joins the fight, so a disorganized group can struggle more than a solo hunter. You must spread out, control the fight, and maximize team synergy.
Also, during team hunts, you fail the quest if the party accumulates a certain number of faints, regardless of which player falls. For the Arkveld hunt, your team has 5 faints available.
- Team Roles - At least one player should focus on tanking, another on support, while others deal damage.
- Positioning - don’t cluster together, spread out to avoid chain attacks and give each other space.
- Use support tools like Shock traps, Pitfall traps, and Flash Pods.
- Break Arkveld’s chainblades and head to weaken its most dangerous attacks.
- If Rey Dau appears, don’t interfere.
Now that you know how to kill Arkveld step by step, it’s time to explore its general traits and characteristics. Understanding its behavior, habitat, and unique features will give you a better understanding of how it reacts, helping you anticipate its actions before the fight begins.
Arkveld's Breakable Parts
Arkveld is a mighty monster, but breaking specific parts will make him weaker, slower, and more vulnerable. It will also increase your chances of getting rare monster parts. If you’re farming for specific materials, prioritizing part breaks is essential. In the table below, we have outlined the Arkveld breakable parts and the most important details about each:
| Breakable Part | Breaking Difficulty | How to Break | Most Efficient Weapons |
| Head | 🔴 Hard | Repeated heavy hits over a long period of time. |
|
| Chainblades | 🟡 Medium | Focus attacks on chainblade joints, especially after Arkveld finishes an attack. |
|
| Tail | 🟢 Easy | Cut off with sharp weapons, attack from behind. |
|
Note: If you want to break a specific Arkveld part, use the new Focus Mode feature to target and hit the weak area. It lets you lock on a certain spot.
Now that you know how to weaken Arkveld by breaking its parts, let’s see what rewards and materials you can get from the hunt.
Arkveld's Rewards & Materials
The rewards you get from Arkveld depend on how you approach the fight. Some materials drop based on part breaks. Check the table below for all Arkveld materials and how to get them:
| Source | Materials |
| Body (sustained body damage) |


|
| Head (break its head) |

|
| Chainblades (break its chains) |

|
| Tail (cut its tail) |


|
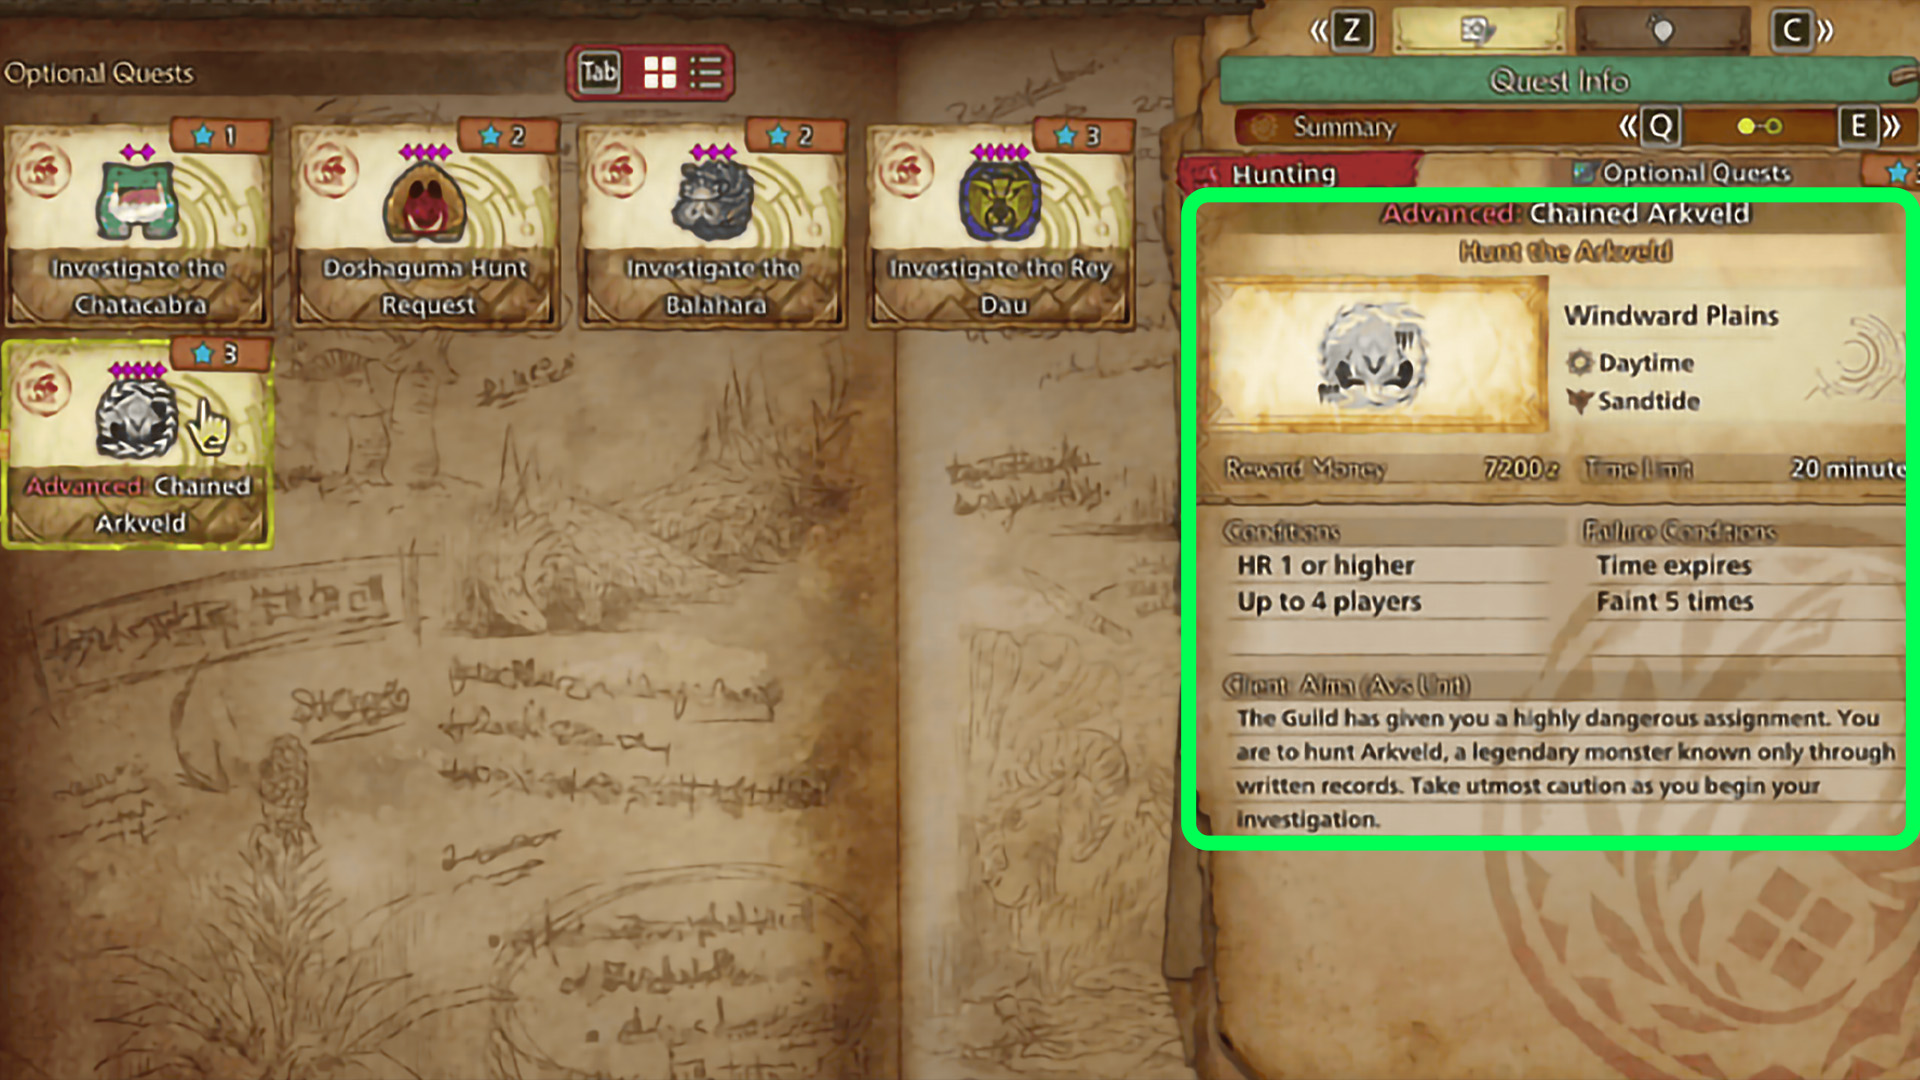
| Quest (complete Advanced Optional Quest: Chained Arkveld) |


|
Arkveld’s materials are crucial for crafting its powerful weapons and armor set, but getting everything you need will take multiple hunts. The grind is worth it, though. Next, we’ll showcase every Arkveld weapon and armor piece so you know exactly what to expect.
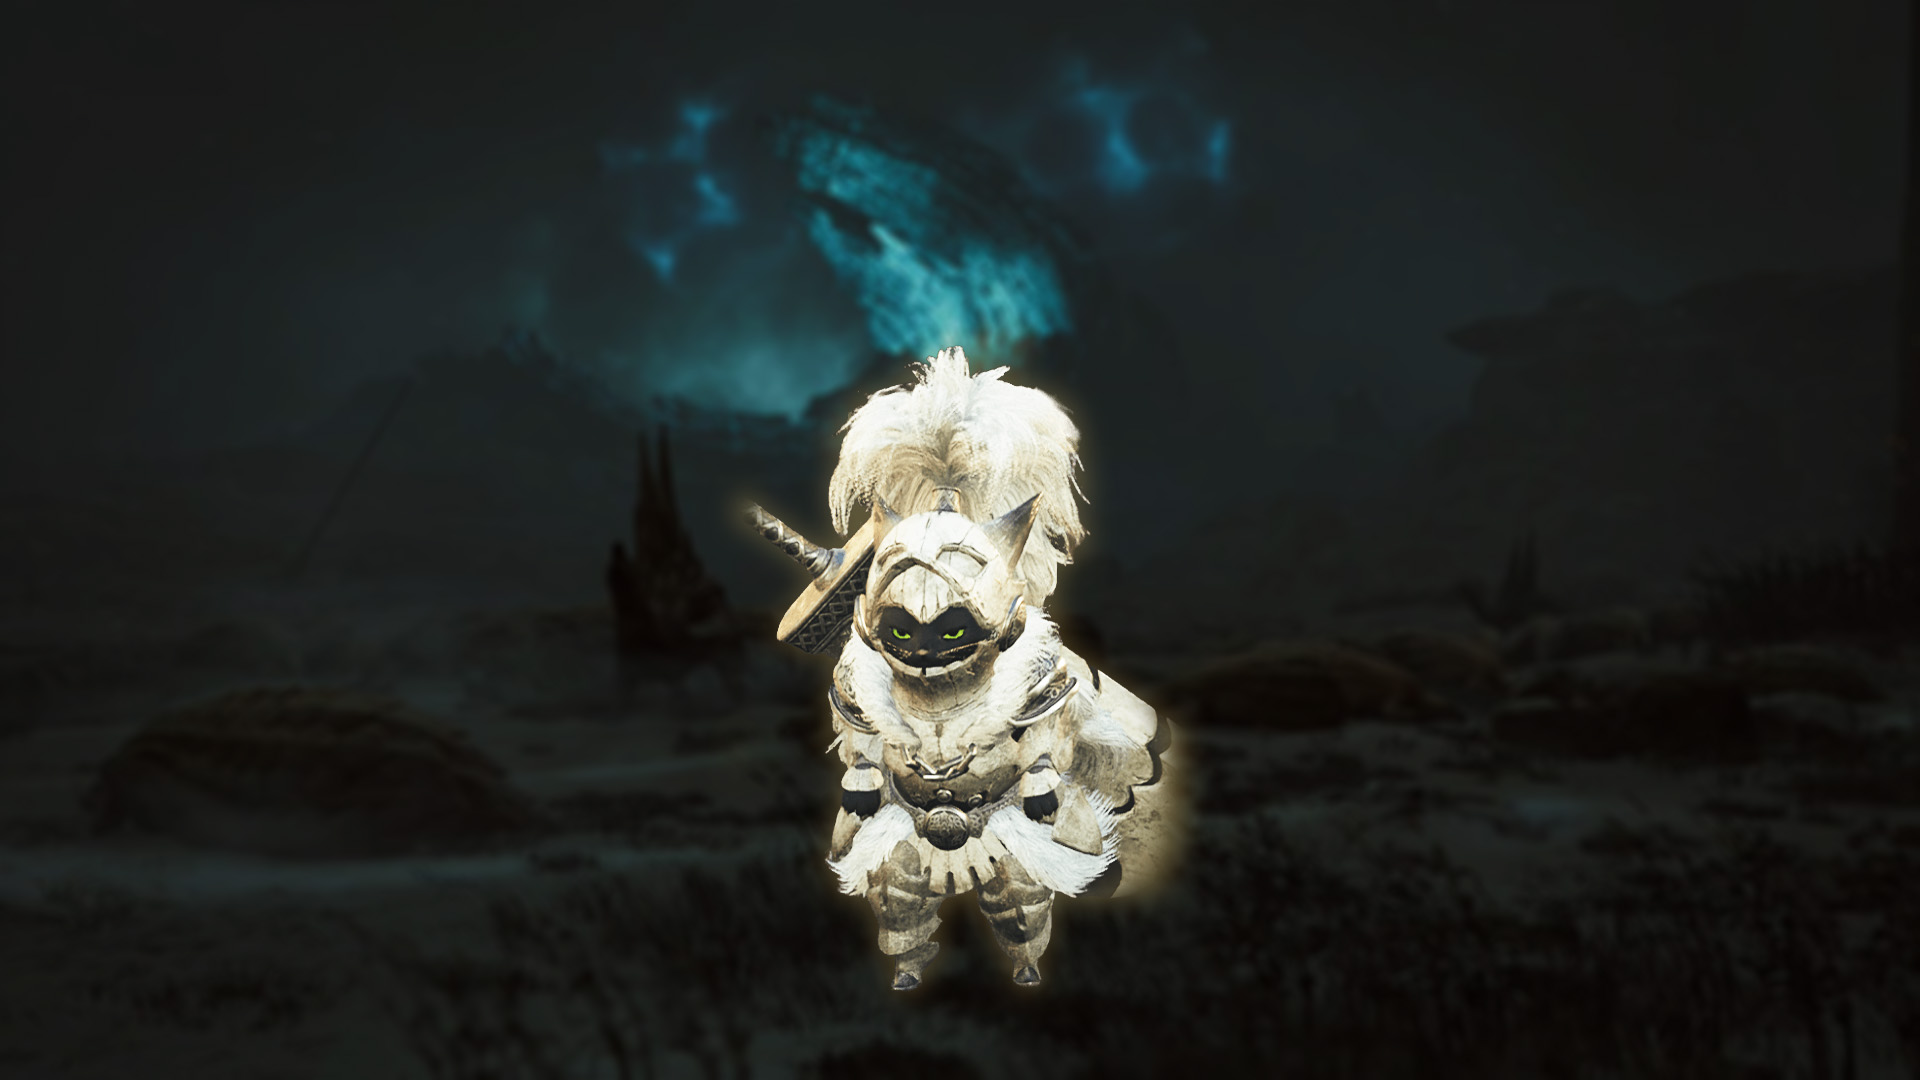
Arkveld Weapons and Armor Set
Arkveld’s gear is valuable and will help you in future hunts, especially against powerful monsters. It has great defense and strong skills, making it a must-have for all hunters.
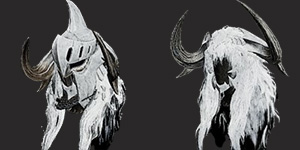
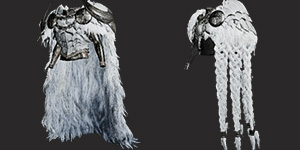
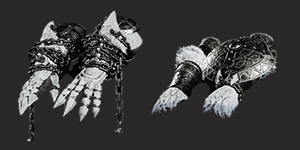
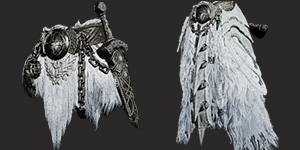
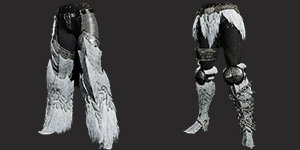
Arkveld Armor Set
The Arkveld Armor is available in two versions: Alpha and Beta. Both sets share identical skills and stats but differ in appearance.
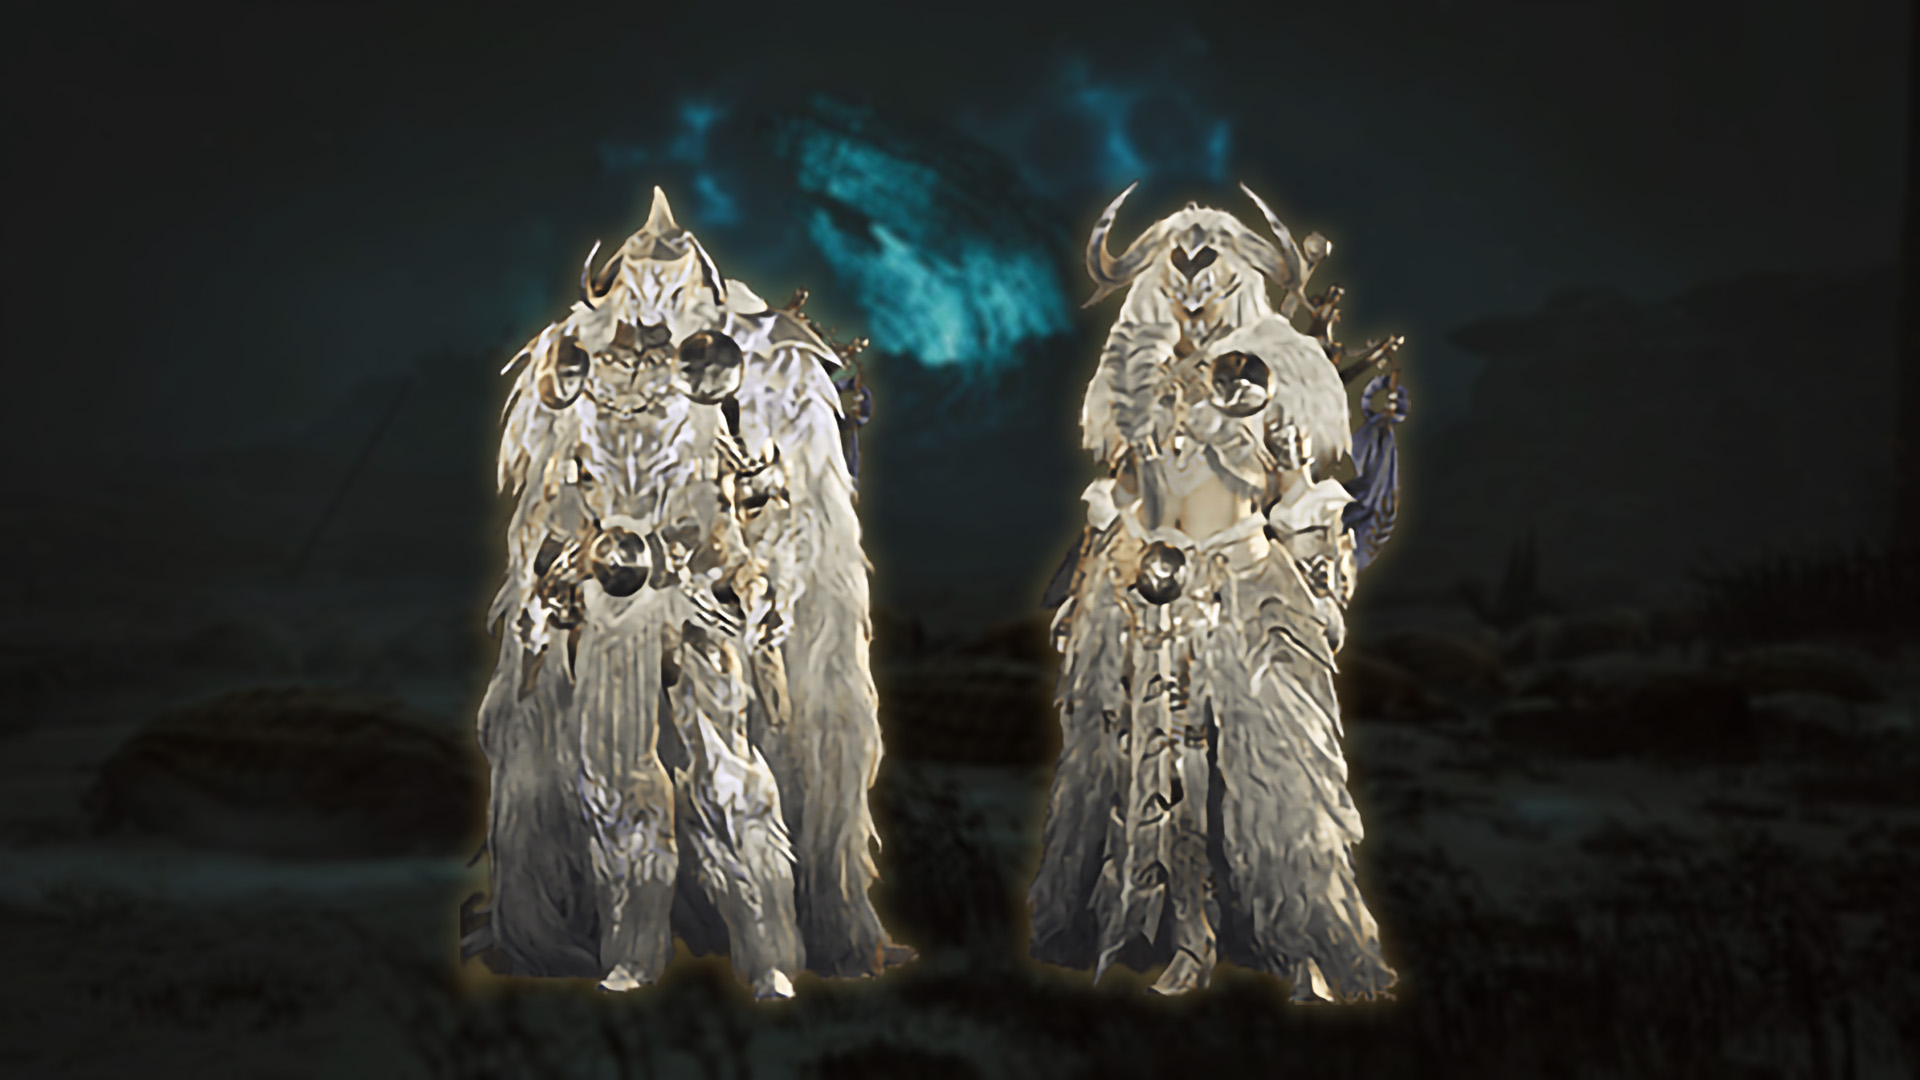
The Alpha set look is more detailed and has ornate design, making it a popular choice for hunters who value aesthetics. The Beta set offers a battle-ready look, better for those who prefer a simpler style.
In the following table, we’ll present each armor set, breaking down the individual pieces with their skills & stats.
| Armor Piece | Defense | Skill | Elemental Stats | |
|
Arkvulcan Helm (α & β) | 66 | Elemental Absorption Lv 2 Convert Element Lv 1 |
|
|
Arkvulcan Mail (α & β) | 66 | Weakness Exploit Lv 1 Elemental Absorption Lv 1 |
|
|
Arkvulcan Vambraces (α & β) | 66 | Convert Element Lv 1 Recovery Speed Lv 1 |
|
|
Arkvulcan Coil (α & β) | 66 | Weakness Exploit Lv 2 Recovery Speed Lv 1 |
|
|
Arkvulcan Greaves (α & β) | 66 | Quick Sheathe Lv 2 Convert Element Lv 1 |
|
Arkveld Armor Set Bonuses
The set bonus is called Arkveld's Hunger and it has 2 Skills, which can be activated once 2 or 4 armor pieces are equipped at the same time.
Hasten Recovery I (2 pieces): Regenerates a small amount of your health as you continually attack a monster. Recovery varies by weapon.
Hasten Recovery II (4 pieces): Regenerates your health as you continually attack a monster. Recovery varies by weapon.
Arkveld Weapons
There are multiple weapons that require Arkveld materials for crafting. In the following list we have reveled all Arkveld weapons in Monster Hunter Wilds:
- Renowned Tristram (Bow)
- Abiding Gawain (Charge Blade)
- Inspired Ywain (Dual Blades)
- Stalwart Lamorak (Great Sword)
- Lawful Bors (Gunlance)
- Exultant Bedivere (Hammer)
- Aeternal Palamedes (Heavy Bowgun)
- Resounding Galahad (Hunting Horn)
- Enduring Tor (Insect Glaive)
- Purifying Beaumains (Lance)
- Expiating Caius (Light Bowgun)
- Righteous Lancelot (Long Sword)
- Indomitable Perceval (Switch Axe)
- Guiding Artorius (Sword and Shield)
Arkveld Weapon and Armor Set for Palico
Aside from your own equipment, you can also craft powerful gear for your companions using Arkveld materials. This includes Palico and Seikret items, giving them better traits to support you in battle.
In the tables below, we have outlined the full Arkveld set & weapon for Palico.
| Weapon | Damage | Elemental Damage | |

|
Felyne Arkveld Sword | Melee: 44 Ranged: 54 |
|
| Armor Piece | Defense | Elemental Stats | |

|
Felyne Arkveld Helm | 54 |
|
|
Felyne Arkveld Mail | 54 |
|
Now that we’ve covered Arkveld’s materials and gear, it’s time to take a step back and study the monster. Understanding its nature, behavior, and unique traits to better prepare for the hunt.
Arkveld Overview
In this section, we’ll explore what makes Arkveld unique, starting with basic characteristics, habitat, abilities, and its role in the game story.
What is Arkveld?
Arkveld is the flagship monster of Monster Hunter Wilds. At first, it may look like an Elder Dragon, but it is actually a Flying Wyvern with Dragon Element. Arkveld is different because it is part of an extinct species, something new in the Monster Hunter series. It is one of the strongest monsters in the game, and you must sharpen your skills to defeat it.
Behaviour & Abilities
Arkveld is an aggressive and unpredictable monster that uses ground and aerial movements. It can fight at long range with its chains. Arkveld adapts quickly and takes advantage of its Dragon element, which allows it to unleash powerful blasts. When enraged, its chains glow red, signaling very powerful attacks. He is pretty slow due to its dimensions, so you should stay alert and react quickly to defeat him.
Arkveld’s Location & Habitat
Arkveld lives in the Windward Plains, a vast area where it can fly freely. The region is known for frequent thunderstorms, which affect visibility and mobility during the hunt. Arkveld engages in Turf Wars with Rey Dau. Arkveld can also be found in Oilwell Basin, Scarlet Forest, and Iceshard Cliffs.
Arkveld moves between different zones during the hunt, often retreating to higher ground. If you know where it goes during each phase, you can use the terrain to your advantage.
How to unlock Arkveld in MH Wilds?
To unlock the Arkveld quest in Monster Hunter Wilds, follow these steps:
- 1. Complete the Chatacabra Trial.
- 2. Return to your base camp and speak with Alma.
- 3. Visit the training area, marked by a green arrow on your map.
- 4. Return to Alma. She will have the Arkveld quest available.
Arkveld Quest
Throughout the campaign, you face Arkveld in The Chains of Life quest at HR4 in the 'guardian version (weaker) and you can repel him. At HR7 you get the Awaking from a Dream quest (HR7), where you are finally able to kill Arkveld for the first time.
In the end-game, the optional quest is called "Chained Arkveld", and sends you to the Windward Plains, where your goal is tracking and defeating Arkveld.
How to capture Arkveld?
Did you know that in Monster Hunter Wilds, you have two choices when you defeat Arkveld? You can slay it for immediate rewards or capture it for better long-term benefits. If you want to capture Arkveld, you need to prepare before and follow the next steps:
- Bring Shock Traps, Pitfall Traps, and Tranq Bombs. Carry extra materials to craft more if you need.
- Hurt Arkveld until it starts moving with difficulty or retreats to its cave (this is the sign that it's ready for capture).
- Place a Shock Trap or Pitfall Trap in its path to immobilize it.
- Once trapped, quickly throw two Tranq Bombs at its head to capture it.
Note: I recommend capturing Arkveld since it provides better rewards over time. It is a smarter long-term choice.
Next, we’ll cover key tips and tricks to help you choose the right gear, improve your positioning, and choose the best combat strategy, making the Arkveld hunt smoother.
Arkveld Extra Tips & Tricks
Follow the next tips and tricks to refine your Arkveld strategy, making the fight easier, breaking all parts, and defeating him fast.
- Use Focus Mode for part breaks – Breaking the head, chainblades, and tail will weaken Arkveld and increase materials drop chances.
- Take advantage of the environment – Windward Plains have natural traps like Vine Traps that Arkveld. There are Falling Boulders in certain areas. Lure Arkveld under them to deal significant damage.
- Positioning & dodging – Stay behind Arkveld’s chainblades to avoid Dragon blasts and chain slams. When its chains glow red, play defensively.
- Let Turf Wars do the work – If Rey Dau appears, don’t interfere since it will damage Arkveld.
- Capture over slaying – Bring Shock Traps, Pitfall Traps, and Tranq Bombs since Arkveld will provide better long-term rewards if you capture it.
Still have questions about Arkveld? Next, we will review the most common questions to clarify any remaining doubts about this monster.
Monster Hunter Wilds Arkveld Guide F.A.Q.s
What are Arkveld weaknesses?
Arkveld is a Dragon-element monster, and its official elemental weakness is Dragon, but all elements may be effective since he doesn't have any natural resistance.
Should I kill or capture Arkveld?
It depends on your purpose. Capture it if you want better long-term rewards. Kill Arkveld if you need instant rewards and don't want to wait.
How to avoid Arkveld’s Blast?
Stay behind its wings or dodge to the sides when its chains glow red.
Can Arkveld’s chains be broken?
No, Arkveld’s chains are not breakable; they just glow red when enraged.
Why is Arkveld the flagship monster of MH Wilds?
Arkveld is the flagship monster, representing the new challenges and mechanics introduced in Monster Hunter Wilds. It opens the road for extinct species in the series and plays a significant role in the game’s story.
Which Arkveld parts can be broken?
You can break Arkveld’s head, chainblades, and tail using weapons like the Great Sword, Long Sword, or Switch Axe.
Update Log
01.03.2025 - we have updated the weakness chart with the most rlelvant details; updated the "Arkveld Armor set & Weapons" section with all the gear pieces you can craft using Arkveld materials, and reviewed all the other sections of our MH Wilds Arkveld guide.
Final Thoughts
Defeating Arkveld is about understanding its weaknesses, breaking its parts, and using the right strategy. Whether you prefer a solo hunt or teamwork, you must learn its attack patterns, use the best weapons and armor set, and take advantage of the tips and tricks we provided in this guide.
Throughout this Monster Hunter Wilds Arkveld guide, we have revealed all its weaknesses, studied attack patterns, and provided key tips to help you choose the best strategy for a successful hunt. Get ready and sharpen your weapons; Arkveld won’t go down without a fight.
About KBoosting
Thank you for taking the time to read our Monster Hunter Wilds guide about Arkveld's Weaknesses & Strategy. Did you know that at KBoosting, we are not only about guides and articles? We also provide boosting services to make things even easier for you. Check out our MH Wilds boosting services; let us handle everything for you while you have some real fun in the game!