ARC Raiders Stella Montis Map Guide – Layout, Loot & Enemies

-
Sale 15%Ends in 8h 20m 52s
Introduction
Welcome to our ARC Raiders Stella Montis Map Guide, where we break down every region, threat pattern, and loot hotspot to help you navigate the map with confidence. Learn how to optimize your routes, adapt your loadout to each terrain type, and leverage the map’s natural chokepoints and elevation to your advantage. With this guide, you’ll be fully prepared to traverse Stella Montis efficiently and extract with top-tier rewards every time.
BUY STELLA MONTIS MAP RUNS NOW!
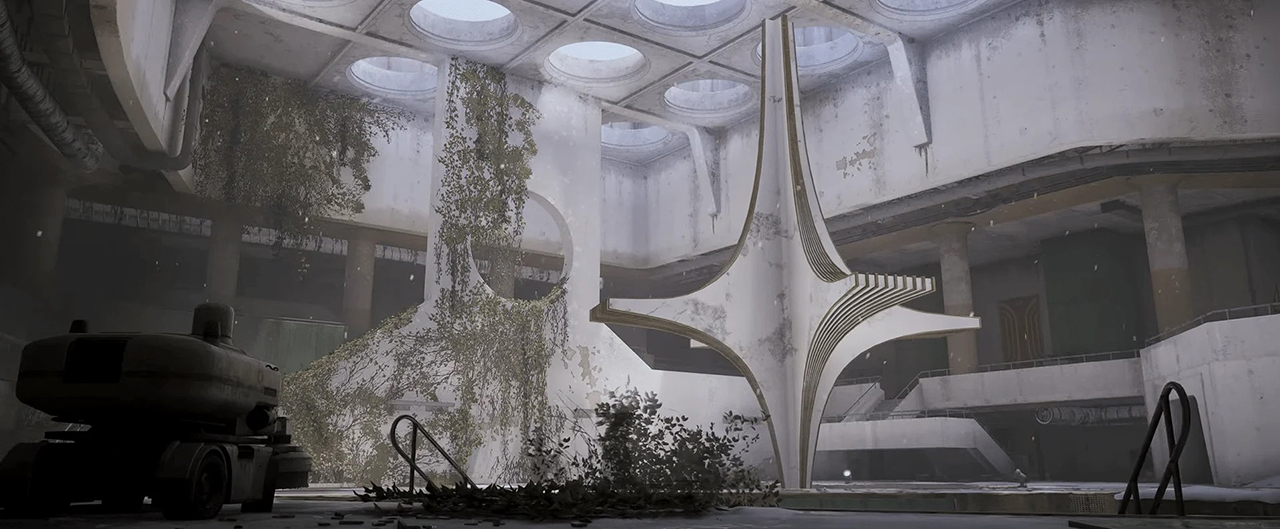
What is Stella Montis?
Stella Montis is basically a crazy labyrinth. It’s very fun to play, and you can tell that the map was intricately designed. There are a few key differences that make this map stand out:
- Map Orientation — This is probably the first map where you can fail to extract just because you got lost. Be ready to check your map often.
- Close Player Spawns — You can spawn in one place, and there’s somebody right behind you in a corridor.
- High Loot Rewards — It seems like the chance of Rare and Epic loot spawning in is higher here.
- Cloth is Hard to Find — Crafting healing items during the raid can be a bit more difficult.
These changes might seem minor, but they completely change the flow of the game. Here, it feels more dangerous because the enemy encounter rate is high. ARCs are lurking everywhere, and it’s easy to miss an enemy due to how dark it is.
How to Unlock the Stella Montis Map?
To unlock the Stella Montis map when the patch released, you had to donate some materials to restore the tunnel network connecting Speranza to the northern territories. Now, the Stella Montis map is accessible to everyone permanently (as long as you completed at least 25 raids before).
Missions
There are a total of 3 quests that were added in the Stella Montis update, and they are as follows:
| Quest | Objective | Reward |
| In My Image | Deploy into Stella Montis & search 3 Androids | 2x Loot Mk.II, 5x Green Light Stick |
| Cold Storage | Search any J Kozma Ventures container | 3x Gas Mine, 1x Raider Hatch Key |
| Snap & Salvage | Take a photo of any Rovers in the Sandbox, Search the papers in the Security Checkpoint room by the Lobby, Deliver a Flow Controller & Magnetron to Tian Wen | 1x Burletta III, 1x Silencer II, 1x Extended Light Mag II, 100x Light Ammo |
New ARC Enemies
Stella Montis introduced a new enemy found only on this part of the map: the Shredder. It’s an ARC that pursues you no matter what. It’s a regular unit with firepower closest to the Rocketeer’s. Thankfully, it can’t shoot up and down. It can only shoot straight. When it notices you, it fires a burst of shotgun shells at you. Apart from Shredder, the list of Stella Montis’ enemies is quite familiar:
- Hornet
- Wasp
- Pop
- Fireball
- Bastion
- Turret
- Bombardier
Though there are no Leapers and Rocketeers on this map, the enemies here are quite tough. Fighting in narrow spaces makes it much more stressful and deadly. Any missed shot on the Pop or a Fireball can easily cost your loot, so thread carefully.
How to defeat the Shredder
These ARC enemies have a single type of attack, but it hits for a lot of damage, and its range is an intermediate between the Hornet's Stun Blast and the Wasp's Bullet Spray. The Shredder attacks with shotgun bullets in a 360º rotating attack that destroys everything that is not behind cover.
Aiming and shooting down a thruster will destabilize the Shredder and send it crashing down the floor, but from there to destroying it completely, it's a different tale.
Shredders can still attack when downed, though their range becomes more limited and the angle of their attacks switches slightly. To completely destroy a Shredder, hit it when on the ground with a grenade or a Fireball Burner. Once it catches fire, its armor will be severely reduced, and landing a few hits will end its reign of terror.
Best Looting Route
There are many good places to loot here. Unlike with other maps, you spawn close to the looting zones. That means that your loot path relies on the spawn point. Take a look at this table of the best loot paths in Stella Montis:
| Spawn Zone | Loot Path | Info |
| Assembly Spawn | Medical Research → Loading Bay Extraction OR Assembly Workshops → Assembly Workshops Hatch | If you spawn on Assembly, there’s almost a 100% chance you’ll face other players. Medical Research is more PVP-heavy than Workshops, but Workshops have a player spawn on the eastern side of it. If you spawn in late, we recommend going to Medical Research. |
| Assembly Workshops Spawn | Assembly Workshops → Assembly Workshops Hatch OR Assembly Workshops → Medical Research → Loading Bay Extraction | If you spawn in late, your best bet is to hope that there are players looting Assembly Workshops still. Usually, they’re filled with loot, and there’s a low chance players from the Lobby will come here. |
| Lobby Northern Spawn | Lobby → Cultural Archives or Assembly Area → Lobby Extraction or Raider Hatch | One of the two Lobby spawns. If you spawn in here, check the left side when running out to the Lobby. Chances are, other players will be going up from the Lobby Metro spawn. Don’t loot until you're sure you’re safe. |
| Lobby Metro Spawn | Upper Lobby → Lobby Extraction OR Lobby Area → Cultural Archives → Eastern Tunnel Hatch/Airshaft | If you spawn in here, you’re in a worse position than the other Lobby spawn. You need to get to the other spawn ASAP and try to clear any raiders there. After that, loot the Lobby and extract. |
| Loading Bay Spawn | Medical Research → Assembly Workshops → Raider Hatch OR Sandbox → Seed Vault → Eastern Tunnel Hatch/Airshaft | The best spawn you can wish for. It has a quite convenient route with some of the best loot. It’s also pretty safe. |
| Seed Vault Spawn | Seed Vault → Sandbox → Loading Bay Extraction OR Seed Vault → Cultural Archives → Eastern Tunnel Hatch/Airshaft/Lobby Extraction | Another great spawn. Lets you cover a lot of ground and offers many options for loot paths and extraction. If you spawn in late, be ready for a shootout. |
In theory, these loot paths are the most efficient. Factually, when you’re in the raid, you might want to take a different route because of the enemies. There might be lots of ARCs on your way or a player shootout. Weigh your risks, check your resources, and decide whether encountering enemies is worth it.
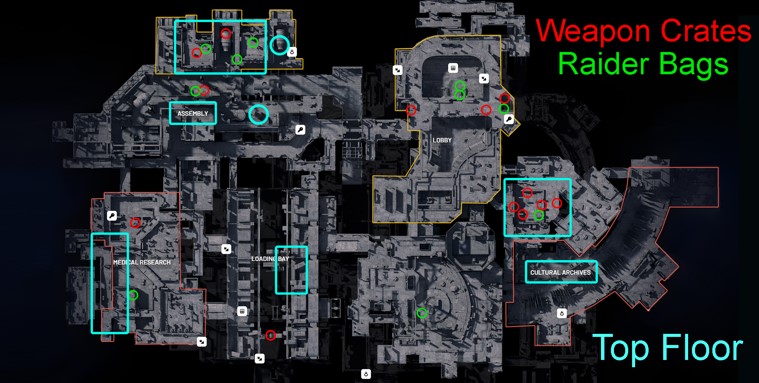
Best Loot Locations
Stella Montis contains tons of good loot. It’s really easy to get overwhelmed with how much you’d want to carry out to Speranza. That’s why we advise prioritizing the loot you need in your runs. It’s best done solo, unless your friends need similar loot. Bear in mind that, even in solo play, this area is highly active for PVP.
If you want to loot well, you don’t have to go to red or yellow zones. It’s easier to find high-tier loot there, yes, but it’s not required. If you are stressed to fight in PVP, just avoid them and loot the outskirts. With that said, let’s talk about the best places to loot on Stella Montis:
- Medical Research — Highest PvP activity zone. There are many places people can attack you from. It has tons of Vita Sprays, blue bandages, and rare materials for your workshop. New Epic loot also spawns here.
- Assembly Workshops — A great and relatively safe zone to loot. There are lots of Fireballs and Pops here, so watch your step. Loot the yellow carts, as they spawn Epic loot. We’ve once found 4 Epic materials in the same cart. Be careful, as this area is next to a few spawn points.
- Lobby — Area to loot if you’re looking for weapon components and security rooms. One of the few areas with the possibility of long-distance fights. If you’re looting here, get your sniper rifles. There are Shredders patrolling it, which are new enemies, so be extra careful.
- Storage Room and Cultural Archives — Warehouse filled with Old World loot. Books, paintings, even the mixtape, all spawn here. Good area if you need to farm items for sale. It’s very narrow and has lots of cover, so fighting here is pretty fun.
- Sandbox A & B — A place to farm mechanical components. Low player traffic due to the number of Shredders, Pops, and Fireballs here. If you play this game enough, you know that ARCs are usually a much higher threat. Go in there well-prepared.
- Seed Vault — An area that requires fuel cells to open up. There are many seed pods that contain just one seed. This is pretty strange, considering this is a red area. There is other good loot spawning here, including weapon crates.
And this covers the best places to loot on Stella Montis. The coolest thing about it is that there are many good places to loot within the vicinity. You can just load in, quickly loot, and then extract. It’s especially good if you have enough Raider Hatch Keys. Luckily, it’s quite easy to craft even in a raid.
Best Farming Build
There are plently of builds out there that can bring success on the Stella Montis map, although nothing is guaranteed, since the PvP element is always present. However, here is a table with what we think will make your life much easier while raiding Stella Montis:
| Best Stella Montis Looting Build | ||
| Primary Weapon | Tempest I (Epic) | 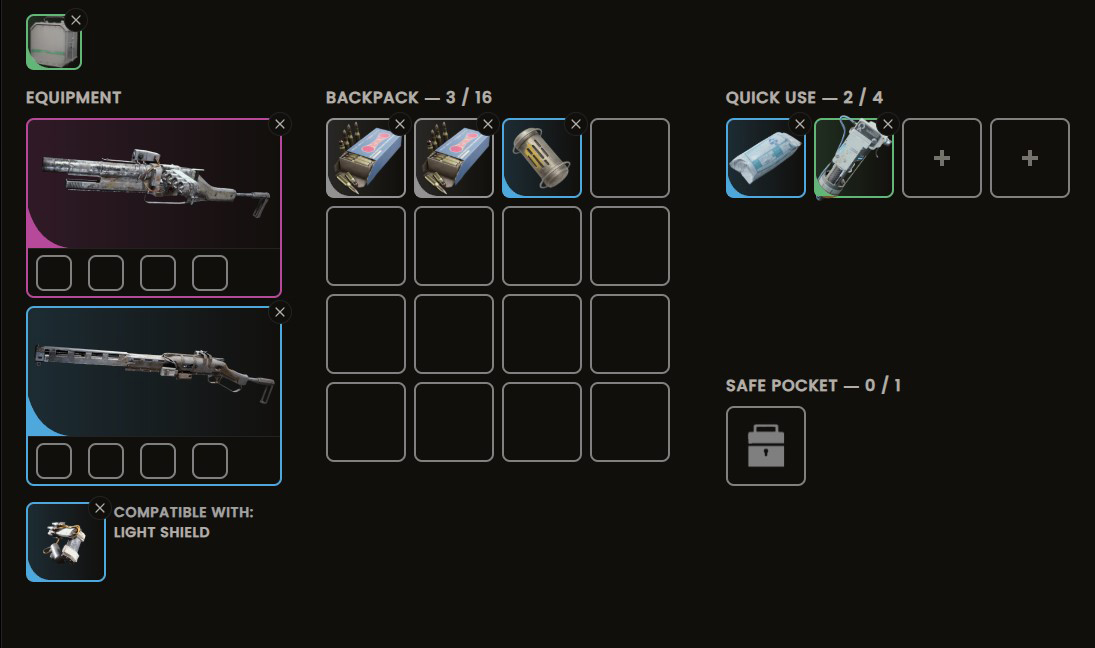 |
| Secondary Weapon | Renegade I (Rare) | |
| Ammo | Medium | |
| Augment | Combat Mk. 1 | |
| Shield | Medium Shield | |
| Quick Use | Sterilized Bandage Shield Recharger Smoke Grenade | |
Tips & Tricks
We've spent a good amount of time exploring, looting, and fighting at Stella Montis. Here are some helpful tips that should hopefully keep you alive as you're exploring this challenging region:
- Bring close-range to medium-range weapons with you - You won't find too many reasons to use long-range weapons, as Stella Montis is full of small corners and tight hallways. You want to bring weapons such as the Bettina, Torrente, Appreggio, Il Toro, Renegade, or the Anvil.
- Avoid fights with the Shredders if you can avoid them - These small ARCs don't look tough, but they can take a beating. Plus, their area-of-effect attack does heavy damage, leaving you exposed to other ARCs or players during these fights.
- When you spawn, don't immediately begin running - Players often find themselves spawning close to other players, and running is a good way to give your location away, allowing an enemy to ambush you. Take your time, look around, and see if you can hear anyone else before running.
- Focus on the Rare and Epic loot - Stella Montis is meant to be an end-game area. It's where you find the best loot, and that means you want to focus on the hard-to-find items that you don't always get from other maps. Be picky with the loot that you grab.
- Don't be afraid to go into Stella Montis with a Free Loadout - It's a good way to test the waters and grab a handful of items before making it back to your workbench.
- Lure fights with the ARCs - There are several ARCs patrolling throughout Stella Montis, and if you get caught out by other players, drawing an ARC or two to your location, especially a Shredder, can be a good way to tip an encounter to your favor.
Conclusion
Navigating Stella Montis becomes far easier once you understand its terrain flow, danger pockets, and high-value pathways. With the strategies in this guide, you can move smarter, avoid common ambush zones, and capitalize on the map’s best loot opportunities. Keep refining your routes, adapt your loadout to the environment, and use elevation and cover to stay one step ahead. Master the landscape, and Stella Montis will reward you every time you drop in.
ARC Raiders Stella Montis Map FAQs
Browse our FAQs for answers to common questions about the Stella Montis map in ARC Raiders.
What's the best loot route on Stella Montis?
Really depends on where you spawn in. We would say Medical Research → Assembly Workshops or Sandbox → Seed Vault.
What are the best places to loot on Stella Montis?
Assembly Workshops, Medical Research, and Cultural Archives are the best loot locations.
How to defeat the Shredder in ARC Raiders?
Bait him to shoot at you, then hide behind the cover. Once he stops the fire, pop out and shoot him in his body. He’s quite a tough nut to crack, so be sure you do that with a high penetration weapon.
Is Stella Montis beginner-friendly?
Not at all. Not only is it a high PVP territory, but it also has some tough enemies and doesn’t have a lot of healing materials to help yourself. Only come in with good equipment.
What’s the safest extraction point on Stella Montis?
It is an Airshaft Extraction, located between the Sandbox and Seed Vault locations. You have to cover only two pathways leading to it.
Final Thoughts
This Stella Montis Map Guide has equipped you with the navigation insight, positioning strategies, and survival fundamentals needed to roam one of ARC Raiders’ most unpredictable zones with confidence. Keep refining your routes, study enemy movement patterns, and use the terrain to your advantage as you push deeper into this rugged landscape. Now gear up, head into Stella Montis, and show the wasteland that skilled Raiders don’t just survive the terrain—they master it. Safe travels, Raider!
About KBoosting
Thank you for taking the time to read our guide about ARC Raiders Complete Matriarch Boss Guide. Did you know that at KBoosting, we are not only about guides and articles? We also provide boosting services to make things even easier for you. Check out our ARC Raiders boosting services, let us handle everything for you, while you have some real fun in the game!
