BO7 Totenreich Easter Egg Guide: Main Quest, Jotunn Star & Dravakar Boss
-
Hot
-
Bundle
-
Totenreich is the new round-based Zombies map in Black Ops 7 Season 3 Reloaded. It drops the crew into Eidskallen, a Norse fishing village pulled into the Dark Aether, with a brand new Wonder Weapon, a multi-step main Easter Egg, and a final boss called Dravakar waiting at the end of the chain.
This guide walks the full main quest end to end, from activating Pack-a-Punch and building the Jotunn Star, through the uranium puzzles and Atomkraft Core defense, to the Dravakar boss fight. We also cover the Richtofen side Easter Egg, the No One There song, and the rewards waiting after the credits.
What is Totenreich in BO7 Zombies?
Totenreich is the fourth Zombies map in Black Ops 7, released with Season 3 Reloaded. It is a round-based map with a structured main Easter Egg, multiple side Easter Eggs tied to specific Operators, and a final boss fight that takes a full prepared loadout to clear.
- Map type: Round-based Zombies, structured main Easter Egg.
- Wonder Weapon: Jotunn Star, required for several main quest steps and the boss fight.
- Final boss: Dravakar, multi-phase fight inside a giant robot arena.
- Side content: Richtofen, Dempsey, and Nikolai each have their own side quest.
Eidskallen Setting and Lore
The map is set in Eidskallen, a Norse fishing village in Norway that has been ripped out of reality and pulled into the Dark Aether. The island has existed since the late Bronze Age, passed through the Viking era, and later became home to a Group 935 research facility before being lost.
Group 935, Richtofen and Dark Aether Connection
The story picks up after Paradox Junction, with the time loop broken and the Dark Heart defeated. The Twins send the crew to Eidskallen because the location is tied directly to Richtofen, Group 935, and a disaster that turned the whole island into another Dark Aether nightmare.
BUY THE TOTENREICH EASTER EGG NOW!
Totenreich Main Quest Overview
The Totenreich main Easter Egg is a 9-step chain that culminates in the Dravakar boss fight. Each step gates the next, so going in unprepared on round 8 is the fastest way to waste a 90-minute run.
| Step | Objective | Required Item | Difficulty |
| 1 | Activate Pack-a-Punch. | Glocke Drop sync. | Easy |
| 2 | Build the Jotunn Star Wonder Weapon. | Constellation puzzle, Astrid souls, lighthouse. | Medium |
| 3 | Get the Crowbar, Flak Gun Round, Transmitter. | AA bullet random spawn. | Easy |
| 4 | Solve the Tyr Blinking Lights Puzzle. | Wunderbarrage Controller. | Medium |
| 5 | Collect three Uranium Pieces. | Fishing Rod, Glocke device, ARC-XD. | Hard |
| 6 | Solve the Claw Machine Puzzle, get the Atomkraft Core. | Strike Controller, claw machine alignment. | Medium |
| 7 | Charge and deliver the Atomkraft Core. | Generator defense, transport to bridge. | Hard |
| 8 | Cook the Dravakar Shard. | Disciple Injection, alt-fire of Jotunn Star. | Medium |
| 9 | Activate Runes and Bonfires. | Sunstone arrow puzzle, alt-fire on bonfires. | Medium |
Required Items and Wonder Weapon
The Easter Egg revolves around a small set of key buildables and the Jotunn Star Wonder Weapon. Knowing what you need before you start saves dozens of minutes of backtracking.
| Item | How to Get It | Used For | Notes |
| Glocke Drop | Follow opening quest markers. | Activates Pack-a-Punch. | First step of the chain. |
| Jotunn Star | Multi-step build via Astrid + lighthouse. | Most main quest steps + boss fight. | Triple Pack-a-Punch for max damage. |
| Crowbar | Picked up after the lighthouse. | Opens AA bullet boxes. | Three of four boxes deal damage, one drops the bullet. |
| Transmitter | Robot drops it after AA bullet hit. | Place in robot head to start Tyr puzzle. | Critical bridge to Step 4. |
| Uranium Pieces (3) | Fishing Rod + Glocke method + ARC-XD secret room. | Powers the Atomkraft Core. | Per-game RNG locations. |
| Atomkraft Core | Claw machine puzzle output. | Charged and delivered to bridge. | Triggers boss prep cutscene. |
Recommended Loadout, Perks and GobbleGums
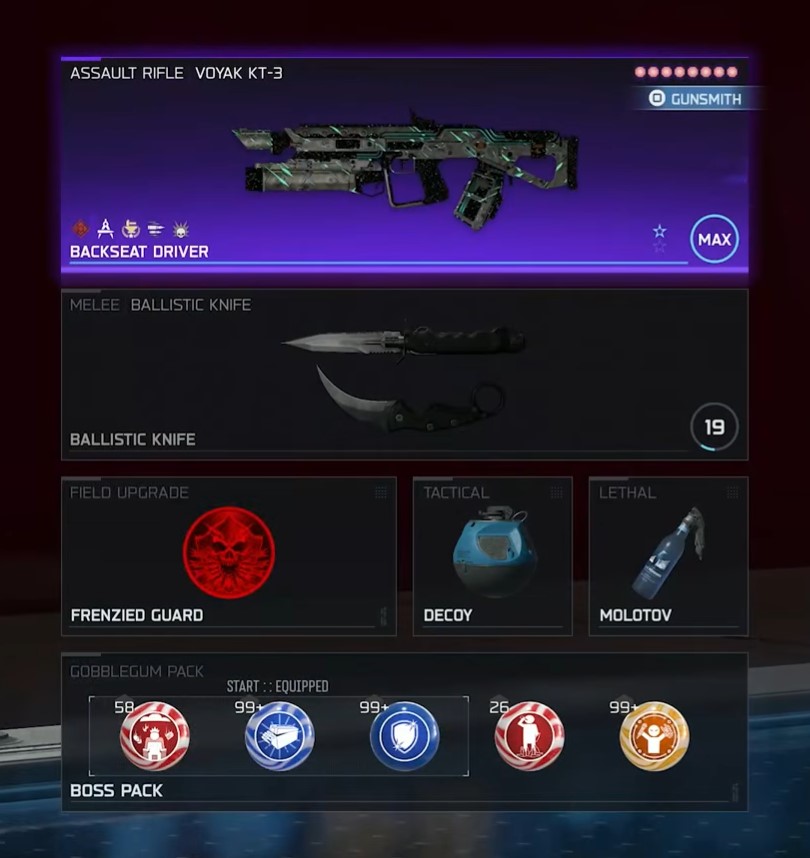
A clean Totenreich run wants strong AR or SMG damage, full perks by mid-rounds, and boss-friendly GobbleGums. The Jotunn Star is mandatory, but you also need a primary that can carry you through long defense phases.
- Primary weapon: Triple Pack-a-Punch MP-40 is a strong creator pick, but any tuned ranged weapon works.
- Perks: Quick Revive, Stamin-Up, Speed Cola, Juggernog as the floor.
- Melee Macchiato: Required if you also want to do the Richtofen side Easter Egg in the same match.
- GobbleGums: Near Death Experience, Shields Up, Idle Eyes for boss safety.
- Armor: Always run full plates into defense phases and the boss.
GET THE LOADOUTS EASILY!
Step-by-Step Main Quest Walkthrough
Each step below assumes you have Pack-a-Punch ready and a primary upgraded at least once. Skipping prep makes most steps feel impossible at higher rounds, so do not rush the first 8 to 10 rounds.
Step 1: Activate Pack-a-Punch with Glocke Drop
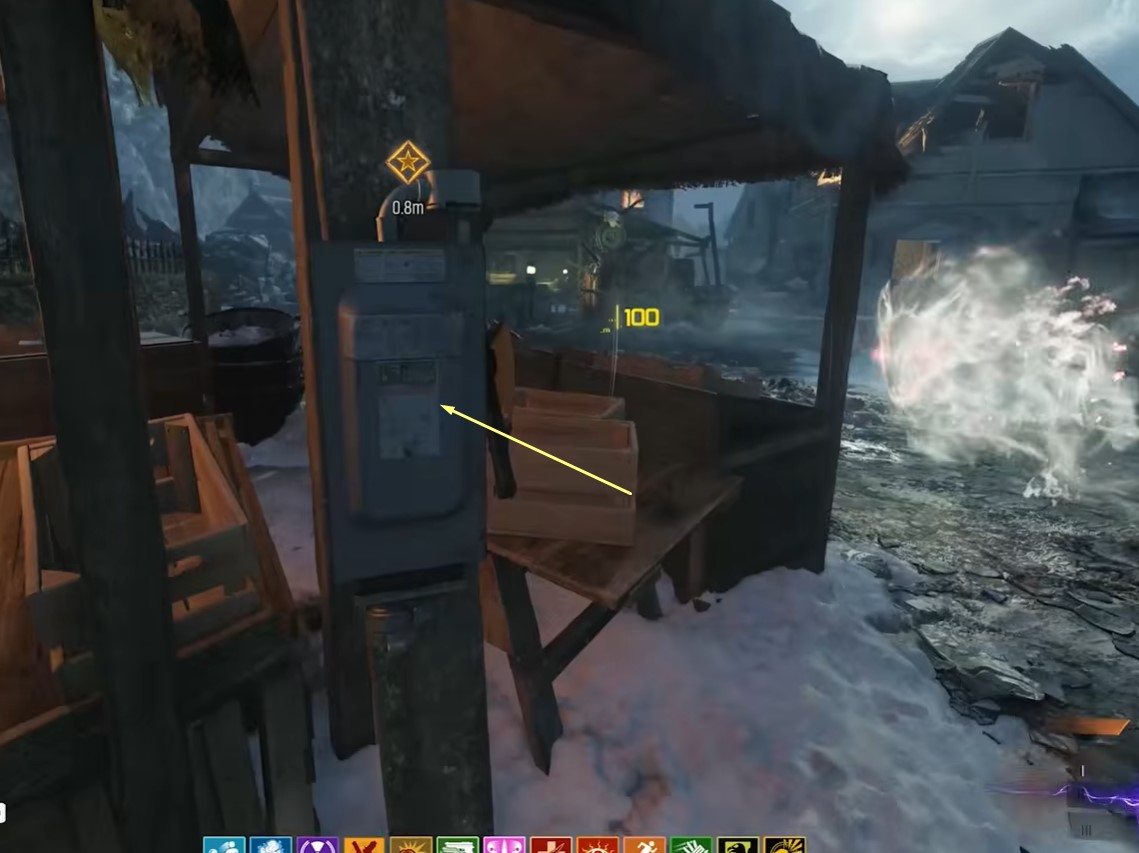
Follow the opening quest markers from spawn. They walk you through power activation, the Glocke Drop sync, and the Pack-a-Punch placement. The map provides indicators on screen, so this step is mostly hands-off.
Important: Pack-a-Punch should be done early because most later steps assume you already have access to the machine and enough damage to survive setup rounds.
Step 2: Get the Jotunn Star Wonder Weapon
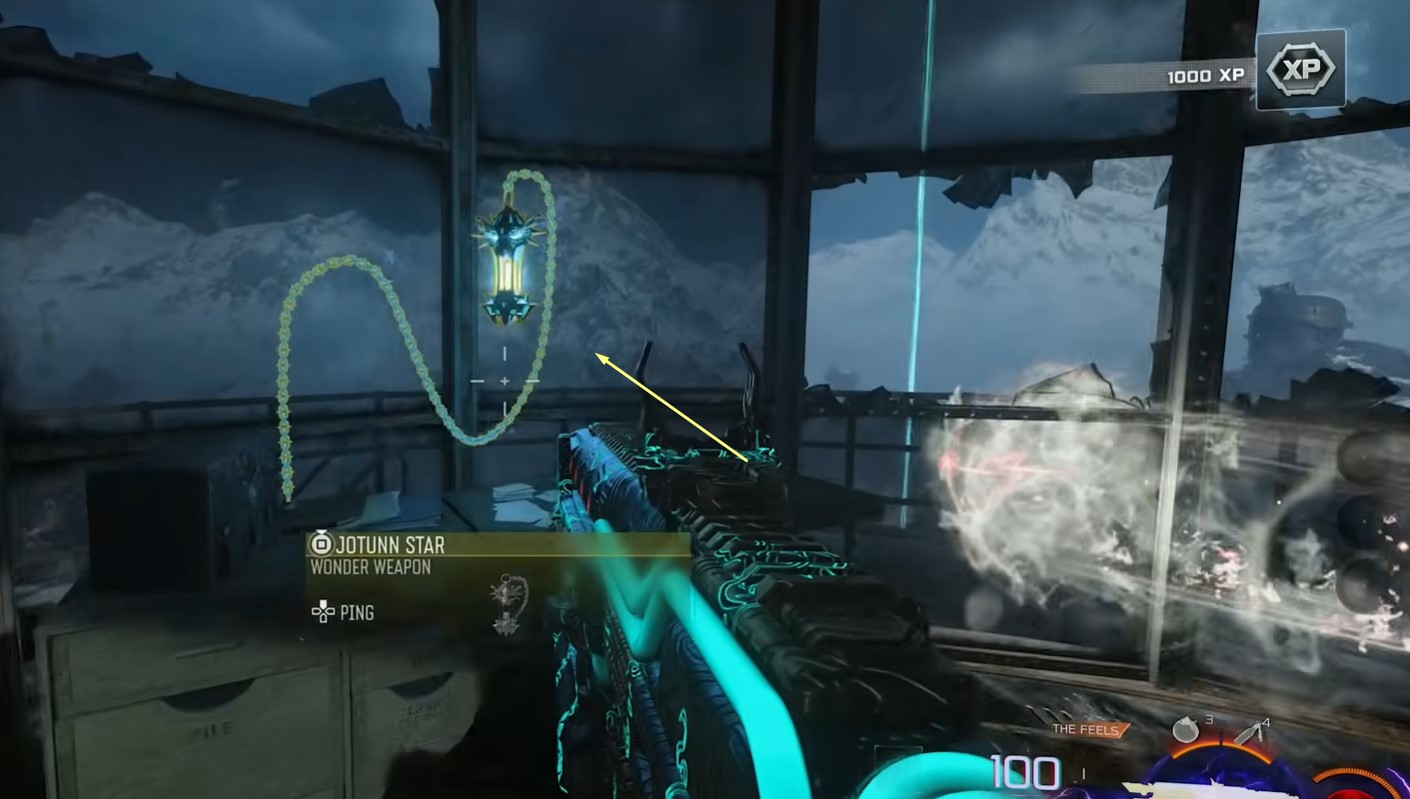
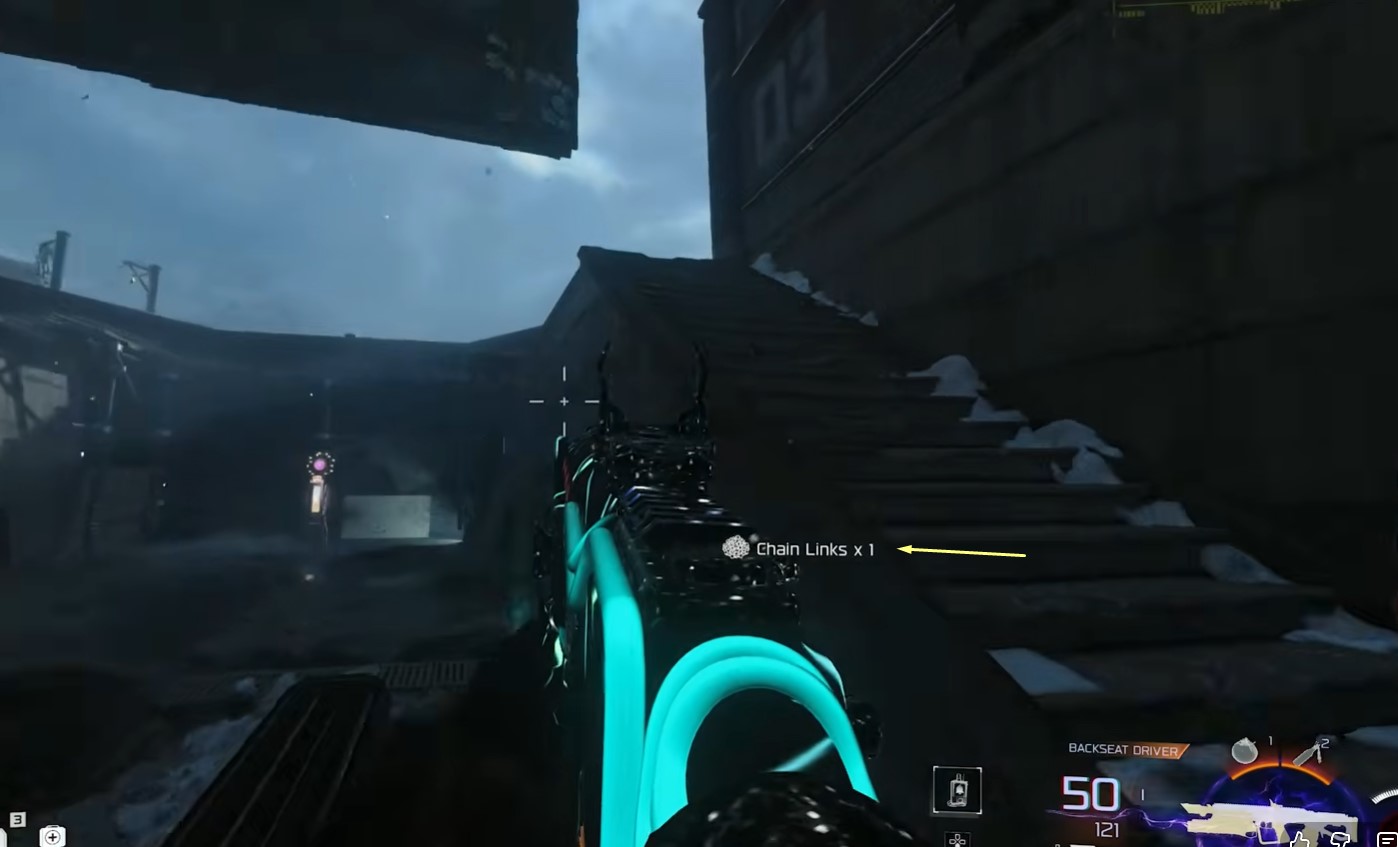
Collect Chains from the Titan crane room (jumping bridge, wall jump to the boat, interact with the edge). Add the Chains to the door at Burial Grounds, then place the can from the bridge crate at the Scallan Market table and wait for an Ice Zombie special round.
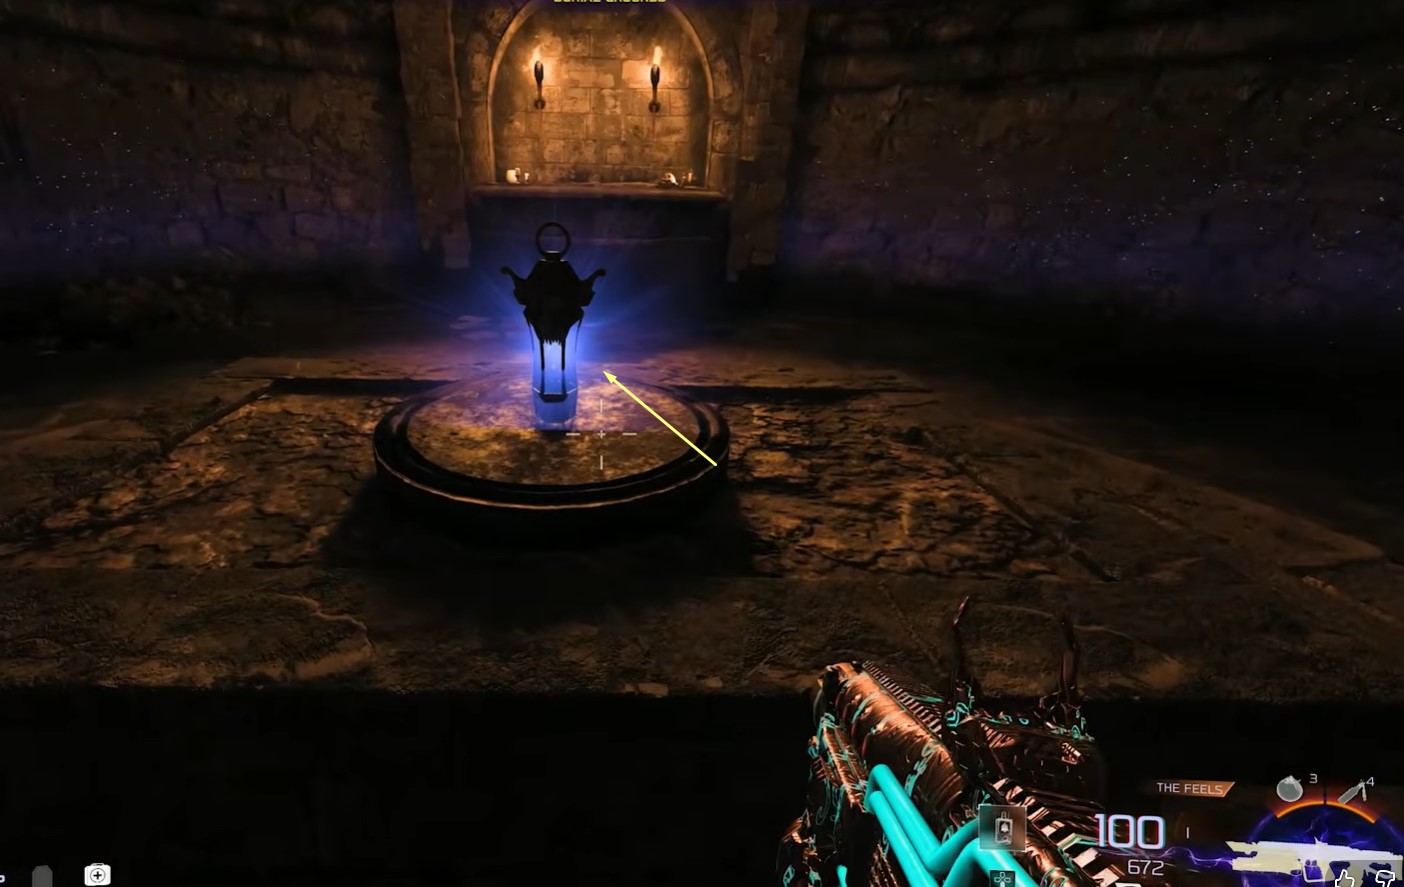
A special Ice Bear spawns during the second special round. Kill it for a lantern, then use the lantern at the Burial Grounds altar to start a 4-symbol matching puzzle (left, right, back, front order). Astrid then spawns and leads you up the lighthouse via wall jumps and rocks.
Note: Astrid only progresses when you stay near her and feed zombie souls near her stopping points. Do not run too far ahead.
- Chains: Titan crane room → jumping bridge → wall jump to boat.
- Can: Bridge crate → place at Scallan Market table.
- Lantern: Drops from Ice Bear in second special round.
- Symbol order: Left → Right → Back → Front.
- Astrid path: Two zombie-soul stops, then up the lighthouse rocks and wall jumps.
Step 3: Get the Crowbar, Flak Gun Round and Transmitter
After the lighthouse, pick up the Crowbar from the table. Open the four AA bullet boxes (Core Foundry, War Factory, Dry Dock, FJ Road). One drops the AA bullet, the other three deal damage. Place the bullet in the AA turret near the lighthouse.
Use the Jotunn Star alt-fire on the AA turret to launch the bullet at the giant robot in spawn. Hold interact in front of the robot to start a search animation, then pick up the Transmitter and place it inside the robot head.
- AA bullet boxes: Core Foundry, War Factory, Dry Dock, FJ Road.
- Three of four boxes deal damage: Only one drops the bullet (random per game).
- Place + alt-fire: Drop the bullet in the AA turret near the lighthouse, then alt-fire the turret.
Step 4: Solve the Tyr Blinking Lights Puzzle
Inside the robot, watch the left and right Morse-style blinking lights. Each light blinks up to 8 times per code, separated by pauses. Combine the two numbers (e.g., left 2 + right 5 = 25). Two codes are given in sequence.
Climb the pylon zip line and input the codes on the radio dials at the top. Use the Jotunn Star alt-fire (or a Molotov) on the pylon zip line first to enable access. Once both codes are correct, you receive the Wunderbarrage Controller.
- Watch the lights: Left light = first digit, right light = second digit.
- Up to 8 blinks: Per light, per digit.
- Two codes total: Pause between codes, then input the second.
- Radio dials: Left dial for left light, right dial for right light.
Step 5: Collect All Three Uranium Pieces
The three Uranium pieces have randomized methods, so do not panic if your run looks different from a guide video. Below is the standard set of methods cross-confirmed across creators.
- Fishing Rod method: Pick up the rod (often on the bridge), find a green fish, fish until the rod glows blue, kill the spawned Ravager three times across two rounds for the first Uranium.
- ARC-XD method: Free RC-XD from Ein Scallan Square truck, drive it down the hill jumping boats, explode near the barrels for the secret room. Match nuke-symbol numbers to letter heads in jars, then solve the cell lock for the second Uranium.
- Glocke device method: Use a Glock controller (fishing or crafting). Run trains of zombies into the Glock device for zero-grav kills. Repeat with multiple trains until enough souls drop the third Uranium.
Pro Tip: Use the tac map to track the irradiated Ravager HVT during the uranium step. It moves between locations after losing health.
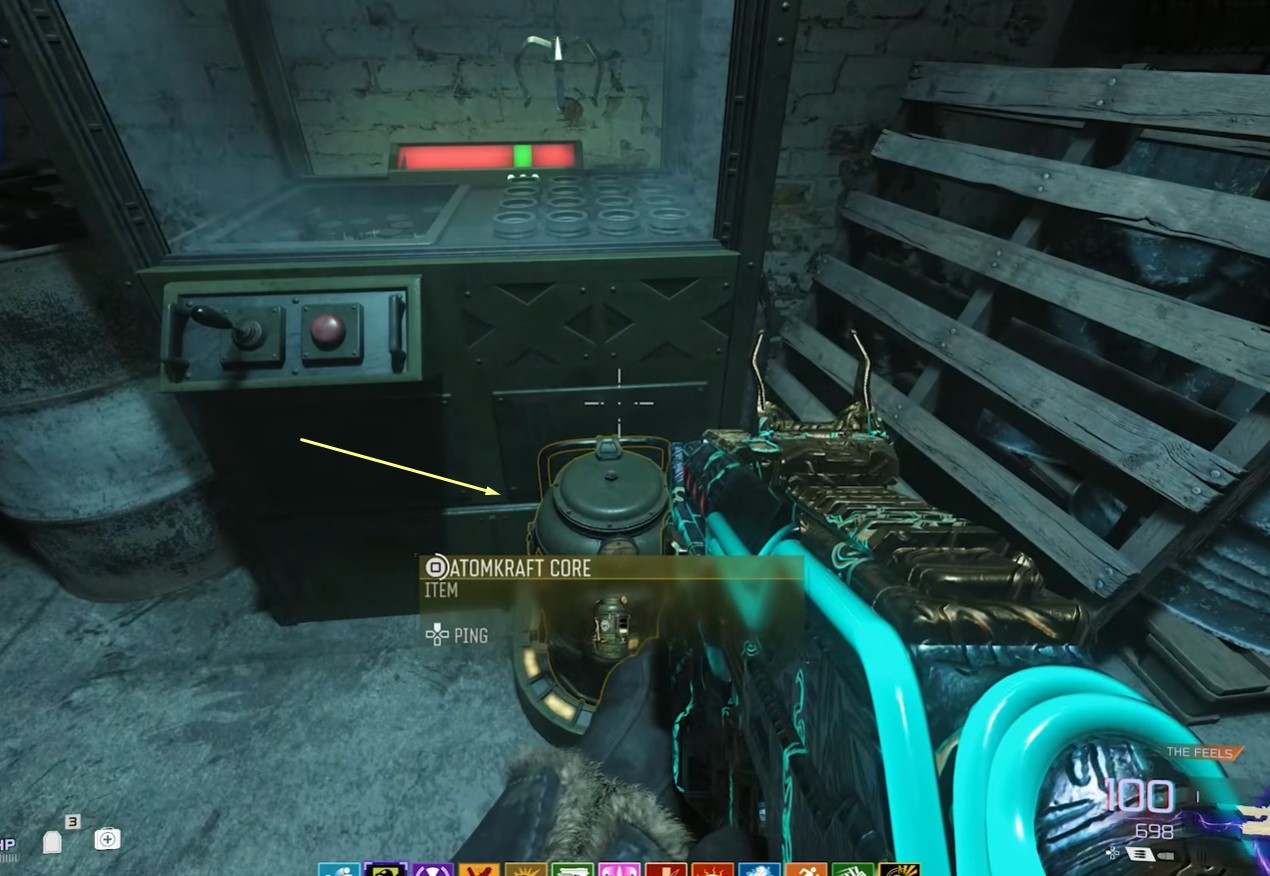
Step 6: Solve the Claw Machine Puzzle and Build the Atomkraft Core
Use the Strike Controller (from the Wunderbarrage step) on the door at Dry Dock to open the stairs. Inside, use the claw machine to align the three Uranium pieces so the arrow lands in the green section.
Connection count controls power. Connect everything for max power, but watch for overshoot past the green zone. The exact alignment is randomized per game, so test, adjust, and redo until the arrow stays green. The machine spits out the Atomkraft Core barrel.
Step 7: Charge and Deliver the Atomkraft Core
Carry the Atomkraft Core barrel to the crates near Quick Revive at spawn. Activate the generator in the next room and defend the barrel. If the generator shuts off mid-defense, simply re-activate it.
Warning: Do not use ziplines while carrying the Atomkraft Core. The core can drop, and you will need to recover it before continuing.
Once the barrel fills, transport it to the bridge and place it on the second barrel marker to trigger a mini boss cutscene. Pick up the boss meat that drops on the left side of the bridge and head to the Blood Heel Hall church.
- Charge spot: Crates near Quick Revive at spawn.
- Generator handling: Re-activate if it shuts off mid-defense.
- Final destination: Bridge marker, on top of the second barrel.
- Boss meat: Drops on left side of bridge after mini cutscene.
Step 8: Cook the Dravakar Shard
Place the meat on the church fire and use the Jotunn Star alt-fire to start cooking. Throw a Disciple Injection on multiple zombies and feed them into the meat to rotate the cook. After the lockdown ends, pick up the resulting stone from the floor.
Step 9: Activate the Runes and Bonfires
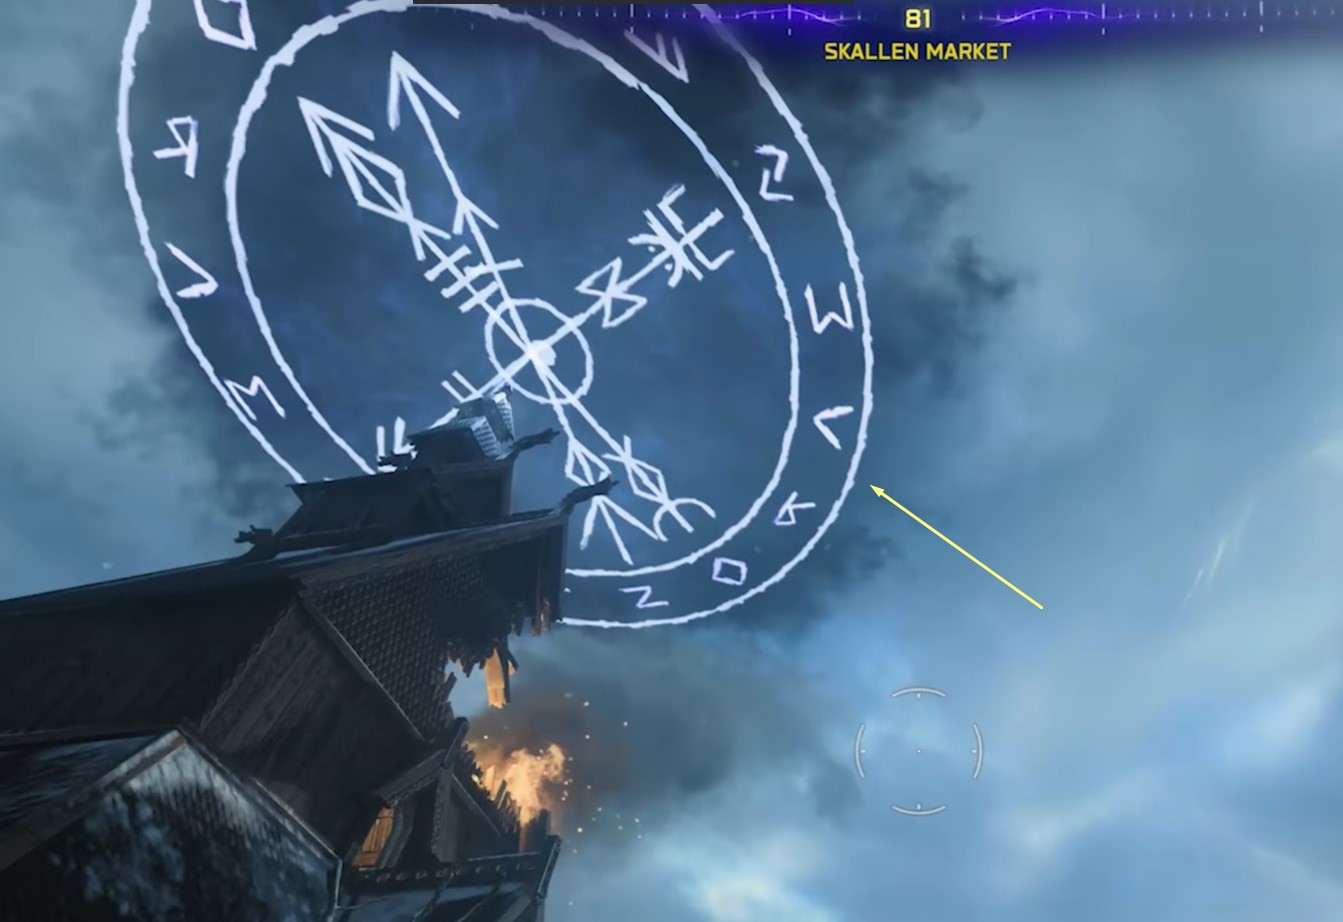
Place the stone on the church altar and use the Jotunn Star alt-fire on it. Symbols appear in the sky with arrows pointing toward them. The arrow count (1, 2, 3) is your activation order.
Find the matching symbols floating around the map with bonfires below them. Use the Jotunn Star alt-fire on each bonfire in the 1-2-3 order shown by the arrows. Once all three are lit, enter the giant robot to begin the Dravakar boss fight.
Dravakar Boss Fight Strategy
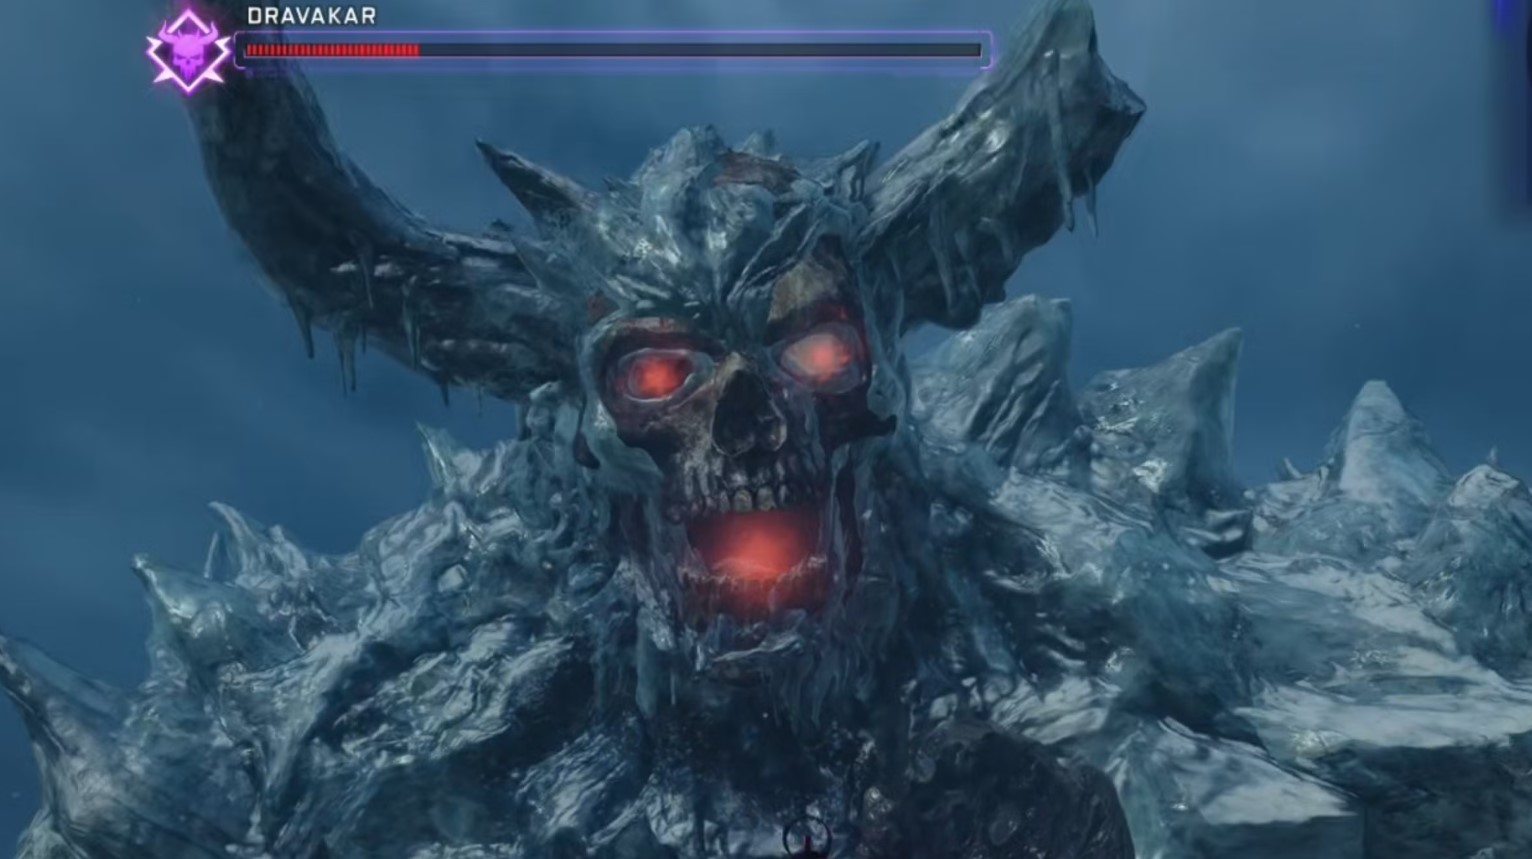
The Dravakar boss fight is no joke at launch. It is a multi-phase fight inside a giant robot arena with weak-spot mechanics, freeze attacks, traps, and a heavy final lockdown. The Jotunn Star is mandatory, but ranged DPS is what closes the fight.
Best Weapons and Loadout
Early gameplay strongly favors a Triple Pack-a-Punched MP-40, but any strong ranged weapon with good accuracy can work if upgraded properly. Bring full perks, full armor plates, and at least one survival GobbleGum.
| Slot | Recommended Option | Why It Works | Notes |
| Primary | Triple PaP MP-40 or strong AR. | High DPS for boss weak spots. | Tested top pick in current footage. |
| Wonder Weapon | Jotunn Star (PaP'd). | Required for skull alt-fire mechanic. | Mandatory, never drop it. |
| Perks | Full board, prioritize Juggernog + Quick Revive. | Survives the freeze + bombard phases. | Drink before starting. |
| GobbleGums | Near Death Experience, Shields Up, Idle Eyes. | Recovery, defense, breathing room. | Save for late phases. |
Pro Tip: Enter Dravakar with a strong ranged weapon, full armor, the Jotunn Star, and boss-friendly GobbleGums. The Jotunn Star is needed for mechanics, but ranged damage is what actually closes the fight.
Boss Phases and Weak Spots

| Phase | Main Mechanic | What to Shoot / Do | Survival Tip |
| Phase 1 | Robot damages Dravakar, opens weak spots. | Shoot the red glowing weak spots. | Stay mobile, save Wonder Weapon ammo. |
| Phase 2 | Skull spawns with red eyes. | Time Jotunn Star alt-fire BEFORE eyes turn red. | Once dropped, shoot it down. |
| Freeze phase | You get frozen solid. | Use the three traps in the arena to thaw. | Pre-position near a trap if you see the windup. |
| Final lockdown | Heavy bombard, energy orbs, attacks. | Jump right, jump left, lie down to dodge. | Pattern-based, learn the rhythm. |
How to Survive the Final Phase
The final lockdown is pattern-based. Watch which way Dravakar is facing because that is the direction his energy goes. Combine right-jumps, left-jumps, and prone slides to dodge. Use Idle Eyes if you get caught out of position.
If the boss fight feels overwhelming, our BO7 Totenreich Easter Egg boost can clear the entire main quest end to end so you walk into the cutscene without burning a single Sigil's worth of attempts.
Totenreich Side Easter Eggs
Beyond the main quest, Totenreich packs three Operator-specific side Easter Eggs plus a hidden song trigger. Each one is independent of the main quest and can be completed in the same match if you plan ahead.
| Side EE | Character / Requirement | Reward | Notes |
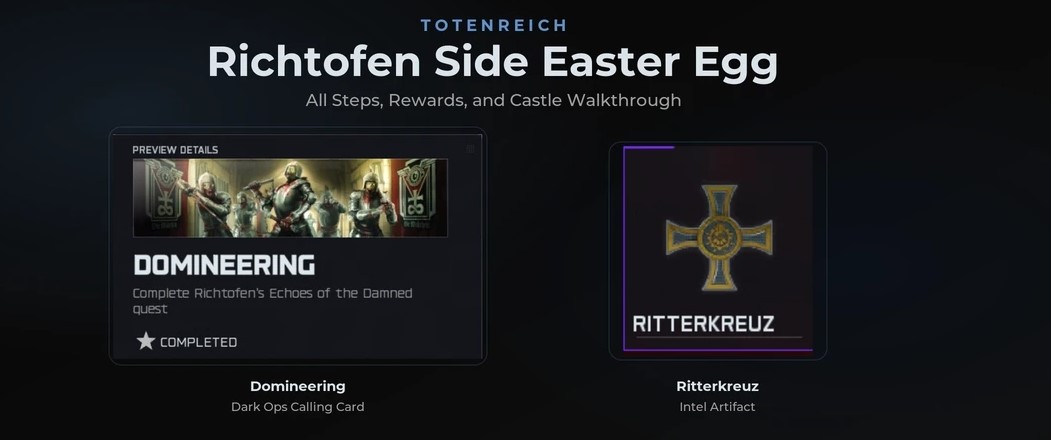
| Echoes of the Damned | Richtofen + Melee Macchiato + round 15. | Domineering Dark Ops calling card + Ritterkreuz artifact. | Castle interior, no enemies until finale. |
| Elusive (Dempsey) | Play as Dempsey, dedicated triggers. | Operator-specific calling card. | Same Dedicated Crew Operator pattern. |
| Go Fetch (Nikolai) | Play as Nikolai, dedicated triggers. | Operator-specific calling card. | Same Dedicated Crew Operator pattern. |
| No One There Song | Find and interact with three Mr. Peeks headphones. | Hidden song trigger. | Light side content, no gameplay reward. |
Richtofen Echoes of the Damned
Play as Richtofen, buy Melee Macchiato at Dry Dock, reach round 15, then punch the barrel at Core Foundry. You enter a Gruppe 935 castle for a no-pressure lore tour with one combat finale.
- Required: Richtofen Operator + Melee Macchiato + round 15+.
- Castle phase: No enemies until the finale, take your time.
- Throne room: Balance scale with 115 crystals and figurines.
- Finale: Castle burns, zombies spawn, surviving or downing both trigger the cutscene.
Dempsey and Nikolai Side Easter Eggs
Dempsey's Elusive and Nikolai's Go Fetch follow the same Dedicated Crew Operator pattern. Each requires playing as the matching Operator and meeting that Operator's specific trigger. Rewards are calling cards or cosmetics tied to the character.
Note: Side Easter Eggs like Richtofen's Echoes of the Damned are separate from the main quest and can be completed independently if you meet the character and round requirements.
No One There Song Easter Egg
Find and interact with three Mr. Peeks headphones hidden around Eidskallen to trigger the No One There song. The locations vary, but they tend to sit on shelves and tables in side rooms across the map. No gameplay reward, just a music callback for fans of the Treyarch song tradition.
Totenreich Easter Egg Rewards
Completing the main quest grants the final cutscene, the Easter Egg calling card, and a Dark Ops achievement. Side Easter Eggs add their own calling cards and Operator-specific cosmetics on top.
- Main quest: Easter Egg calling card + Dark Ops achievement + final cutscene.
- Richtofen side EE: Domineering Dark Ops calling card + Ritterkreuz artifact.
- Dempsey + Nikolai side EEs: Operator-specific calling cards.
- No One There song: Hidden track plays through map.
- XP and camo progress: Boss fight rewards heavy XP, useful for mastery grinds.
Tips and Mistakes to Avoid
Totenreich is long and unforgiving on first attempts. Most failed runs come from skipping prep, mistiming the boss mechanics, or losing track of the buildable order. The list below covers the most common ways the run breaks.
- Do not rush Pack-a-Punch: Most steps assume you have the upgrade, opening rounds without it stalls the entire run.
- Pick up Astrid's path slowly: Running ahead breaks her progress and forces zombie-kill recovery.
- Watch the Tyr light counts: A miscount in the Morse-style puzzle resets the radio inputs.
- Do not pick up corrupted spam: Some boxes deal damage, only one drops the AA bullet.
- Save Jotunn Star ammo: Refill before each Jotunn alt-fire step, do not enter Step 9 dry.
- Pre-stage GobbleGums for the boss: Activating Idle Eyes mid-bombard saves runs.
- Do not forget perks before boss: Going in without Juggernog gets you one-shot in the lockdown phase.
FAQs
1. What is Totenreich in BO7 Zombies?
Totenreich is the fourth Black Ops 7 Zombies map, released with Season 3 Reloaded. It is set in Eidskallen, a Norse fishing village pulled into the Dark Aether.
2. How do I activate Pack-a-Punch on Totenreich?
Follow the opening quest markers, complete the Glocke Drop sync, and place the machine where prompted. The map walks you through this with on-screen indicators.
3. What is the Wonder Weapon on Totenreich?
The Jotunn Star, built through a multi-step process involving Astrid's lighthouse path and a 4-symbol matching puzzle.
4. Where are the three Uranium pieces?
One from a Fishing Rod and a green-fish Ravager, one from an ARC-XD secret room, and one from a Glocke device train method. Locations rotate per game.
5. How do I solve the claw machine puzzle?
Use the claw to position the Uranium pieces so the arrow lands in the green section. Connection count controls power, so adjust until the arrow stays green.
6. Who is the final boss?
Dravakar. The fight is multi-phase, with red weak spots, a skull alt-fire mechanic, freeze attacks, and a heavy final lockdown phase.
7. What is the best weapon for Dravakar?
Triple Pack-a-Punched MP-40 is a strong pick from current creator footage. Any tuned ranged weapon works alongside the Jotunn Star.
8. Can I do side Easter Eggs in the same match?
Yes. Side Easter Eggs are independent of the main quest, but each requires the matching Dedicated Crew Operator and specific triggers like Melee Macchiato.
9. What does the Richtofen side EE reward?
The Domineering Dark Ops calling card plus the Ritterkreuz artifact lore item.
10. How long does the main quest take?
A clean run lands around 90 minutes with prep, longer if you also tackle a side EE or push for the song trigger.
Final Thoughts
The Totenreich Easter Egg is one of the most ambitious Zombies quests Treyarch has shipped in a while. It hands you a brand-new Wonder Weapon, layers nine connected steps with serious puzzle variety, and ends with a multi-phase boss fight that tests both your mechanical play and your prep.
Whether you grind it solo or with a coordinated team, the cleanest path is to prep early, follow the steps in order, and respect the boss mechanics. Pack-a-Punch on round 8, Jotunn Star by round 15, and a clear plan for the Dravakar fight before you light the bonfires.
If you would rather skip the long grind and lock the calling card on the first run, our BO7 Totenreich Easter Egg boost handles the entire main quest end to end, so you log in to a finished run with the rewards already secured.
