Rite of the Nine Guide – Complete Destiny 2 Activity Walkthrough


-
Bundle

- Powerful & pinnacle gear with 25% off
- Increase your power level easily
-
Hot

-
Out of Stock
-
Out of Stock

- RotN Prophecy solo flawless guaranteed
- Earn exclusive emblem & report badge

-
Out of Stock
-
Out of Stock
-
Out of Stock
-
Out of Stock

-
Out of Stock
-
Out of Stock

- Rite of the Nine bundle with 30% off
- Get all Rite of the Nine dungeon event loot
Introduction
The Rite of the Nine activity was released in Destiny 2 in Episode: Heresy Act III episode, on May 9th, 2025. The guide will take you through every step needed for you to complete it, covering all mechanics, strategies, and loadouts.
Table of Contents
In this guide, we will cover the following subjects:
- Activity Preparation
- How to access the activity
- Rite of the Nine difficulties
- Rite of the Nine scoring system
- Prophecy dungeon encounters
- Spire of the Watcher dungeon encounters
- Ghosts of the Deep dungeon encounters
- Extras & Challenges
- FAQ
- Conclusion
How to access the activity
To access the Rite of the Nine activity, you don't need any previous expansion, as it will be free for all players.
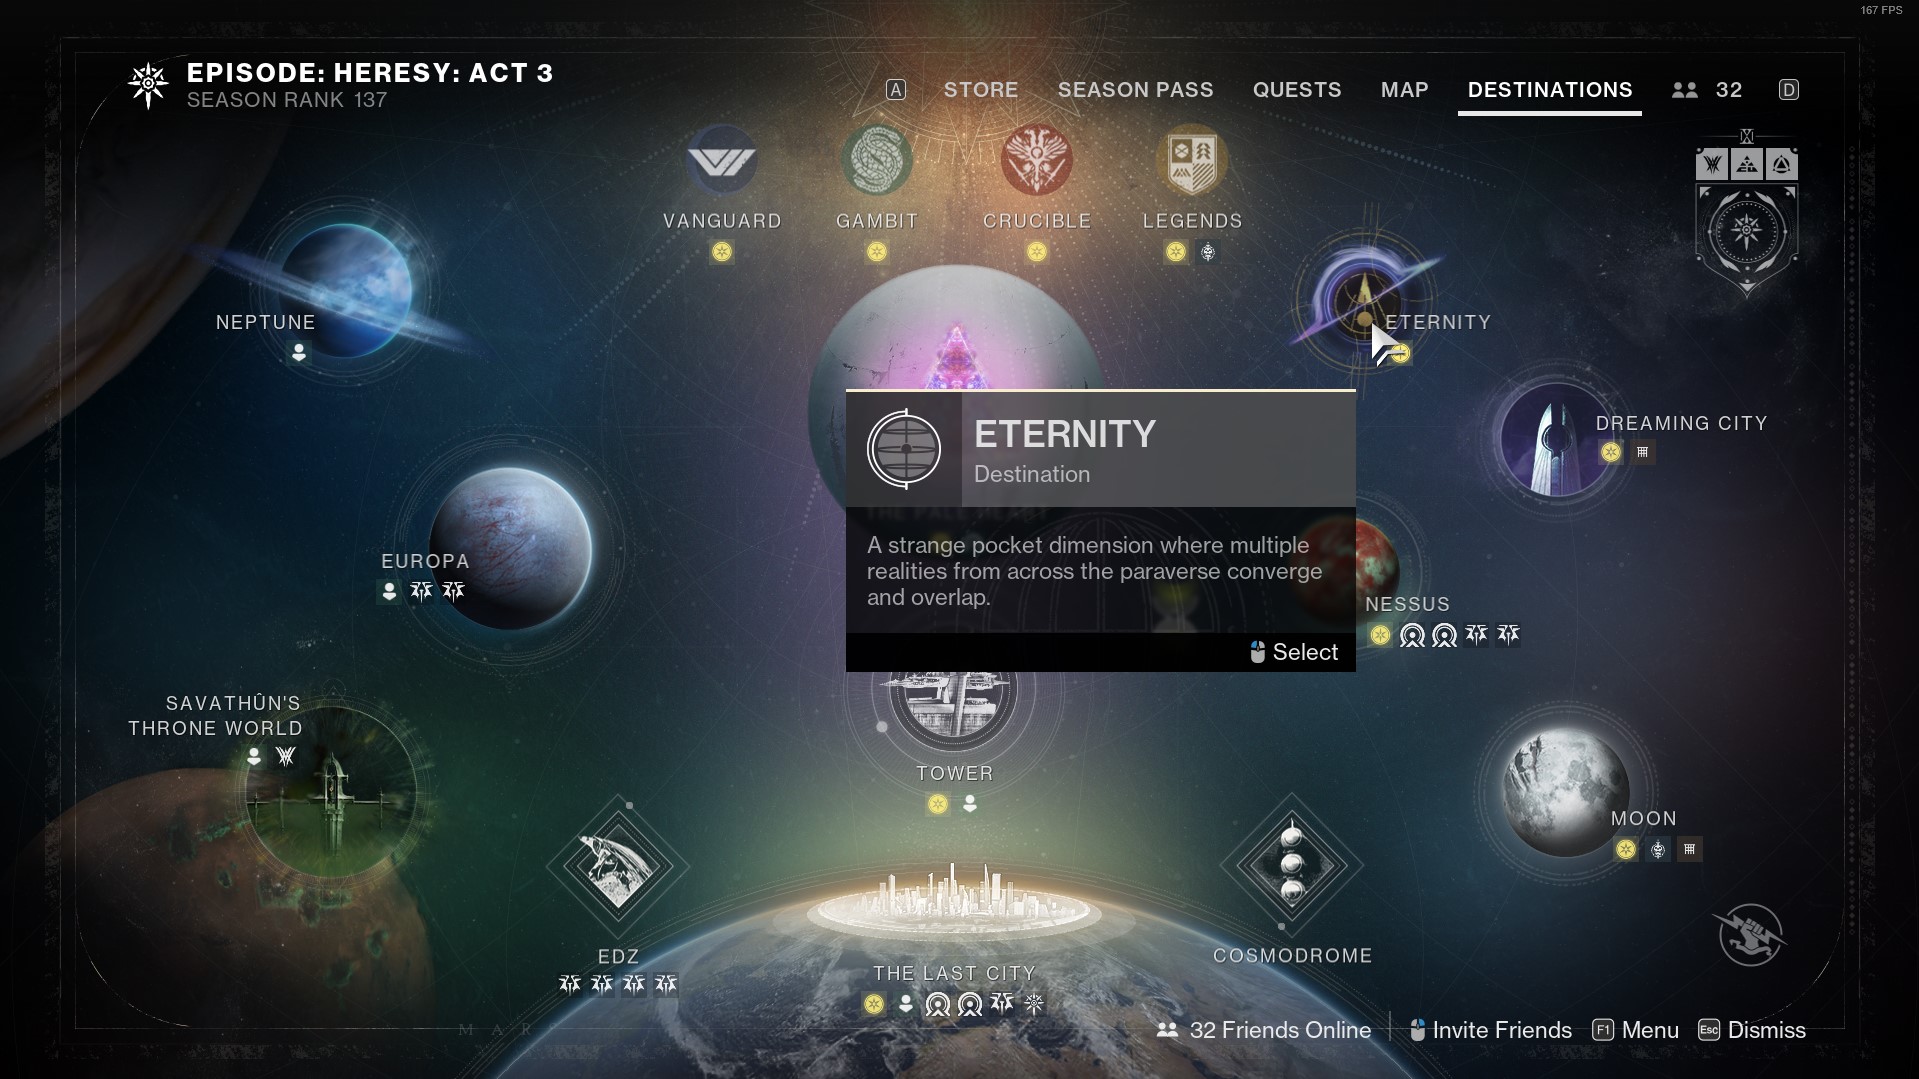
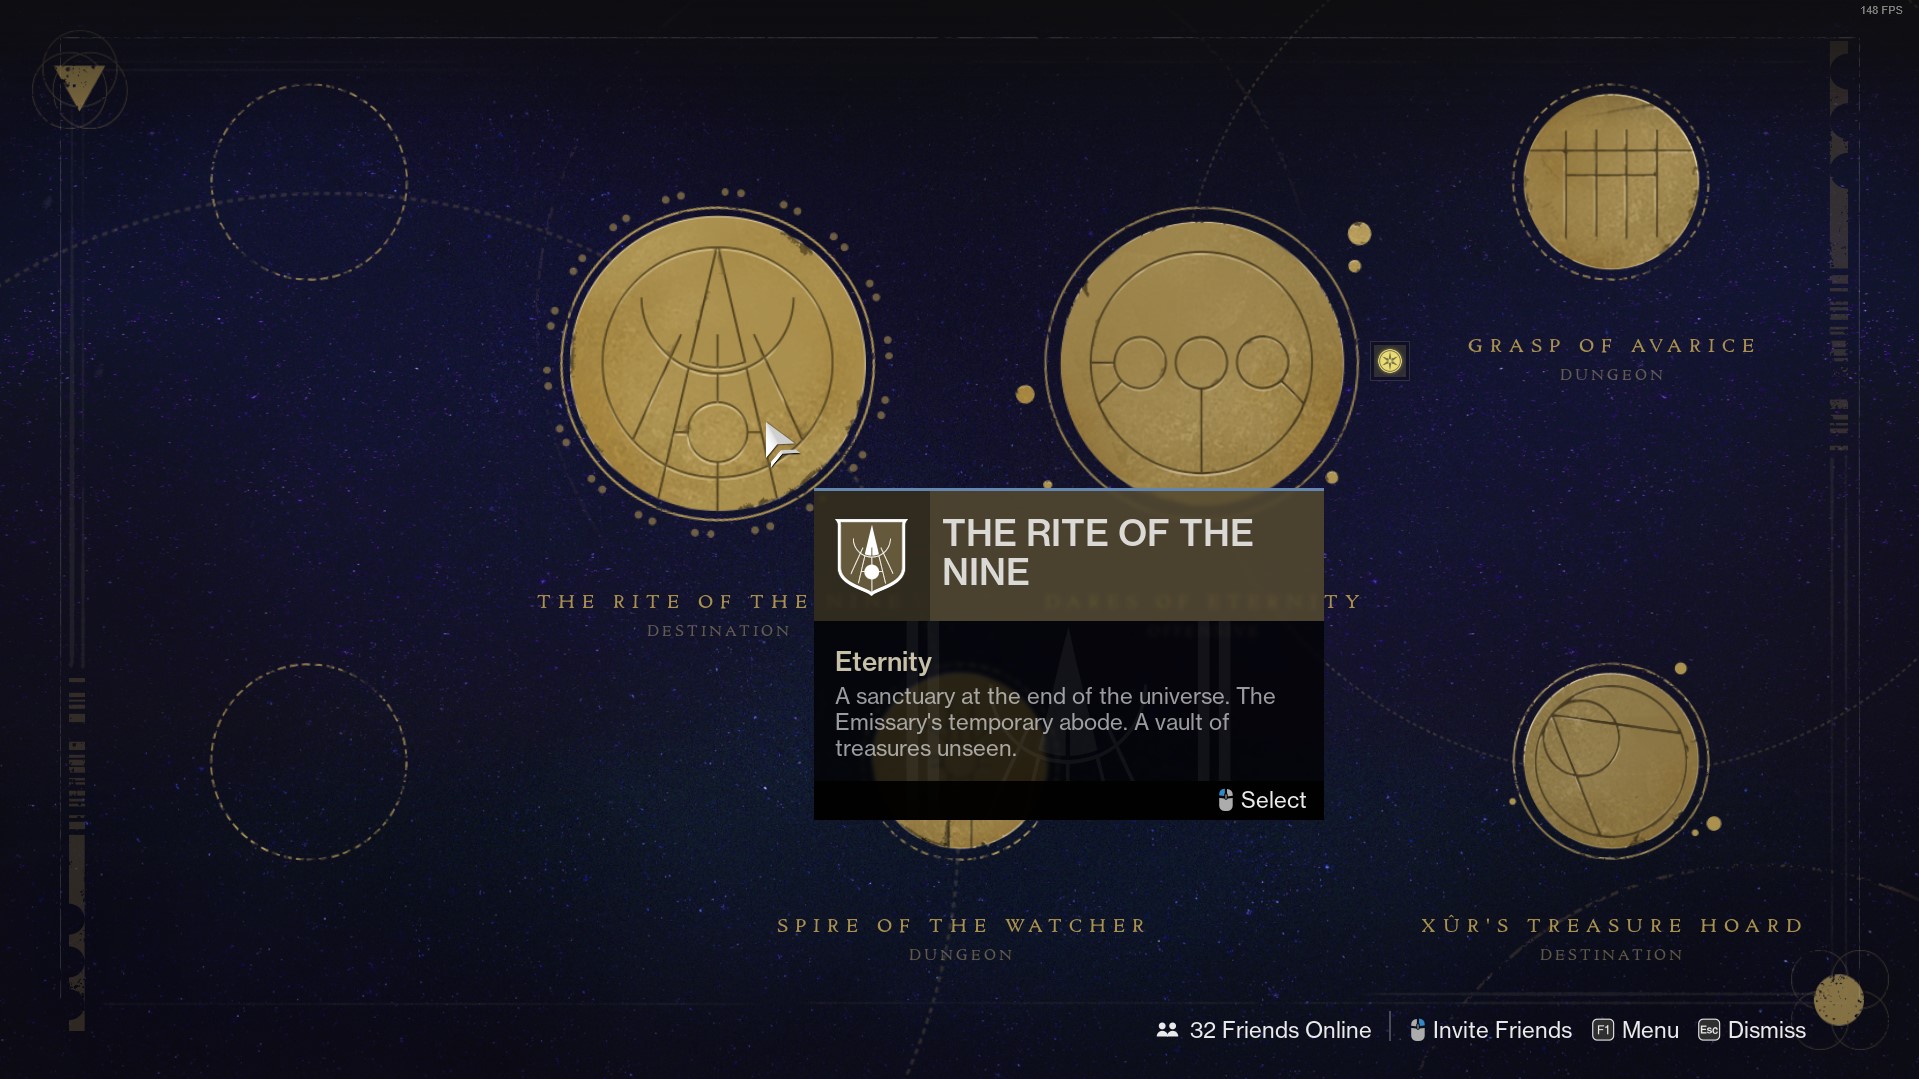
Once you're ready, navigate to the Eternity tab and locate the Rite of the Nine destination in the left side of the map.
Raid Preparation
The Rite of the Nine dungeons feature revamped mechanics, so being prepared with the best meta loadouts will help you out immensely with each dungeon. I’ll be going over some of the best weapons & subclasses that you should be using to ensure your success.
SKIP THE GRIND! BOOST YOUR GUARDIAN NOW!
Best subclasses & builds
Best weapons loadouts
Here, I’ll be going over some of the best meta weapons to use in the Rite of the Nine activity:
- Primary slot: Tinasha's Mastery, Adamantite, The Mountaintop.
- Energy slot: Lord of Wolves, Forbearance, Ikelos SMG.
- Heavy slot: The Queenbreaker, Thunderlord, Scintillation.
Rite of the Nine difficulties
The Rite of the Nine activities features 3 difficulty modes, offering different challenges and rewards for both new and experienced players. Here are the difficulties:
- Explorer: This is the starting difficulty, designed for new players looking to explore the dungeons with added guidance for mechanics. Here you will find waypoints & respawns last 5 seconds, ensuring a smoother experience.
- Eternity: This difficulty adds a scoring system, where it drops if you or your fireteam wipes, granting fewer rewards. Your health is greatly increased and won't regenerate by itself, so you have to kill enemies to heal up. Certain mechanics in the dungeons are also tweaked.
- Ultimatum: This difficulty is built for experienced players, being compared to the Contest Mode. The scoring system works the same here, and you also have limited revive tokens (one for each).
Rite of the Nine difficulties
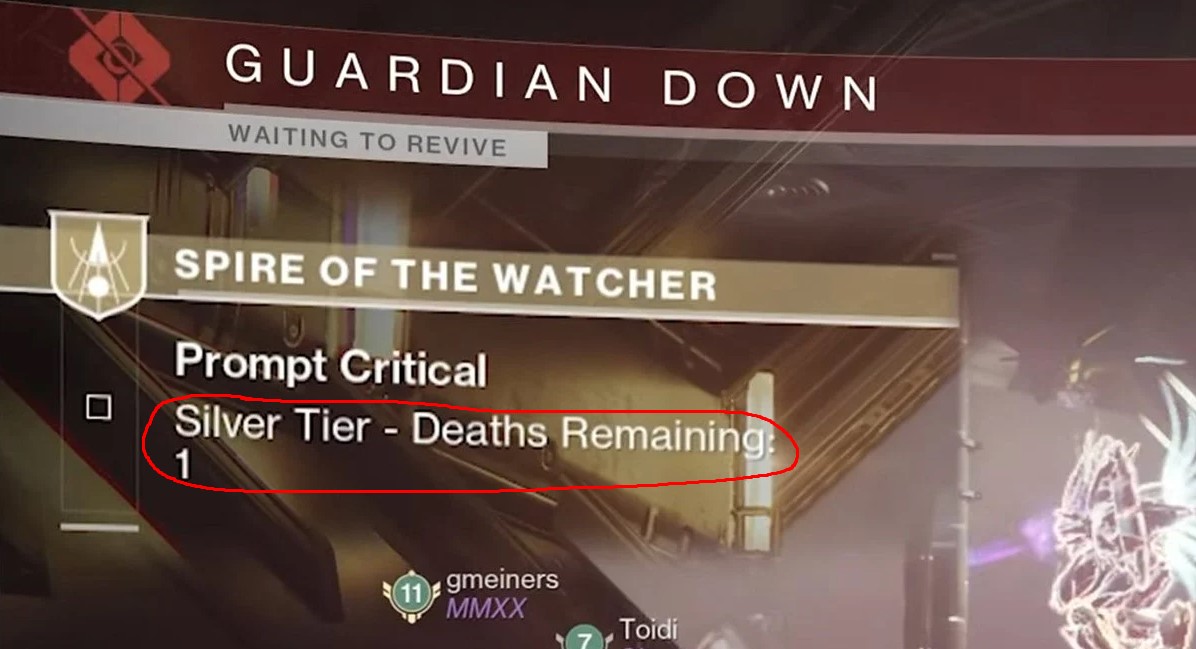
While playing the Rite of the Nine activity on Eternity or Ultimatum difficulties, you will notice a scoring system; named Bronze, Silver & Gold. Maintaining the Gold tier for better rewards is straightforward, just avoid deaths. You can still hold a Gold tier if only one player dies, but two deaths will drop you to Silver, and the same rule applies from Silver to Bronze.
The real reason you want to achieve a Gold score each run is for loot. Completing a Rite of the Nine dungeon with a Gold score can reward you with up to 3 Adept weapons. Even better, each dungeon has a unique Emblem awarded exclusively for achieving Gold tier.
Prophecy dungeon encounters
SKIP THE GRIND BUY RITE OF THE NINE PROPHECY CARRIES!
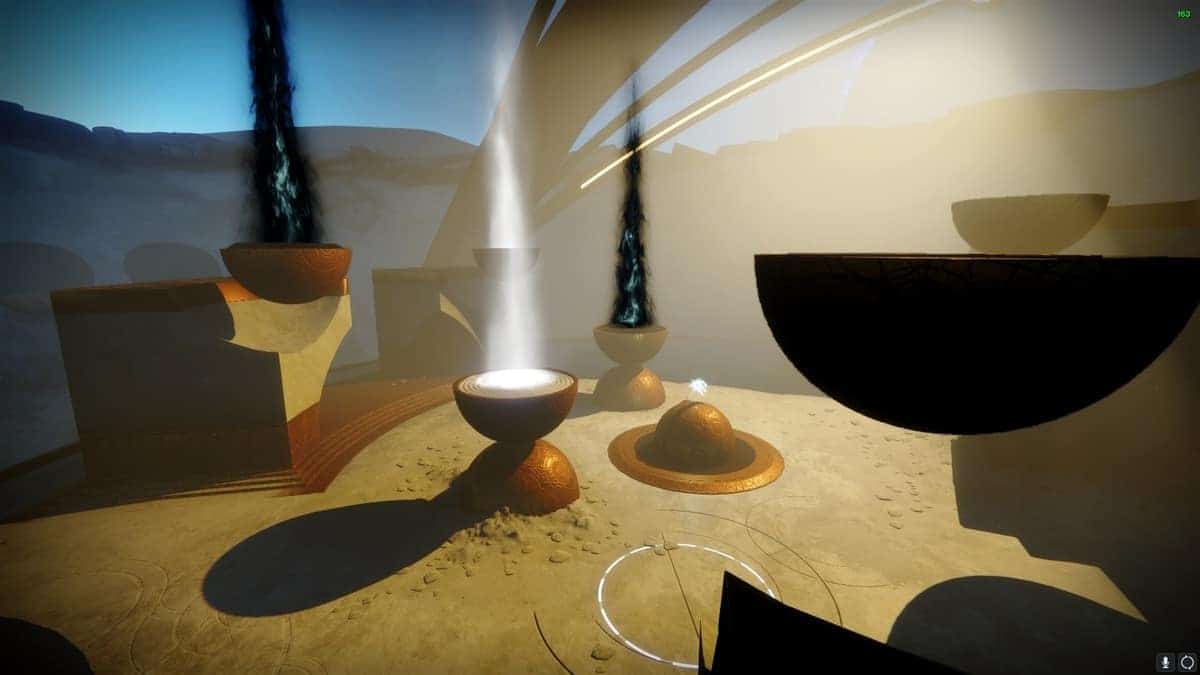
Prophecy is a surreal, atmospheric dungeon set in the realm of the Nine. It features a heavy theme of Light and Dark mechanics, with shifting environmental elements and symbolic enemies. Players must master the motes mechanic and traverse complex arenas full of Taken threats and dimensional puzzles. It includes 3 main encounters.
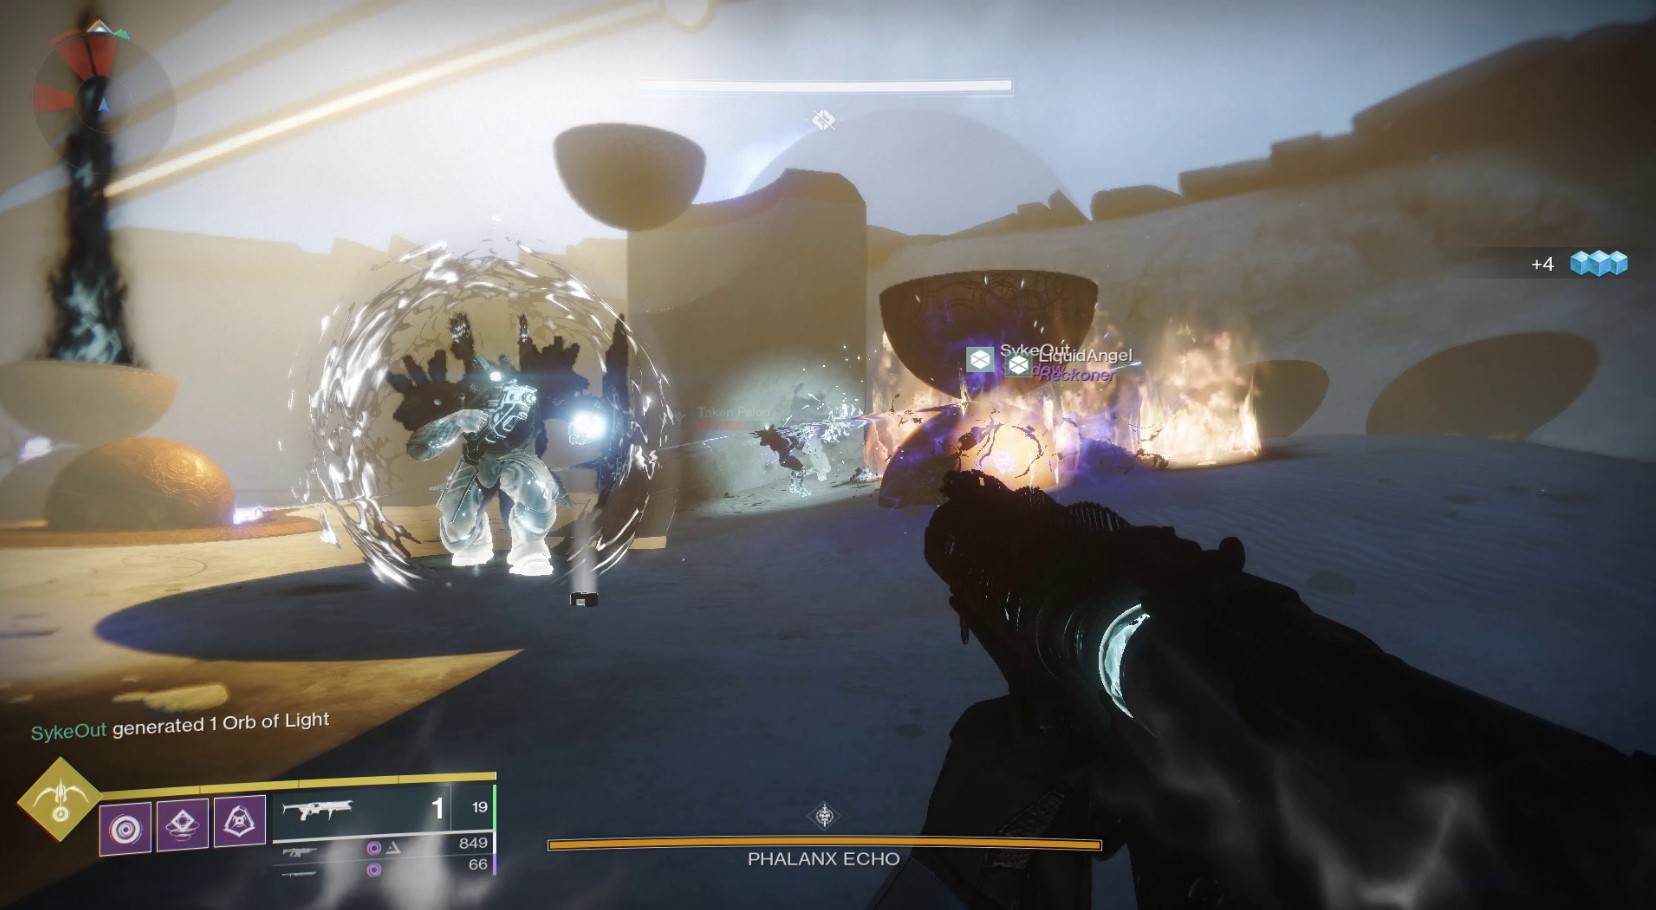
First Encounter - Phalanx Echo
General Objective Overview
Defeat the Phalanx Echo by using Light and Dark motes to align pillars and unlock the boss’s damage phase. Manage arena control and timing while dealing with high enemy density.
Arena & Layout
There is a circular arena with 3 mote pillars around the edge. There is a central platform where the boss appears for DPS. Taken enemies (mostly Thrall, Knights, and Eye of Riven snipers) spawn frequently.
Team Roles & Asignments
- Mote Runner A: They grab the buff and shoots node chains to power up fuses on each side platform.
- Mote Runner B: Mirrors Player 1’s actions on different sides.
- Ad Clear: Focuses on controlling adds and supporting runners.
Mechanics
Killing Taken Knights drops motes. Standing in Light (white area) or Dark (shadow area) while picking them up determines their type. Deposit 5 motes of the correct type (indicated by the pillar’s aura) to align each pillar. Once all 3 are aligned, Phalanx Echo becomes vulnerable.
DPS Phase
The boss will move to the center platform and will be vulnerable for a short time. Focus fire with burst-heavy weapons (e.g., Linears, Rockets). After a few seconds, he retreats, and a new phase begins.
Tips & Mistakes to Avoid
✔️ - Coordinate who’s grabbing which motes to avoid mix-ups.
✔️ - Clear the Eye of Riven snipers quickly—they can overwhelm you.
❌ - Don’t pick up motes in the wrong light zone; they become the wrong type.
❌ - Don’t delay; motes expire if not deposited fast enough.
Second Encounter - Hexadedron

General Objective Overview
Navigate and manipulate the rotating cube-shaped arena by completing Light/Dark mote puzzles. Clear waves of enemies and realign the cube sides to progress.
Arena & Layout
The entire arena is a massive cube room, with one active side at a time. Each side has its own pillar puzzle with a specific Light or Dark requirement. Enemies spawn in waves while the boss (Taken Centurion) rotates the arena.
Team Roles & Asignments
- Mote Collector: Focuses on killing Knights and collecting correct motes.
- Ad Clear/Roamer: Focuses on clearing Psions, Ogres, and blights.
Mechanics
Kill Taken Knights for motes, using Light/Dark zones to determine type. Deposit 5 correct motes on the glowing pillar on the active cube face. Once completed, the cube rotates, revealing a new side. After 6 rotations, the final side opens a door to the next area.
DPS Phase
There is no DPS phase for this encounter.
Tips & Mistakes to Avoid
✔️ - Assign a player to call out the correct mote type needed per side.
✔️ - Bring range weapons to handle floating Psions fast.
❌ - Don’t stand still—arena can disorient you when it rotates.
❌ - Avoid overcollecting motes; you can only carry five at a time.
Boss Encounter - Kell Echo
General Objective Overview
Defeat the Kell Echo by navigating through Light/Dark zones, completing mote puzzles in split dimensions, and surviving fast-paced DPS phases. Requires high mobility and strong burst damage.
Arena & Layout
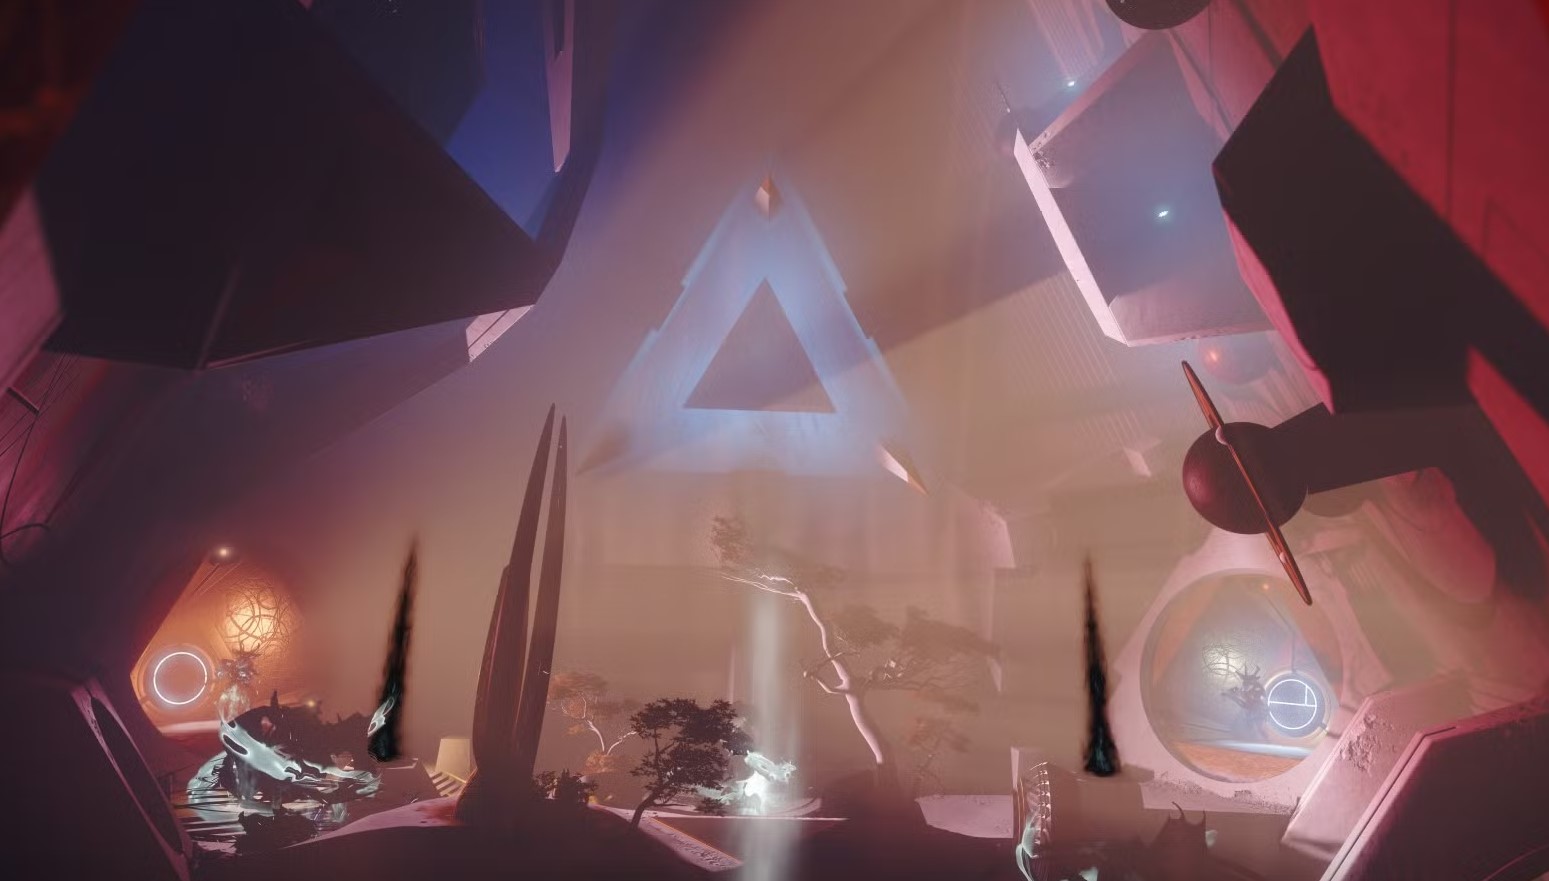
The arena starts in a triangular arena with 3 teleport pads, each leading to a different dimension. The DPS platform is in the central triangle after completing all 3 puzzles.
Team Roles & Asignments
- Light/Dark Collector: Grabs motes in correct zones and deposits them.
- Ad Clear Holds enemies in each dimension and leads boss damage.
Mechanics
Around the arena you will find a Taken Knight, motes, and pillars with a Light/Dark requirement. Deposit 5 correct motes in each pillar. After all 3 are complete, a portal to the central triangle opens for DPS. After damage, the arena resets and players must repeat the sequence.
DPS Phase
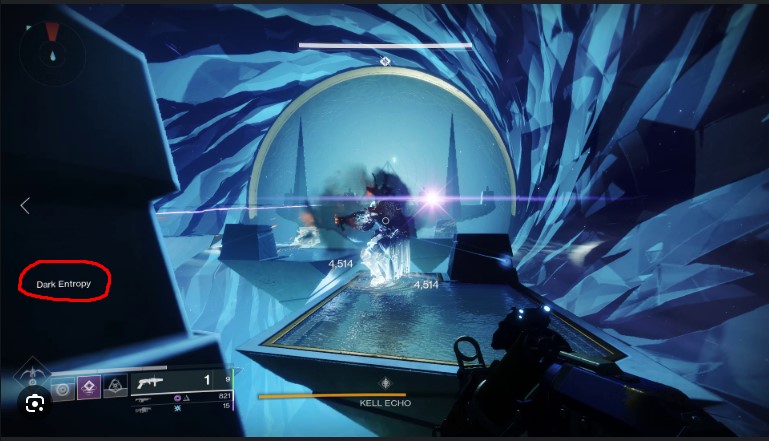
When you reach the DPS phase, start hitting the boss with long-range weapons like a Linear Fusion and make sure your Dark Entropy debuff doesn't reach x10 or you will die. Keep moving with the teleporting boss and do constant DPS. Rinse and repeat until he is dead.
Tips & Mistakes to Avoid
✔️ - Use burst supers and heavy weapons during DPS (e.g., Nova Bomb, Linears).
✔️ - Dunk the correct motes on the pillars; this will make the boss's clones dissappear.
❌ - Don't let the Dark Entropy debuff build up; stay close to the boss to keep it low and stay alive.
Spire of the Watcher dungeon encounters
SKIP THE GRIND BUY RITE OF THE NINE SOTW CARRIES!
Spire of the Watcher is a dungeon set on Mars within a Seraph facility, themed around the Golden Age and inspired by old Western motifs. It features Vex enemies and focuses on activating circuits and defending nodes under pressure. The dungeon includes 3 main encounters, each requiring quick coordination, puzzle-solving, and strong DPS phases.
First Encounter - Ascend the Spire

General Objective Overview
Activate energy circuits by connecting nodes using the Arctrician buff and defend areas while progressing up the spire. Complete all fuse links to unlock the next level of the facility.
Arena & Layout
The encounter takes place across multiple levels of a central spire tower. Each level includes terminals and nodes that must be connected in sequence. Verticality is a core element here; players ascend by completing node circuits and unlocking the next elevator or pathway.
Team Roles & Asignments
- Arctrician Runner: Grabs the Arctrician buff and activates all nodes in sequence.
- Ad Clear: Focuses on ad control and protects the Runner.
- Floater: Covers other angles, helps defend nodes, and assists during tougher waves.
Mechanics
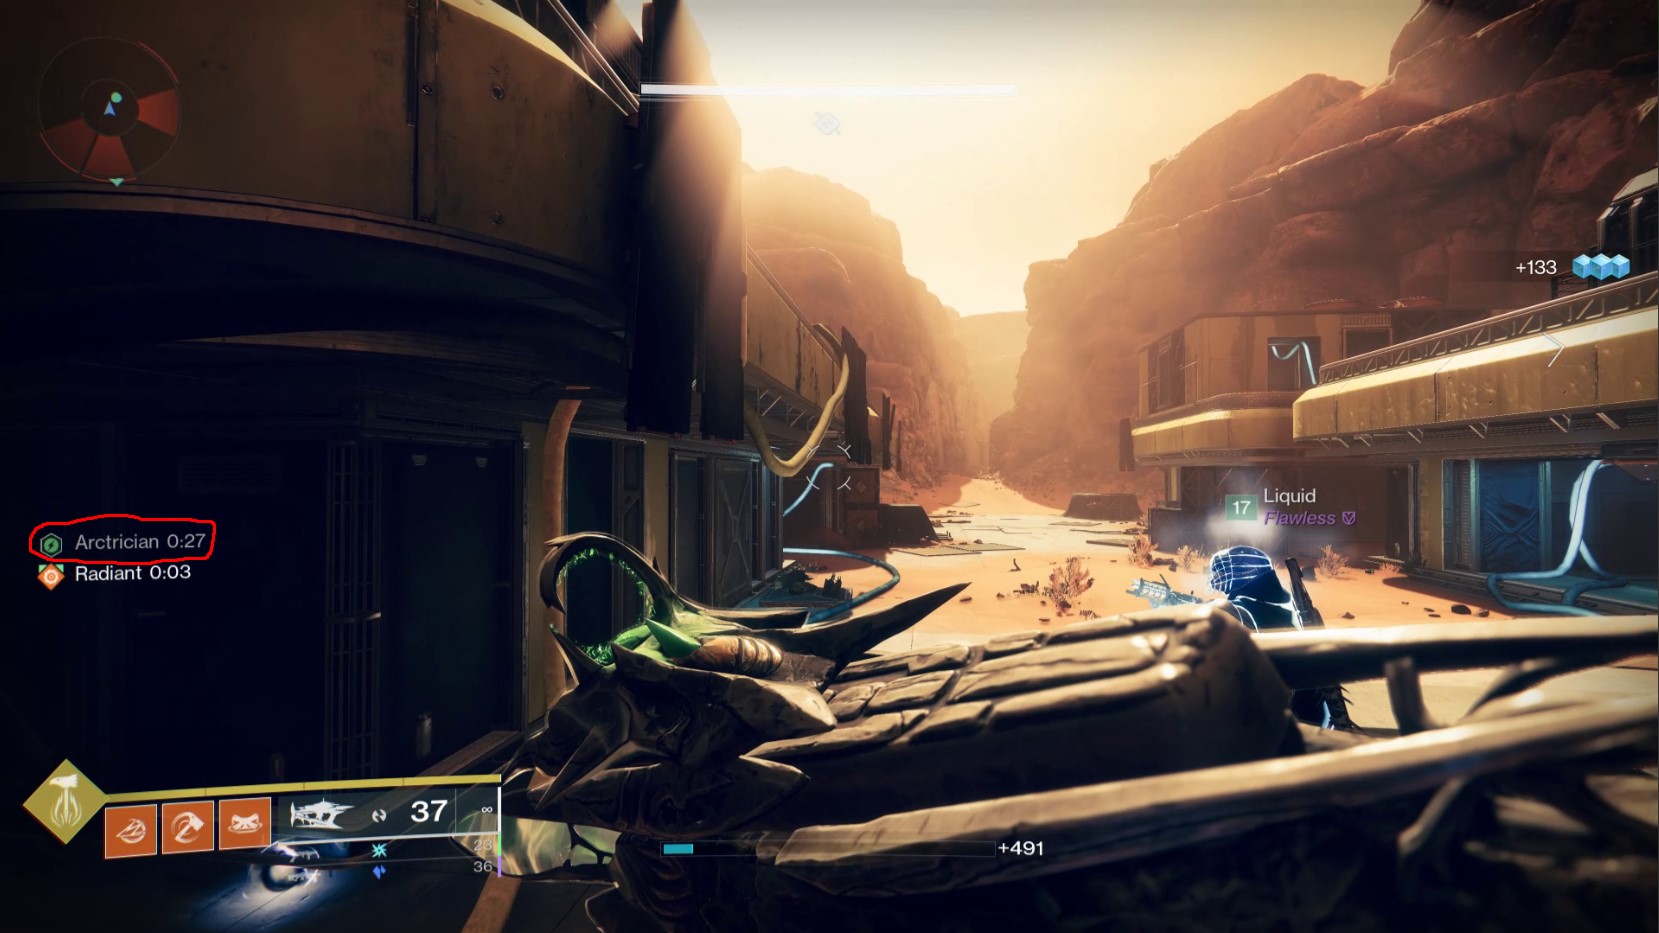
The Arctrician buff is dropped by defeating Conduit Minotaurs. This is needed to activate terminals and nodes. Once the buff is picked up, use it to shoot energy nodes (small circular devices with lights).
Nodes must be activated in a certain order to complete a circuit and progress to the next area. Activating all fuses progresses the team upward to the next tower level.
DPS Phase
There is no DPS phase for this encounter.
Tips & Mistakes to Avoid
✔️ - Memorize node locations to move quickly when you have the Arctrician buff.
✔️ - Always kill Conduit Minotaurs as soon as they spawn to maintain Arctrician uptime.
❌ - Don’t activate nodes out of order or you’ll reset the circuit.
❌ - Don’t ignore Sniper Harpies; they can easily down you or your Arctrician Runner.
Second Encounter - Akelous, The Siren's Current
General Objective Overview
You will have to defeat Akelous, the Siren's Current, a large Vex Hydra, by activating all power conduits in four wings of the platform and dealing damage during short DPS windows. Coordination, movement, and timing are critical.
Arena & Layout
The arena is a large circular platform with 4 side platforms (North, South, East, West). Each wing contains a set of Vex nodes and a mini Hydra protecting a fuse. The central platform is where the DPS phase takes place after fuse activation.
Team Roles & Asignments
- Arctrician Runners: They grab the buff and shoots node chains to power up fuses on each side platform.
- Ad Clear: Clears ads and supports with firing Arctrician nodes when needed.
Mechanics
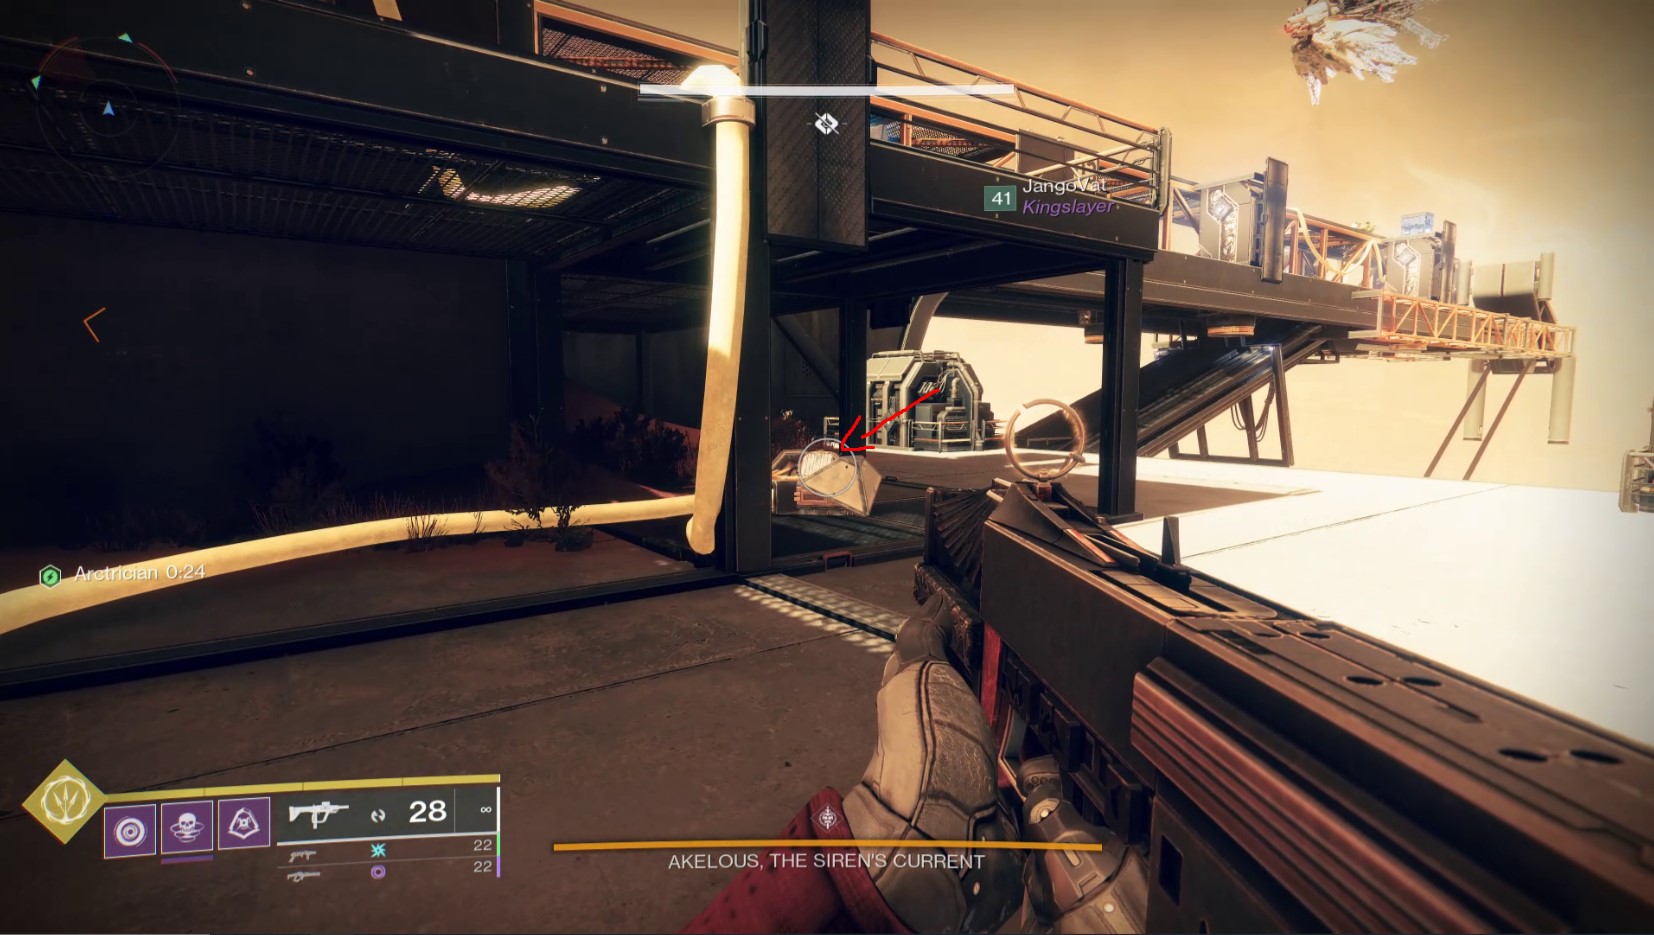
Conduit Minotaurs spawn regularly, defeating them drops the Arctrician buff. Use the buff to shoot node circuits on each wing to activate energy fuses. Each wing has its own circuit and a mini Hydra. Once all 4 fuses are activated, Akelous moves to the center, and the DPS phase begins.
DPS Phase
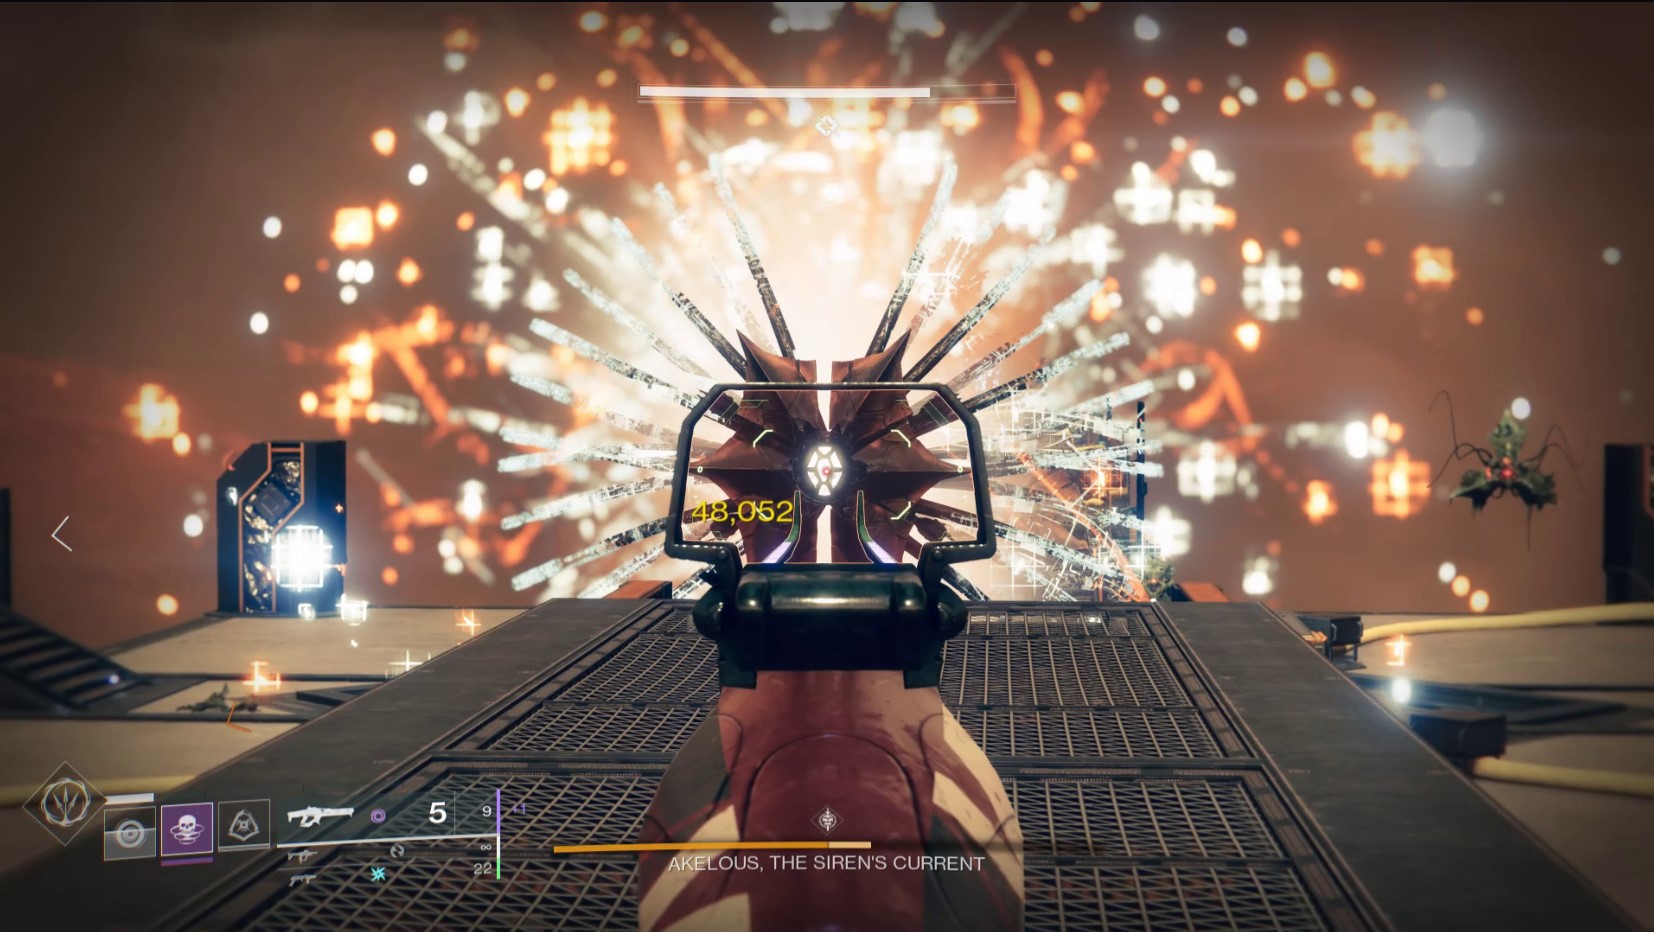
Akelous floats to the main platform, exposing multiple critical spots (fuse points). The team must deal burst damage to these fuses within the short time Akelous remains vulnerable. After several seconds, she withdraws, and the encounter resets for another circuit phase.
Tips & Mistakes to Avoid
✔️ - Use linears & grenade launchers combos for quick burst damage during DPS.
✔️ - Assign wings ahead of time to rotate and clear circuits efficiently.
❌ - Don’t waste time wandering—fuses deactivate after a short window if not completed in sync.
❌ - Avoid standing still during DPS, Akelous can push or snipe you off the map.
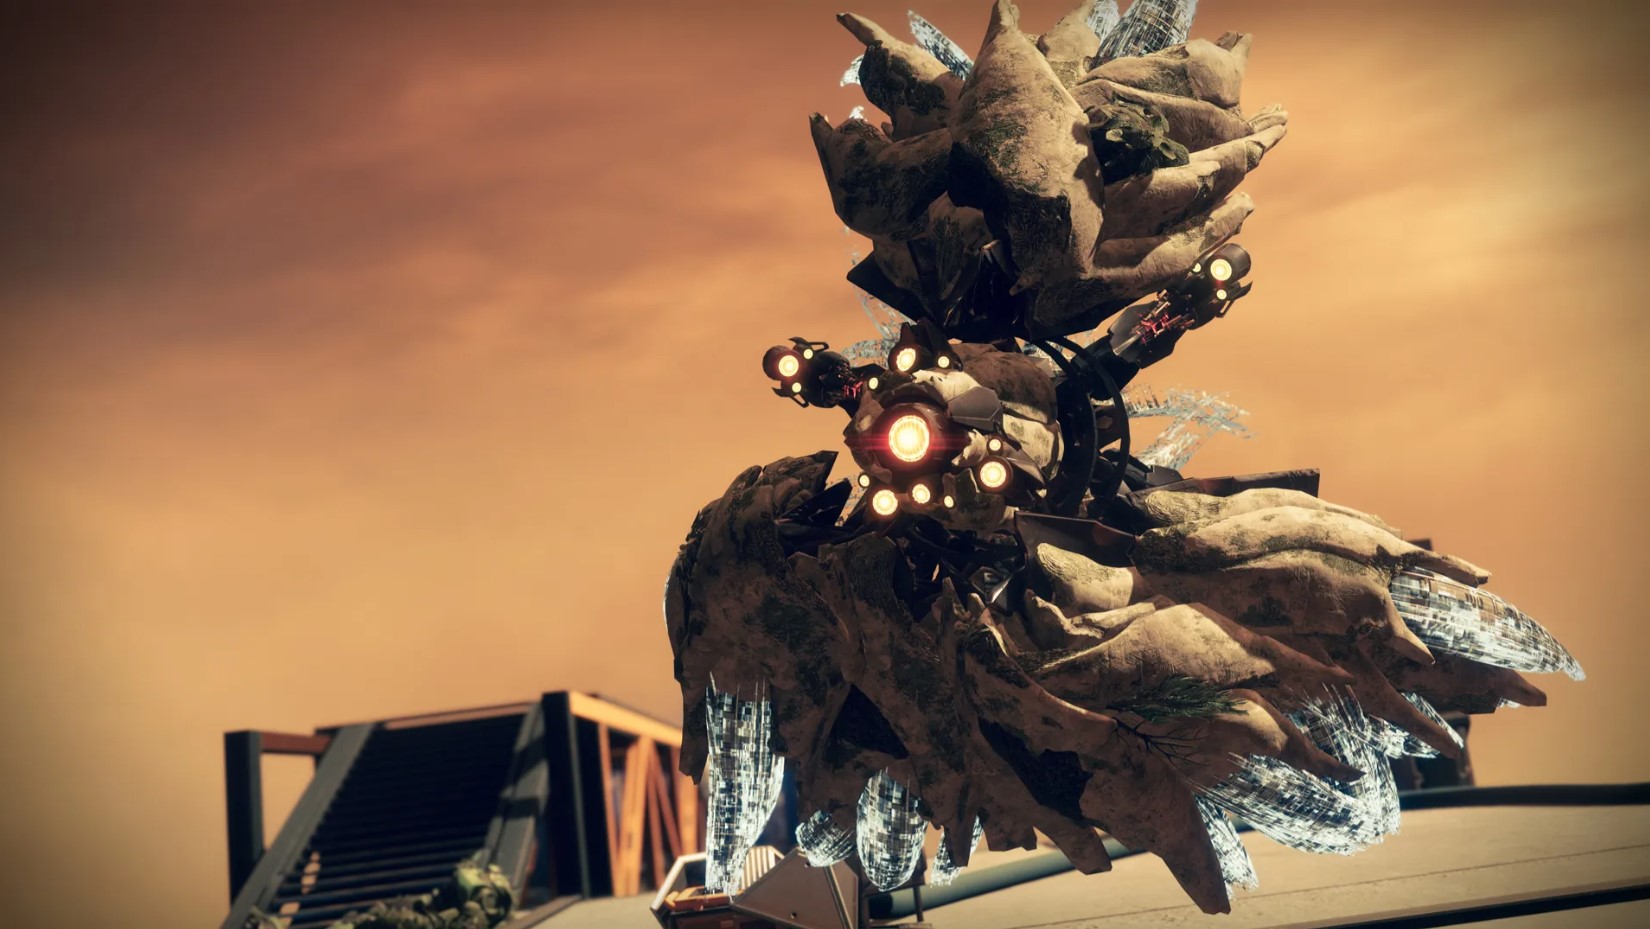
Boss Encounter - Persys, Primordial Ruin
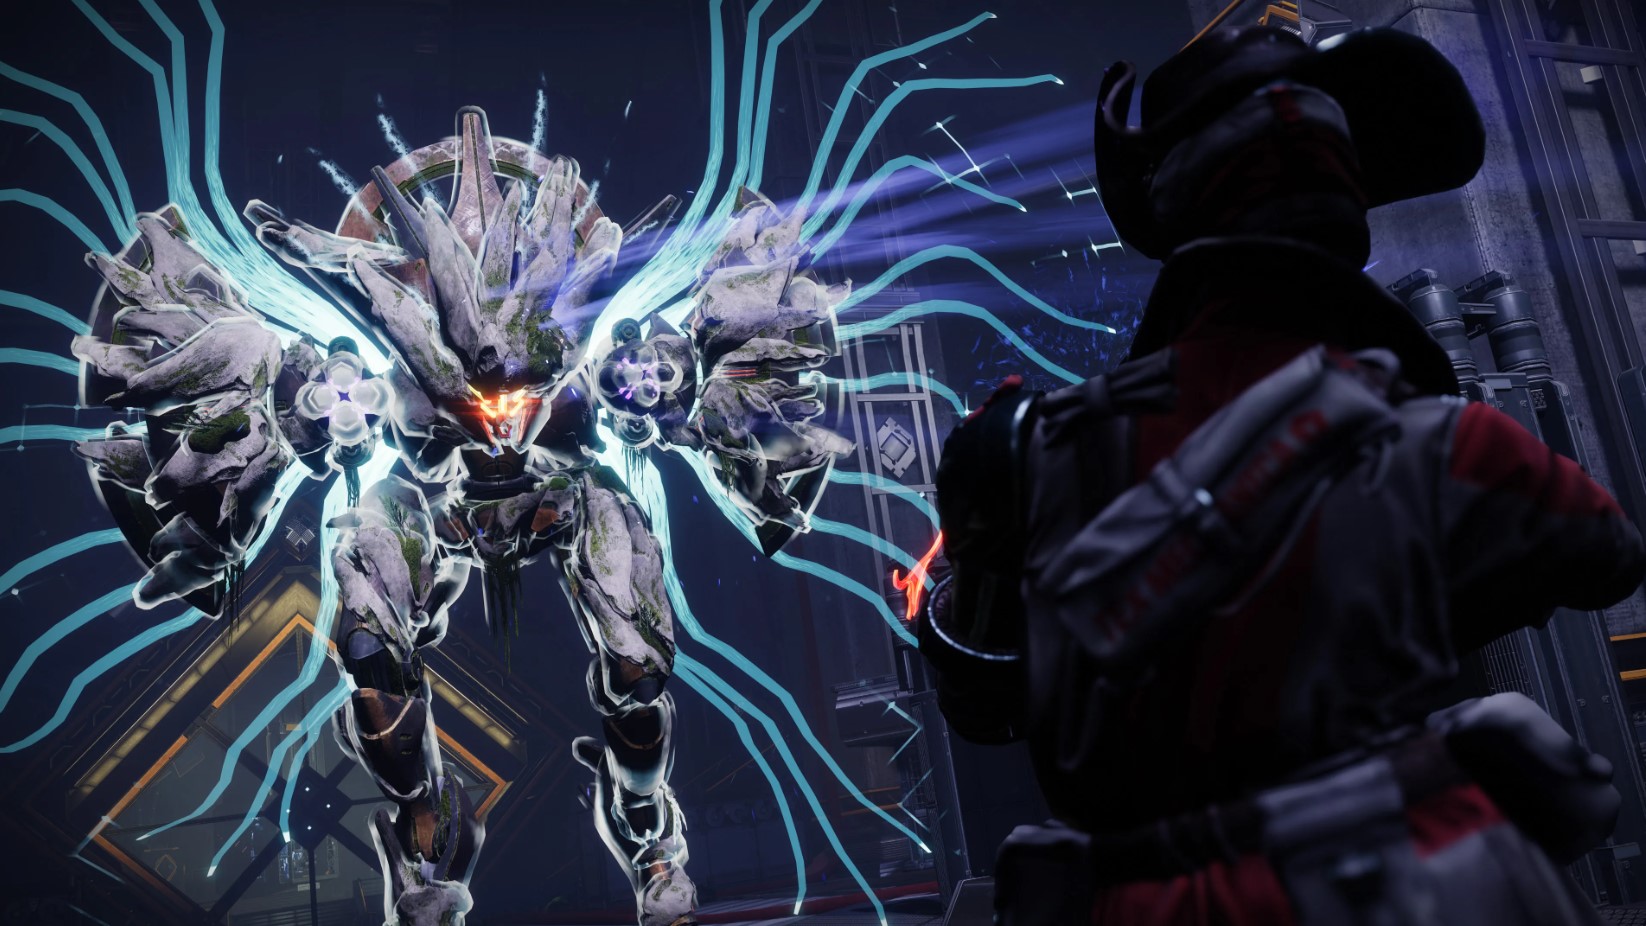
General Objective Overview
You must defeat Persys, Primordial Ruin, by completing a series of circuit activations and triggering damage phases while being hunted by a mobile Hydra boss in a confined interior space. This encounter mixes puzzle-solving with high-intensity pressure.
Arena & Layout
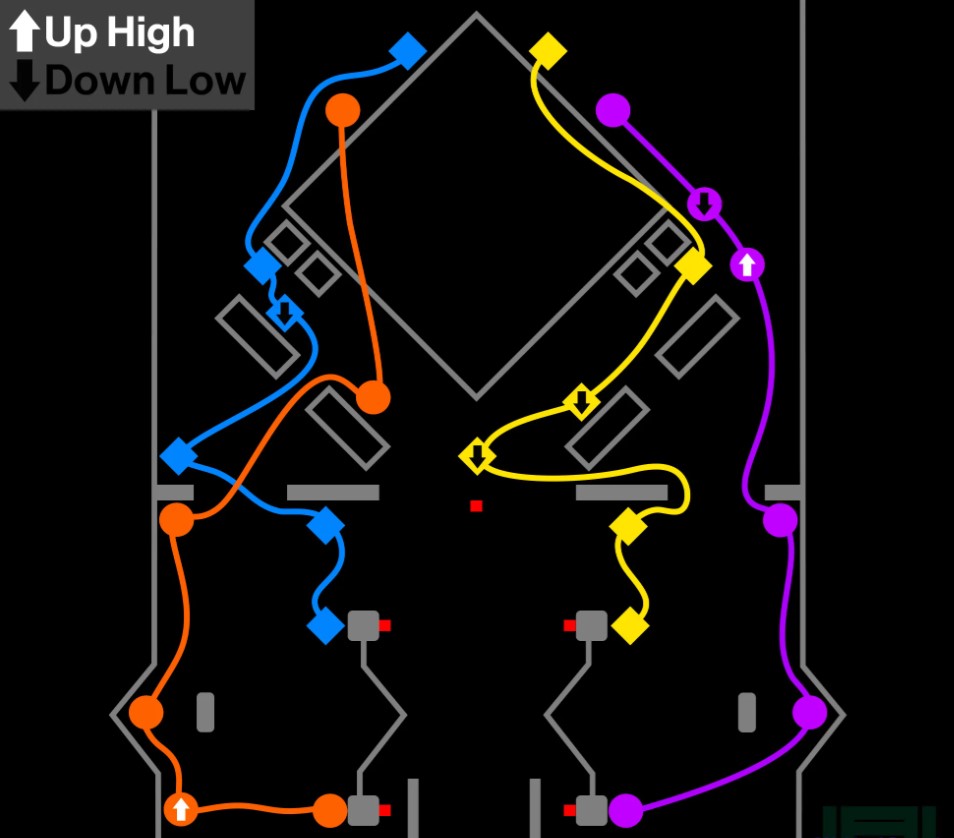
The arena takes place inside a long, narrow facility split into multiple rooms and hallways. Includes two main generator rooms that must be activated simultaneously. Persys roams the space freely, putting pressure on the fireteam throughout the encounter.
Team Roles & Asignments
- Arctrician Runner 1: Grabs the Arctrician buff and completes the node chain in the left generator room.
- Arctrician Runner 2: Does the same thing in the right generator room.
- Floater: Clears ads, supports whichever runner is under pressure, and leads DPS against Persys.
Mechanics
Defeat Conduit Minotaurs to gain the Arctrician buff. Use the buff to activate energy nodes in the correct sequence to power up both generators. Once both rooms are complete, the main cooling chamber opens, initiating the DPS phase. After DPS, coolant levels rise, and a timer begins—fail to complete the node sequence again in time, and the fireteam wipes. Rinse and repeat until Persys is defeated.
DPS Phase
Persys enters the cooling chamber and becomes fully vulnerable. You’ll have limited time before the chamber heats up again. Focus fire on the center of Persys' chassis, where the crit spot appears. After a short window, the room locks and resets, and players must restart the activation phase.
Tips & Mistakes to Avoid
✔️ - Split responsibilities and memorize node locations for faster activation.
✔️ - Use Void or Arc ad-clear builds (like Storm Grenades or Volatile Rounds) to handle dense enemy waves.
❌ - Don’t overstay in DPS; once the coolant rises, you must reset immediately or risk wiping.
❌ - Don’t ignore Persys’ position; he can corner players and cause chain deaths if left unmonitored.
Ghosts of the Deep dungeon encounters
SKIP THE GRIND BUY RITE OF THE NINE GOTD CARRIES!
Ghosts of the Deep is a Hive-themed dungeon set beneath the ocean surface on Titan. It combines eerie environments with ritual-based mechanics, Hive runes, and intense boss fights. You’ll face Lucent Hive, memory echoes, and ritual sacrifices, with 3 main encounters requiring precise coordination and a solid understanding of symbols and phases.
First Encounter - Hive Ritual
General Objective Overview
Disrupt Hive rituals by collecting Vestiges of Light, matching Hive runes, and dunking them at the correct altars while fighting off Lucent Hive forces. Completing three successful dunks triggers a Lightbearer kill, leading to the next phase.
Arena & Layout
The encounter takes place in a large submerged Hive temple with 3 ritual altars arranged in a triangle. Each altar is associated with a Hive rune symbol, visible via Hive tablets. Enemies spawn at each altar in waves, including Lucent Acolytes and Lightbearer Knights.
Team Roles & Asignments
- Rune Reader: Identifies the correct Hive symbols on the tablets and calls out where to dunk.
- Ad Clear/Vestige Carrier: Focuses on gathering Vestiges and supporting combat.
- Floater: Fills in roles, helps with enemy control and rotations between altars.
Mechanics
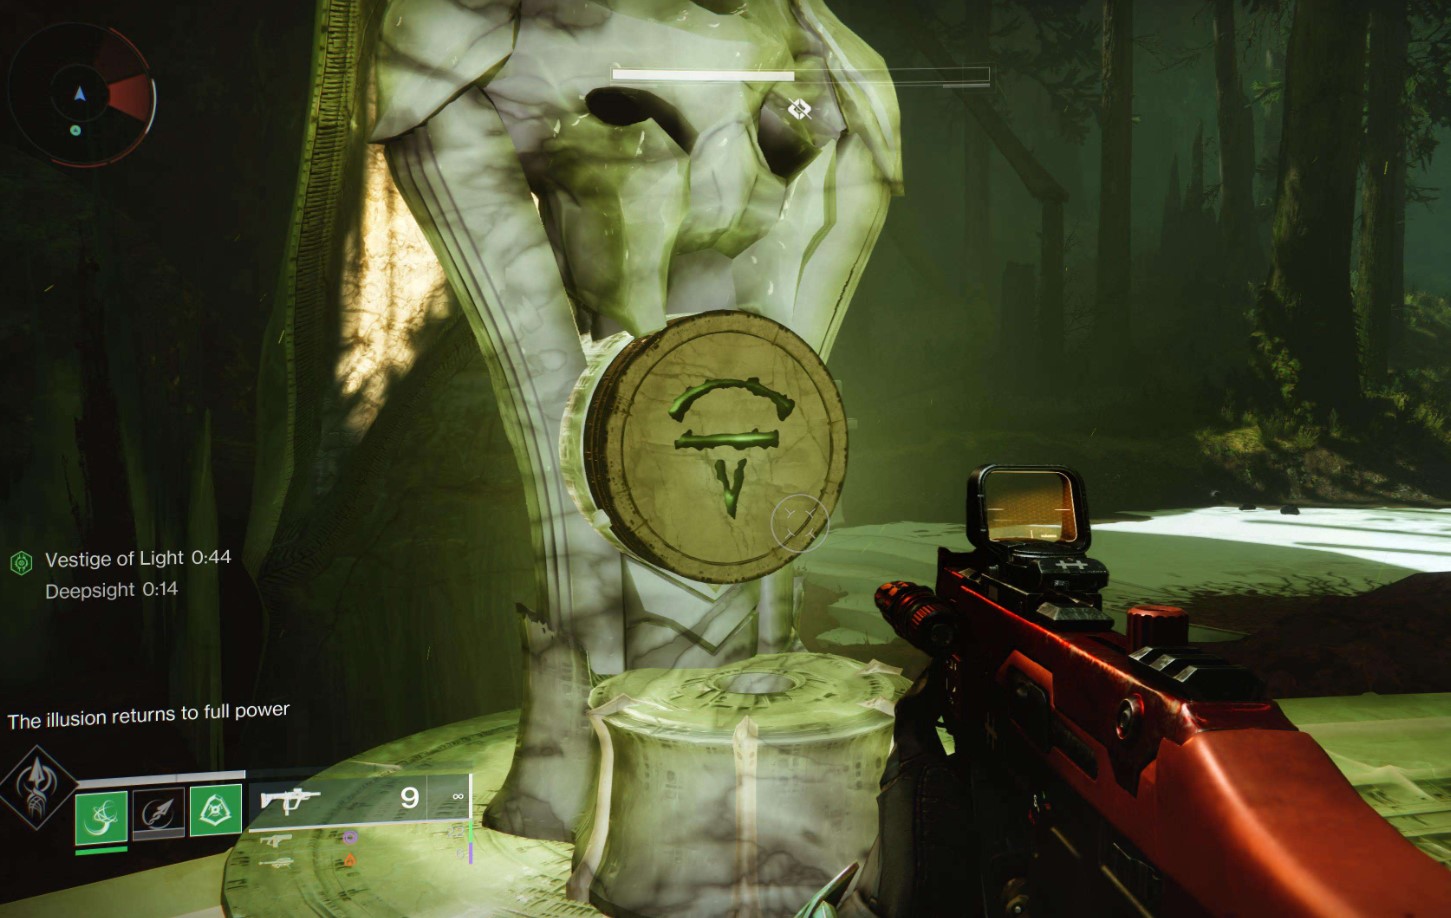
Kill designated Hive targets to drop Vestiges of Light. A Hive rune appears at each altar. Match the rune with the correct altar and dunk the Vestige there. After 3 correct dunks, a Lucent Lightbearer Hive appears. Kill the Lightbearer, crush the Ghost and dunk the corresponding symbol at the statue to complete a phase.
DPS Phase
There is no DPS phase for this encounter.
Tips & Mistakes to Avoid
✔️ - Assign one player to memorize rune symbols to speed up calls.
✔️ - Use mobility builds to rotate quickly between altars.
❌ - Don’t dunk at the wrong rune altar; it resets progress.
❌ - Don’t forget to crush Ghosts; if you skip it, the Lucent Hive will respawn.
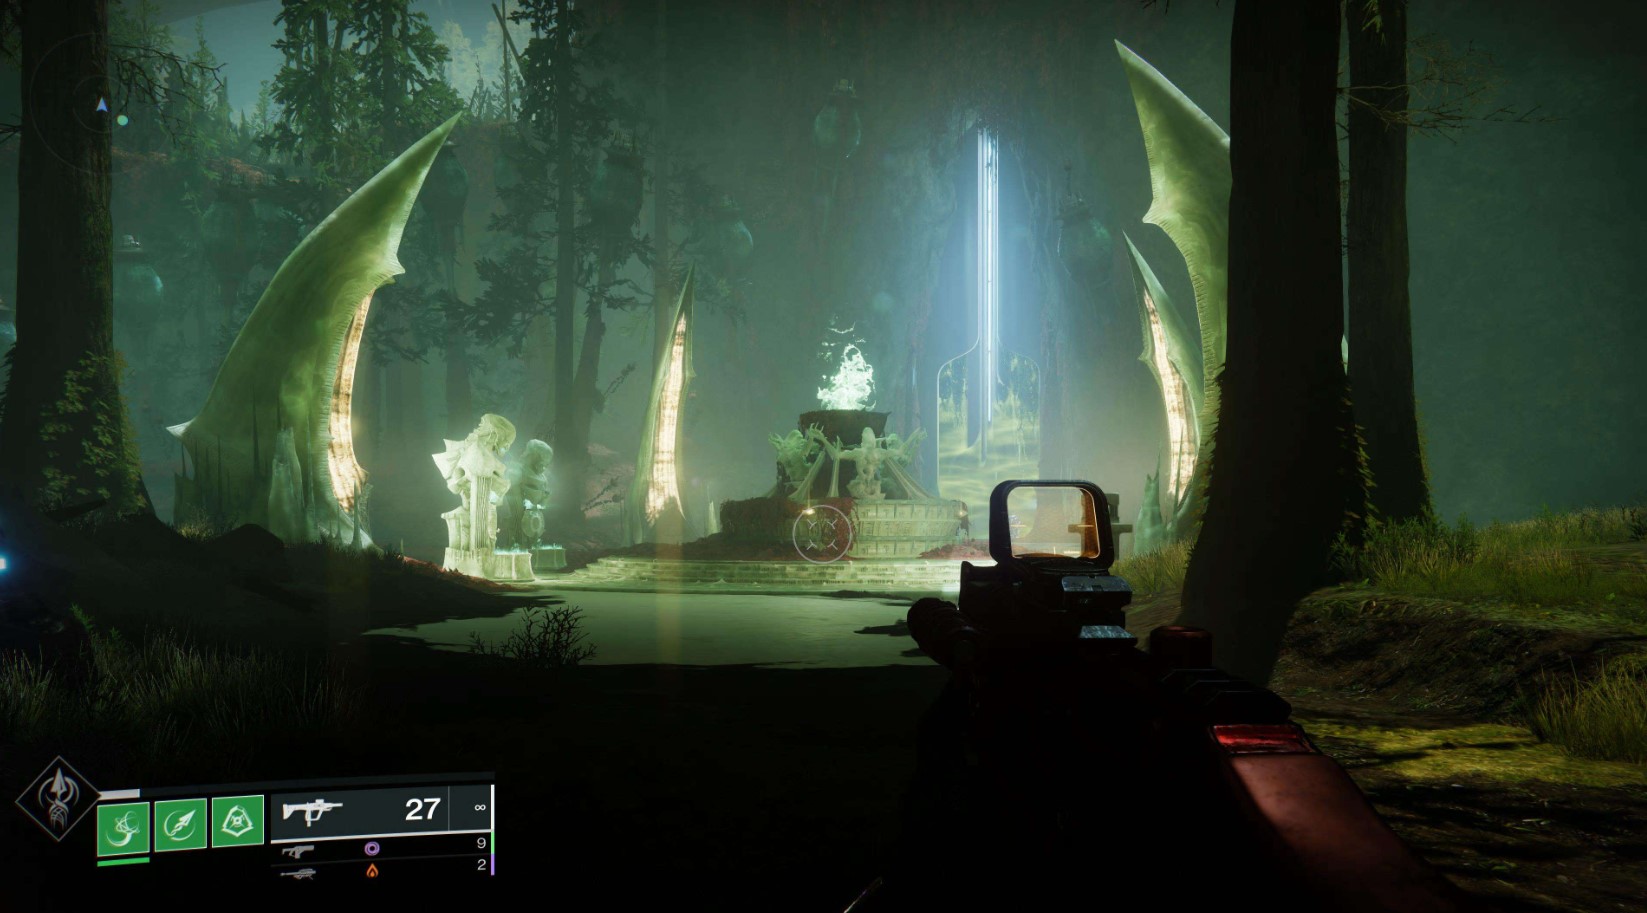
Second Encounter - Ecthar, Shield of Savathun

General Objective Overview
Defeat Ecthar by completing Hive ritual circles using Hive runes, defeating Hive lieutenants, and exposing the boss with Lucent Hive ghosts. You'll need to rotate between 3 ritual zones and trigger DPS phases after completing rune sequences.
Arena & Layout
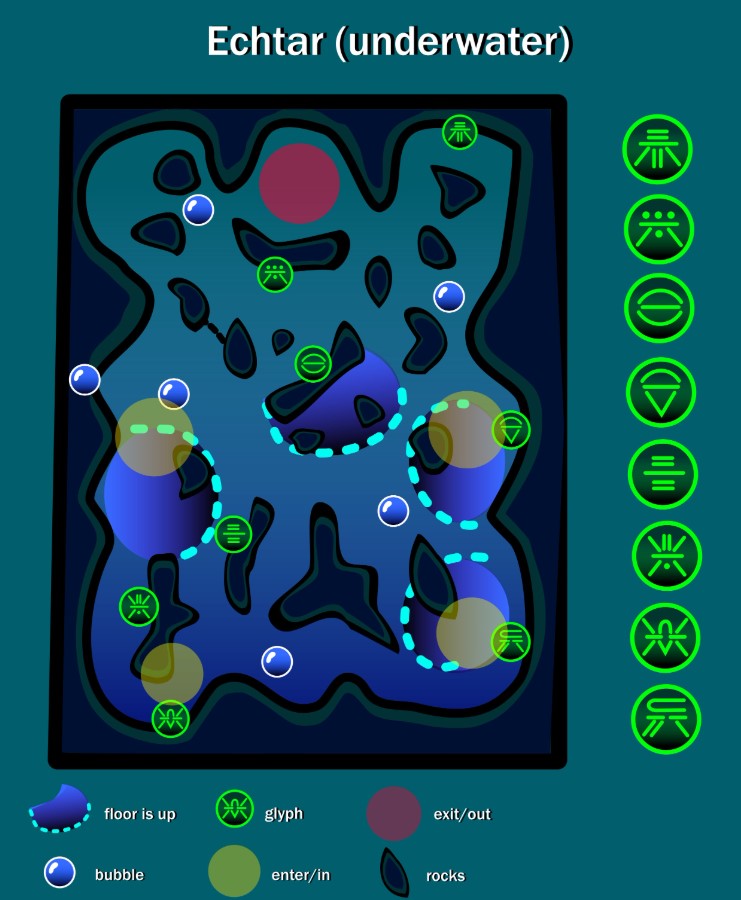
You will find yourself in a swamp-like outdoor arena with 3 ritual platforms around a central pool. Each platform contains a rune puzzle, Hive enemies, and a path to dunk motes. The boss roams the center of the arena during add phases and becomes vulnerable after each puzzle cycle.
Team Roles & Asignments
- Symbol Runner: Reads Hive runes, calls symbols, and guides dunking.
- Ad Clear: Focuses on killing named Hive enemies and Lucent Hive, collects Vestiges of Light and prepares for DPS.
Mechanics
Kill Lucent Hive Bearers to obtain runes and read the correct symbol. Collect Vestiges of Light and dunk them at the plates that matches the called rune. Once all 3 runes are correctly matched and dunked, get ready for DPS.
DPS Phase
Ecthar shield drops in the central pool. Deal damage quickly before he retreats. Repeat the ritual sequence to trigger another DPS window.
Tips & Mistakes to Avoid
✔️ - Assign players to specific rune zones for smoother cycles.
✔️ - Use Void weapons or supers to deal with Lucent Hive shields.
❌ - Don’t forget to crush Lucent Ghosts; otherwise the enemies will respawn.
❌ - Don’t let Vestiges expire; they’re time sensitive.
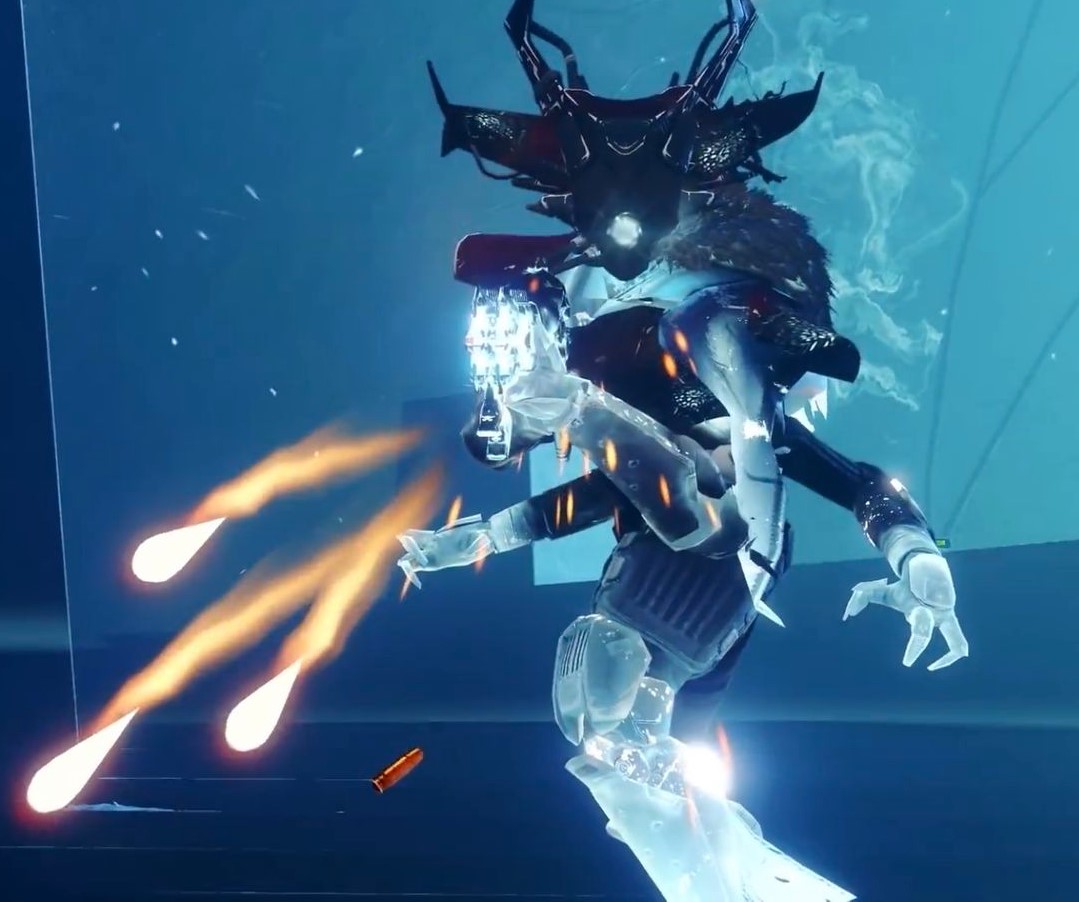
Boss Encounter - Simmumah Ur-Nokru
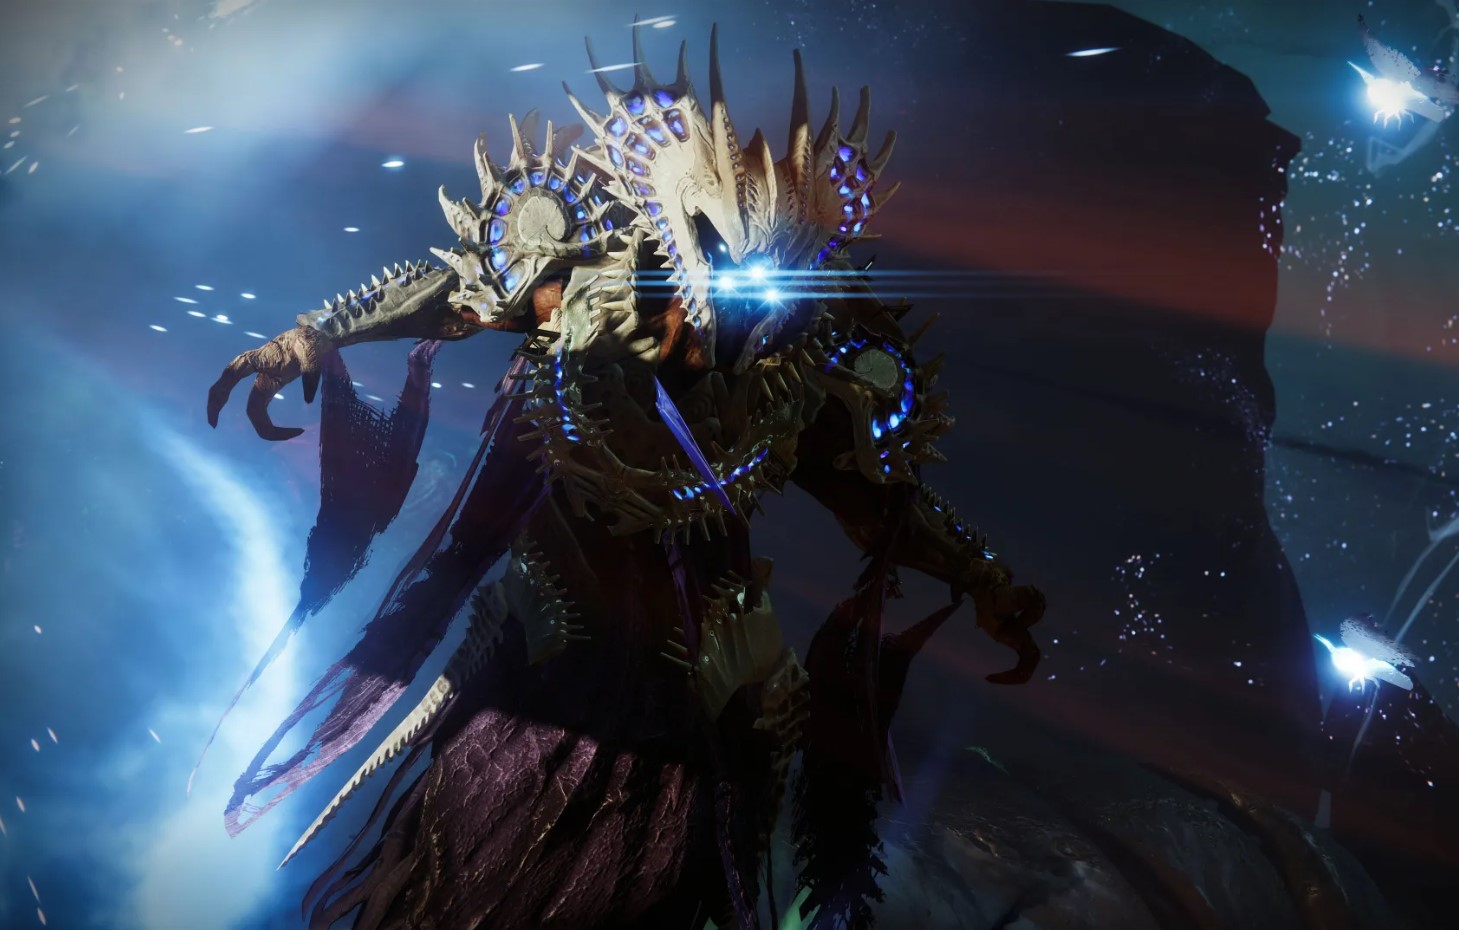
General Objective Overview
Defeat Simmumah Ur-Nokru by collecting memories, interpreting Hive symbols, and disrupting the Hive necromantic rituals. It’s a hybrid of puzzle-solving and intense multi-phase DPS.
Arena & Layout
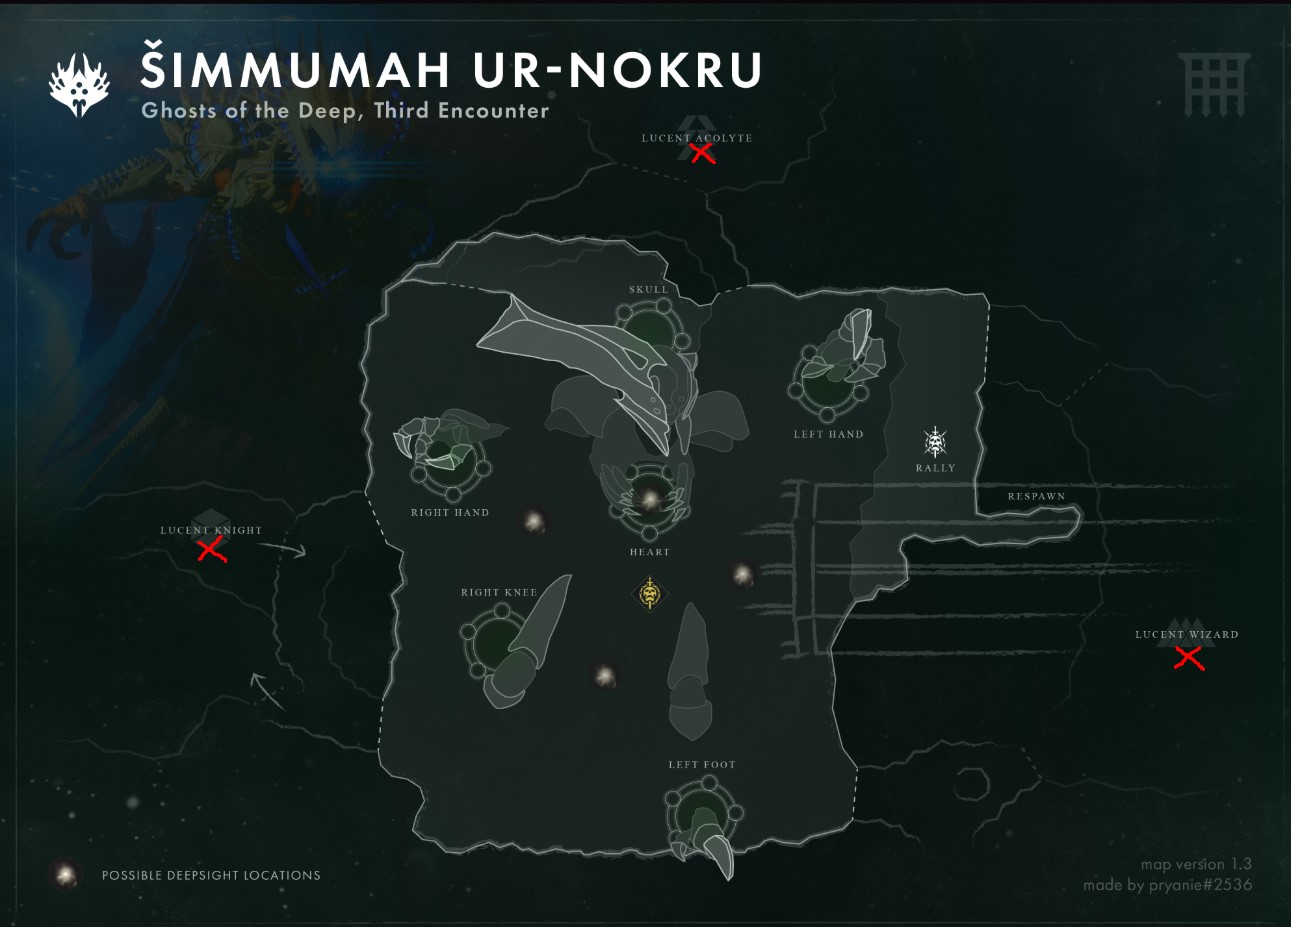
A large cathedral-like chamber with elevated platforms, ritual altars, and Hive architecture. Split into three main ritual areas, each tied to a rune/symbol.
Team Roles & Asignments
- Memory Collectors: Collects Memory Vestiges and reads rune tablets.
- Ad Clear/Deepsight Giver: Takes care of ads and gives Deepsight to the Memory Collectors when needed.
Mechanics
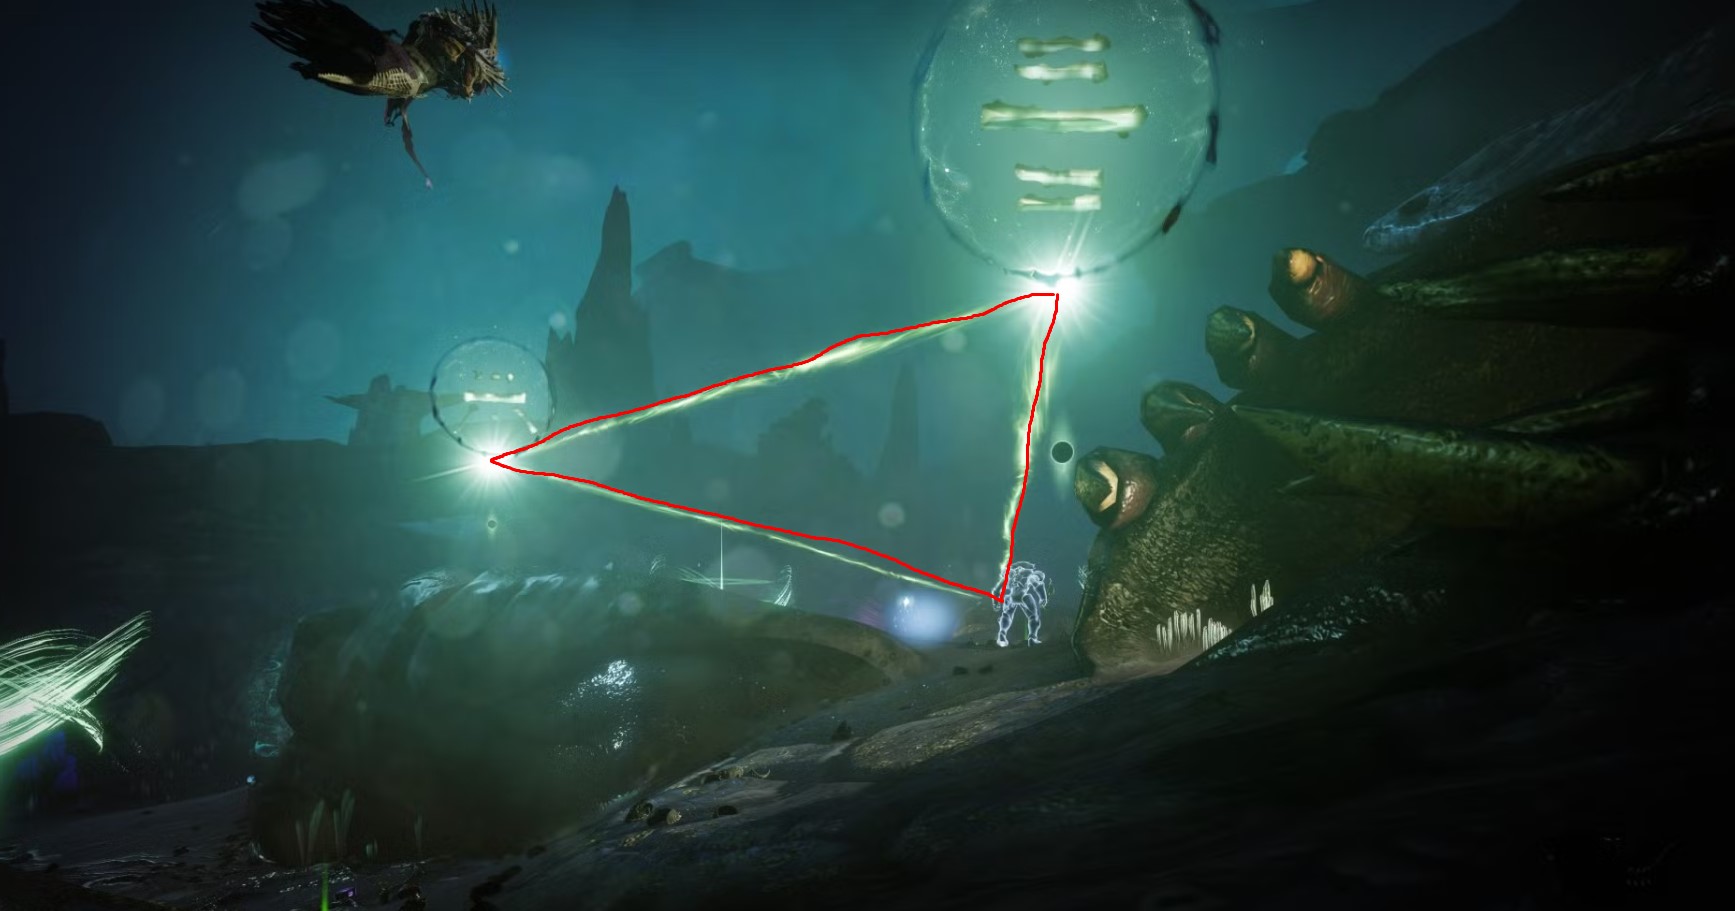
Read the 3 Hive symbols per round. Collect Memory Vestiges dropped from marked Lucent Hive enemies at rune-labeled altars. Dunk Vestiges at the corresponding ritual plate. After all 3 are complete, get to one of the dunk spots, take her shield down and begin the DPS phase.
DPS Phase
Simmumah becomes vulnerable in a set area after rituals are completed. Keep shooting her with long-range weapons until you take her down. Aim for her head as that is her crit spot.
Tips & Mistakes to Avoid
✔️ - Keep one player on each rune zone to quickly match and dunk memory Vestiges.
✔️ - Equip burst damage weapons (Rockets, Linears, Grenade Launchers).
❌ - Don’t ignore Hive ghosts; missing one cancels the DPS phase.
❌ - Don’t dunk the wrong rune; mismatches delay the boss phase.
Extras & Challenges
The Rite of the Nine activity has a certain number of collectables, a title (or seal), & unique emblems. We’ll be going over each of them and tell you what are the best tips & tricks on acquiring them.
Title & Seal
The title for the Rite of the Nine activity is called Eternal. Below you will find the list with all the required triumphs needed to acquire your seal:
- Seasoned Dungeoneer - Complete all of the ''Into the Dungeon'' quests.
- Foiled Again - Complete all 9 ''Elegant Arsenal'' quests.
- Seeker of the Nine - Find all 6 hidden collectables in the 3 dungeons on any mode.
- Who Watches - Earn Gold scores for each encounter in the ''Spire of the Watcher'' dungeon on Eternity mode.
- Peak of the Spire - Earn Gold scores for each encounter in the ''Spire of the Watcher'' dungeon on Ultimatum mode.
- Down in the Depths - Earn Gold scores for each encounter in the ''Ghosts of the Deep'' dungeon on Eternity mode.
- The Deepest Commitment - Earn Gold scores for each encounter in the ''Ghosts of the Deep'' dungeon on Ultimatum mode.
- As Was Foretold - Earn Gold scores for each encounter in the ''Prophecy'' dungeon on Eternity mode.
- Vision of the Future - Earn Gold scores for each encounter in the ''Prophecy'' dungeon on Ultimatum mode.
SKIP THE GRIND BUY RITE OF THE NINE TITLE & SEAL!
Emblems

The Seer emblem can be obtained by earning Gold scores on each encounter in Spire of the Watcher dungeon on Eternity difficulty.

The Calibrated emblem can be obtained by completing all Elegant Arsenal quests as part of the Rite of the Nine.
FAQs
The Rite of the Nine is located in the Eternity tab.
Yes, the Rite of the Nine activity can be farmed, but only one of the three dungeons are on rotation each week.
Yes, you can solo the dungeons, although it will be very challenging due to encounter mechanics and increased difficulty.
No, the Rite of the Nine activity is free for all players, even if you don't own the specific dungeon keys.
Final Thoughts
I hope this guide will ease your experience with the Rite of the Nine dungeons encounters and help you get one step further to success. We did all the research, and now it’s your turn to show your skill. Give it a try, Guardian!
About KBoosting
If you are struggling to find a fireteam or don't have enough time to play yourself, at KBoosting, besides articles & guides, we also provide Destiny 2 boosting services. All you need to do is check our Rite of the Nine boosting services and let us handle everything for you, while you have some fun in the game!
